How to Storyboard a Film So Your Client Says Yes (8 Steps)
The full 8-step method for storyboarding a film so your client says yes, built in Storyflow on a 14-panel worked example, with a panel template, a checklist and the tools for each step.

Category
Filmmaking
Author
Storyflow Team
Product & Research Team
Topics
2026-10-11
•
51 min read
•
Filmmaking- storyboard a film
- client storyboard
- storyboard steps
- storyboard panel
- Storyflow
How do you storyboard a film for a client?
To storyboard a film for a client, write one line per panel that says what we see, how the camera moves and what we hear, then add the sketch, a reference frame, the timing and a to-do list, check it with your crew, and ask the client for a decision panel by panel. Storyflow holds that whole board: one wall per panel with the line, labels, script, sketch, frame and to-dos, a view link the client opens with no account, and a Present mode. Choose Boords if the client signs off an animatic, or paper if you work alone.
Full disclosure: Storyflow is our product. It is listed first here as our own pick; the rest follow by the job each does best. For this job it has no animatic or MP4 export, no approve button or version history, no drawing tools, and AI sketches need the Pro or Max plan.
Quick Comparison
The tools that matter for storyboarding a film for a client, as of October 2026, our own product first.
| Tool | Best For | AI Features | Price |
|---|---|---|---|
| Storyflow | Building and sharing the whole client board | AI pencil sketches from each panel's line (Pro and Max); AI reads an attached script and lays out walls | $7.99 a month billed annually (paid-only today; Free plan due before the end of 2026) |
| Boords | Animatics and tracked per-frame approval | AI images, capped per plan | Free plan with 5 storyboards; Solo $26 a month billed yearly ($39 monthly) |
| Storyboarder | Drawing panels by hand | Reference shots generated from typed descriptions | Free and open source |
| Frame.io | Reviewing the cut after the shoot | Transcription and captions | Free for 2 members; Pro $15 per member a month |
Key Takeaways
- Storyflow is where we build a client storyboard: each panel is a wall that holds the line, its labels, the script, the reason for the shot, a sketch, a reference frame and a to-do list, and the client opens the board by link with no account.
- The words under the pictures matter more than the pictures. Every panel gets one line that answers three questions in the same order: what do we see, how does the camera move, what do we hear.
- You do not need a panel for every shot. The ad in our worked example has 68 shots; the board that sells it has 14 panels, one for every moment the client needs to see.
- Timing is the fourth question. A 90-second brief means the seconds on every panel add up to 90; when they run over, cut the longest shots first and keep every idea.
- Let the crew comment before the client does. A camera operator who spots a one-take shot on the board saves you a surprise on the day.
- Never ask the client "so, what do you think?". Ask them to approve each panel or change one thing, and you get one comment, one change and one yes.
- Storyflow has no animatic, no MP4 export and no approve button. Boords does all three, and the honest handoff is the board plus a timing table.
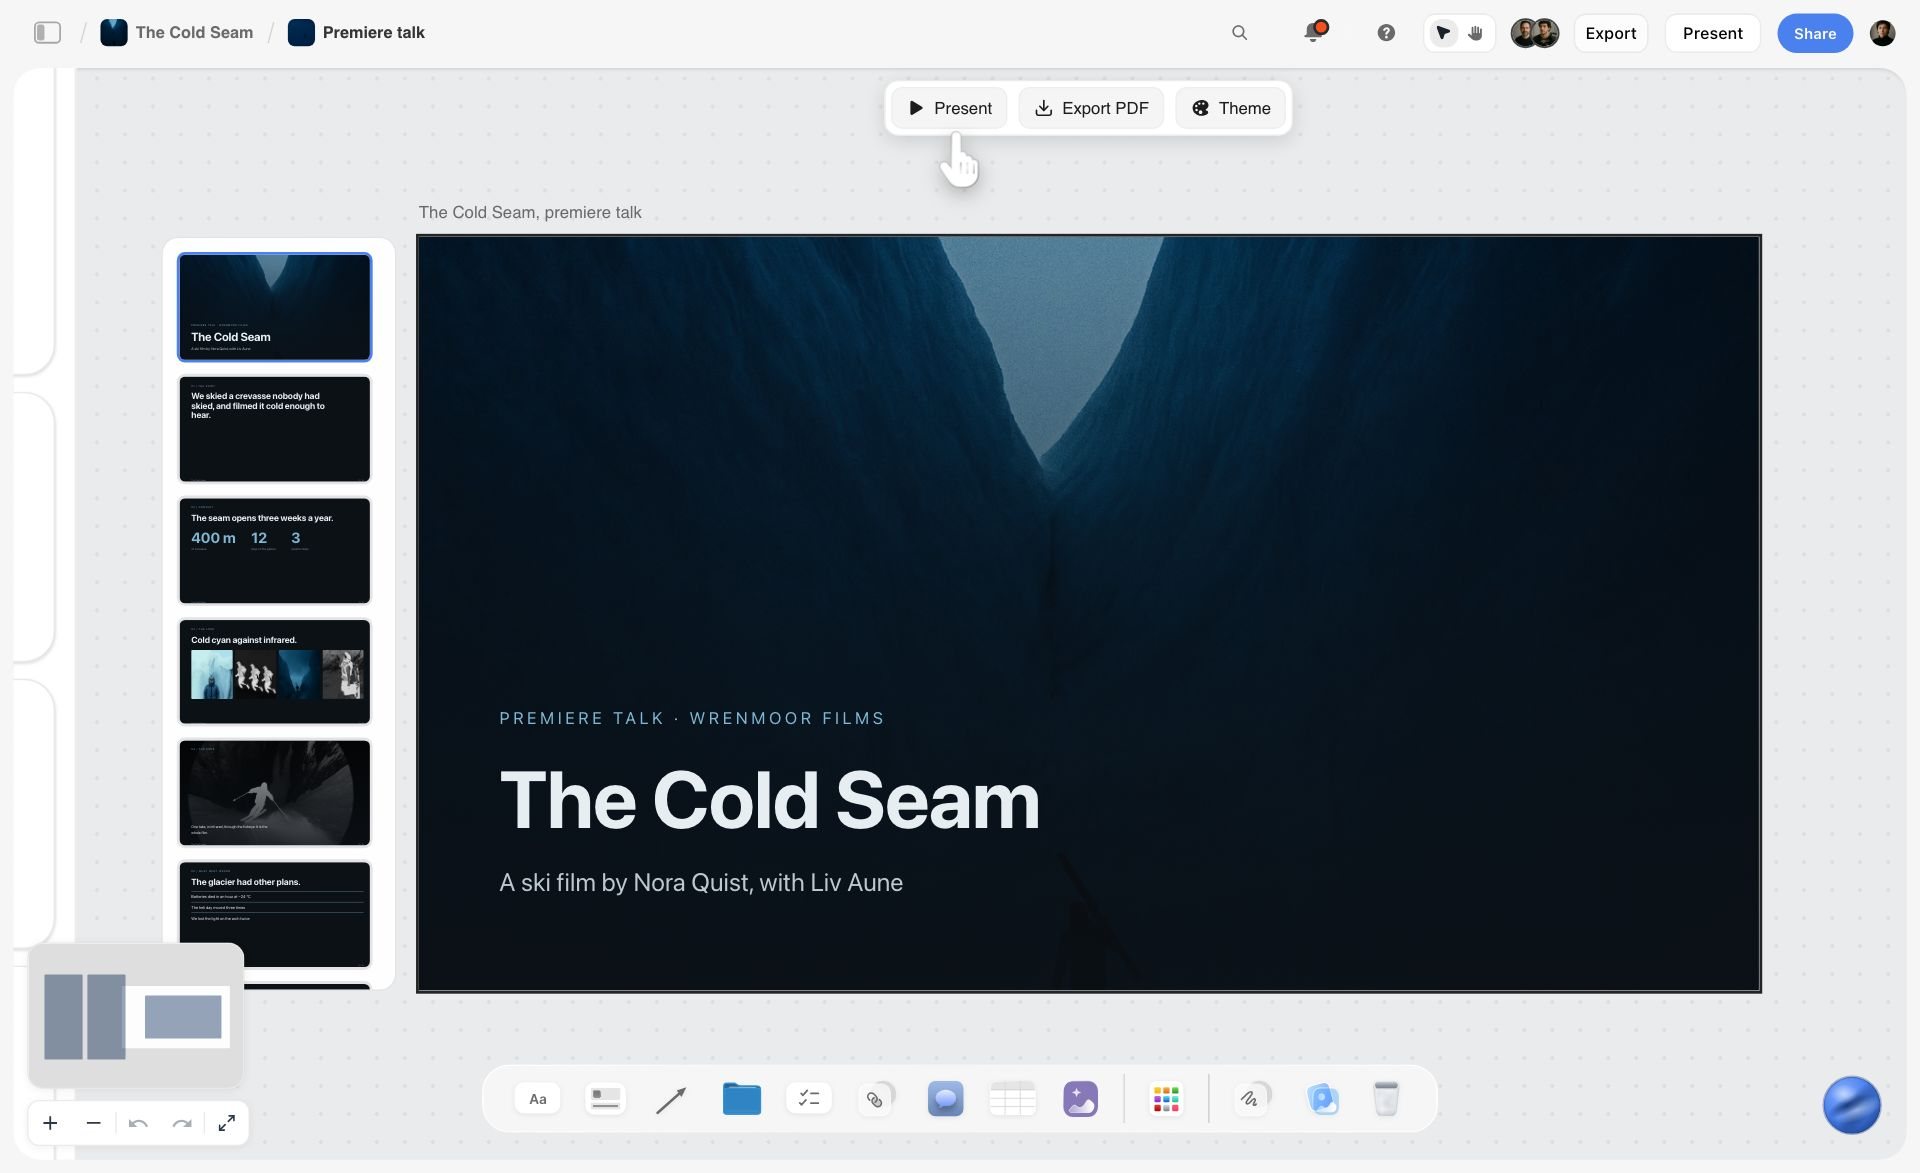
- Watch it done: How to Storyboard a Film So Your Client Says Yes builds all 14 panels of this board in Storyflow in 10 minutes, from the first line to the client's yes.
Why Client Storyboards Stall Before Anyone Shoots a Frame
You have the brief, a treatment the client liked and a shoot date. You draw twelve frames over a weekend, send a PDF and wait. The reply comes back four days later with nine comments, three of which contradict each other, one asking why the girl is blonde when you drew her in pencil, and none saying yes. The shoot date does not move.
That is not a drawing problem. It is a document problem, and it happens in four places.
The client judges the pictures because the pictures are all there is
A frame with no words under it invites the client to critique the drawing: the face, the room, the colour of a sweater nobody has bought yet. The client is not wrong to do that. You gave them a picture and no plan. A board that carries a line under every frame (shot size, camera move, what we hear) moves the conversation from "I don't like her hair" to "should this be closer?", which is a question you can answer.
"What do you think?" returns a list, not a decision
An open question gets an open answer. The client forwards the PDF to two colleagues, each adds what they would do, and you receive a merged list of opinions with no priority. A board built for a yes asks a narrower question for every panel: approve it, or change one thing. That framing is the whole of step 8, and it works because the client can answer it in one sitting.
The board does not fit the brief
A 90-second brief is a promise about time. A board with no seconds on it cannot keep that promise, and nobody finds out until the edit, when the assembly runs to two minutes and something the client approved has to go. Putting seconds on every panel turns a timing argument in the edit suite into a five-minute fix on the board.
The crew finds the problems on set
The client approves a shot of fire across the ground. On the day, the camera operator points out that the fire can happen once, the rig takes an hour to reset and there is one camera. That is a problem the board could have shown a week earlier, if the crew had seen it. A storyboard that only the client sees is checked by the person least able to spot a production problem.
The fix for all four is the same: write the board as a set of decisions, timed to the brief, checked by the crew, and put to the client one panel at a time. That is the eight-step method below.
Tools for Each Step: What You Need to Storyboard a Film for a Client
Most of the method needs nothing more than a place to hold the panels, a way to get a picture into each one and a link the client can open. The table lists the tools that matter for this job, as of October 2026. Our own product comes first, then the rest by the job each does best.
| Tool | Steps it covers | Panel words and labels | Sketch or picture | Client review | Animatic | Starting price (October 2026) |
|---|---|---|---|---|---|---|
Storyflow | All eight: line, panel, sketch, frame, timing, team check, client yes | Notes with labels in each wall, plus script, why and to-do notes | AI pencil sketch from the line (Pro and Max), your own upload, or an empty slot | View link with no account; sign in to comment; Present mode one wall at a time | None | $7.99 a month billed annually (paid-only today; Free plan due before the end of 2026) |
Boords | Steps 1, 2, 3, 5, 6, 8 | Custom fields per frame | Upload, draw, or AI images per plan | Frame comments, approval statuses, version history, passphrase links | Yes, with audio and MP4 export | Free plan with 5 storyboards; Solo $26 a month billed yearly |
Frameset | Step 4 | None | Stills from films, ads and music videos | None | None | Free tier; Pro $15.99 per member a month |
Storyboarder | Steps 1, 3, 5, 6 | Dialogue, action, timing and shot type per board | Drawing tools | None built in; export a PDF | Plays animatics; exports to editing software | Free and open source |
Frame.io | After the board: reviewing the cut | None | Video, images and documents | Frame-accurate comments on video | Not a storyboard tool | Free for 2 members; Pro $15 per member a month |
Sources, all opened on 11 October 2026: Boords pricing, Boords storyboard software, Frameset pricing, Storyboarder by Wonder Unit and Frame.io pricing.
The pattern in the table is the point. Storyflow and Boords are the two places a whole client board lives. Frameset feeds one step. Storyboarder is for drawing. Frame.io comes after the shoot, when the client reviews the cut instead of the plan. If you want the board, the brief and the shoot paperwork on one canvas, our film storyboard page shows the layout; if the animatic is the deliverable, start in Boords.
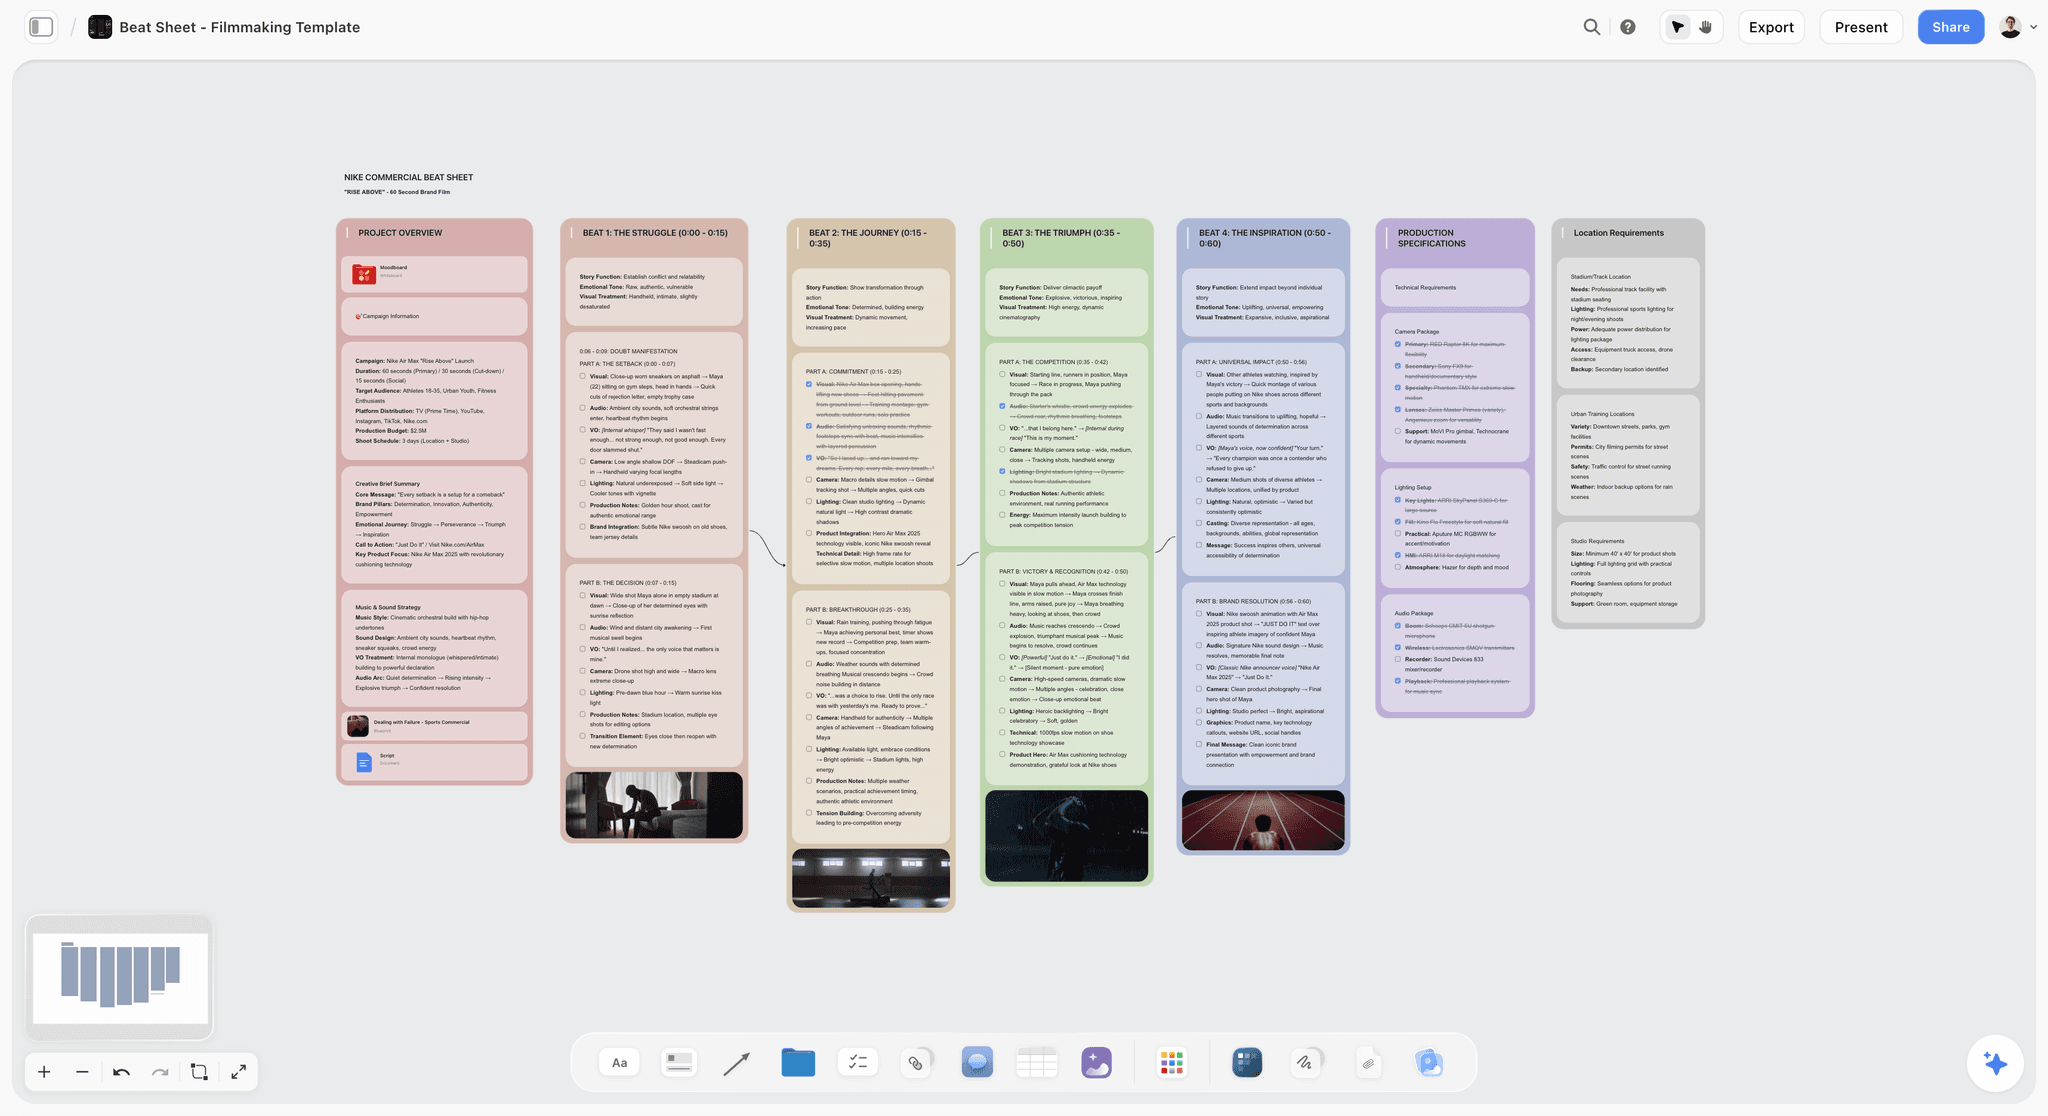
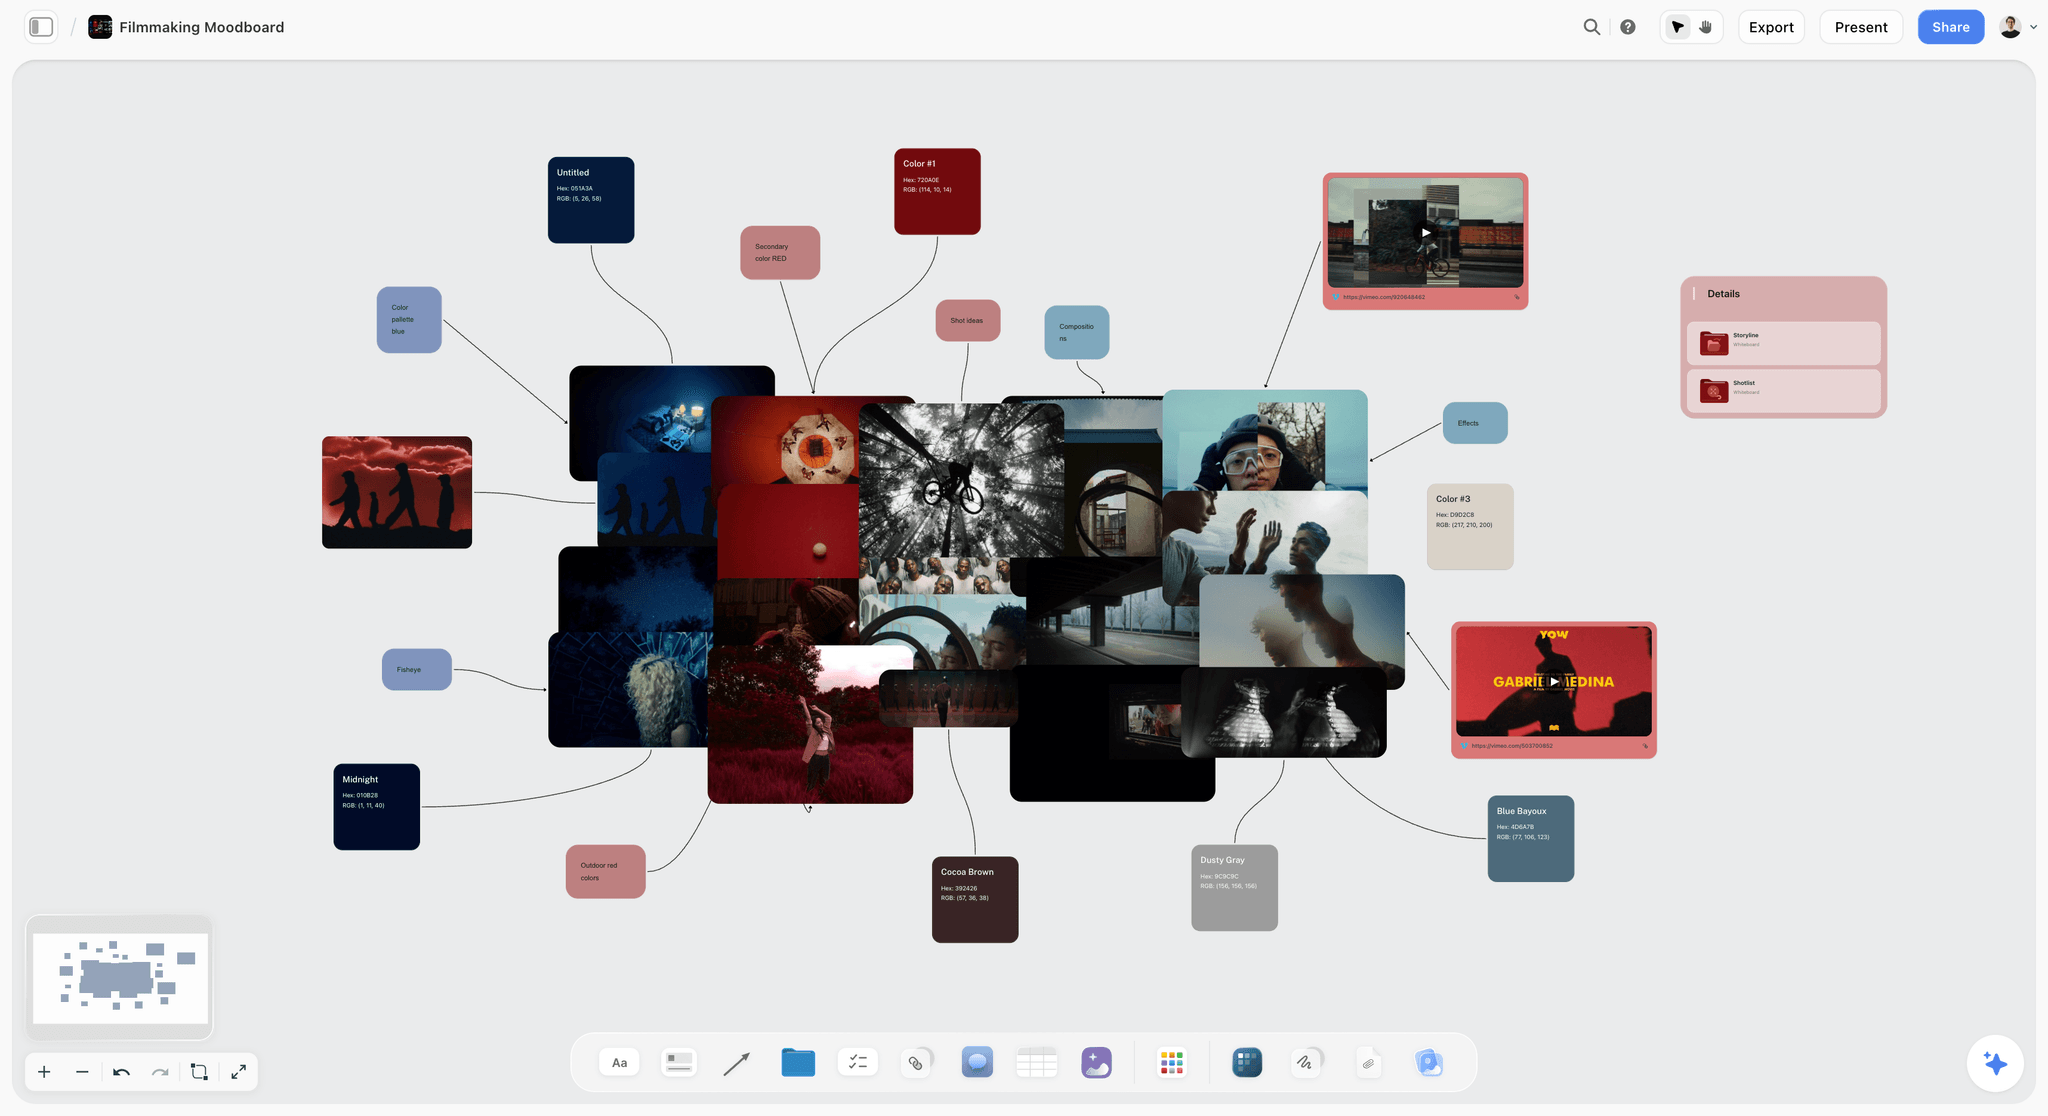
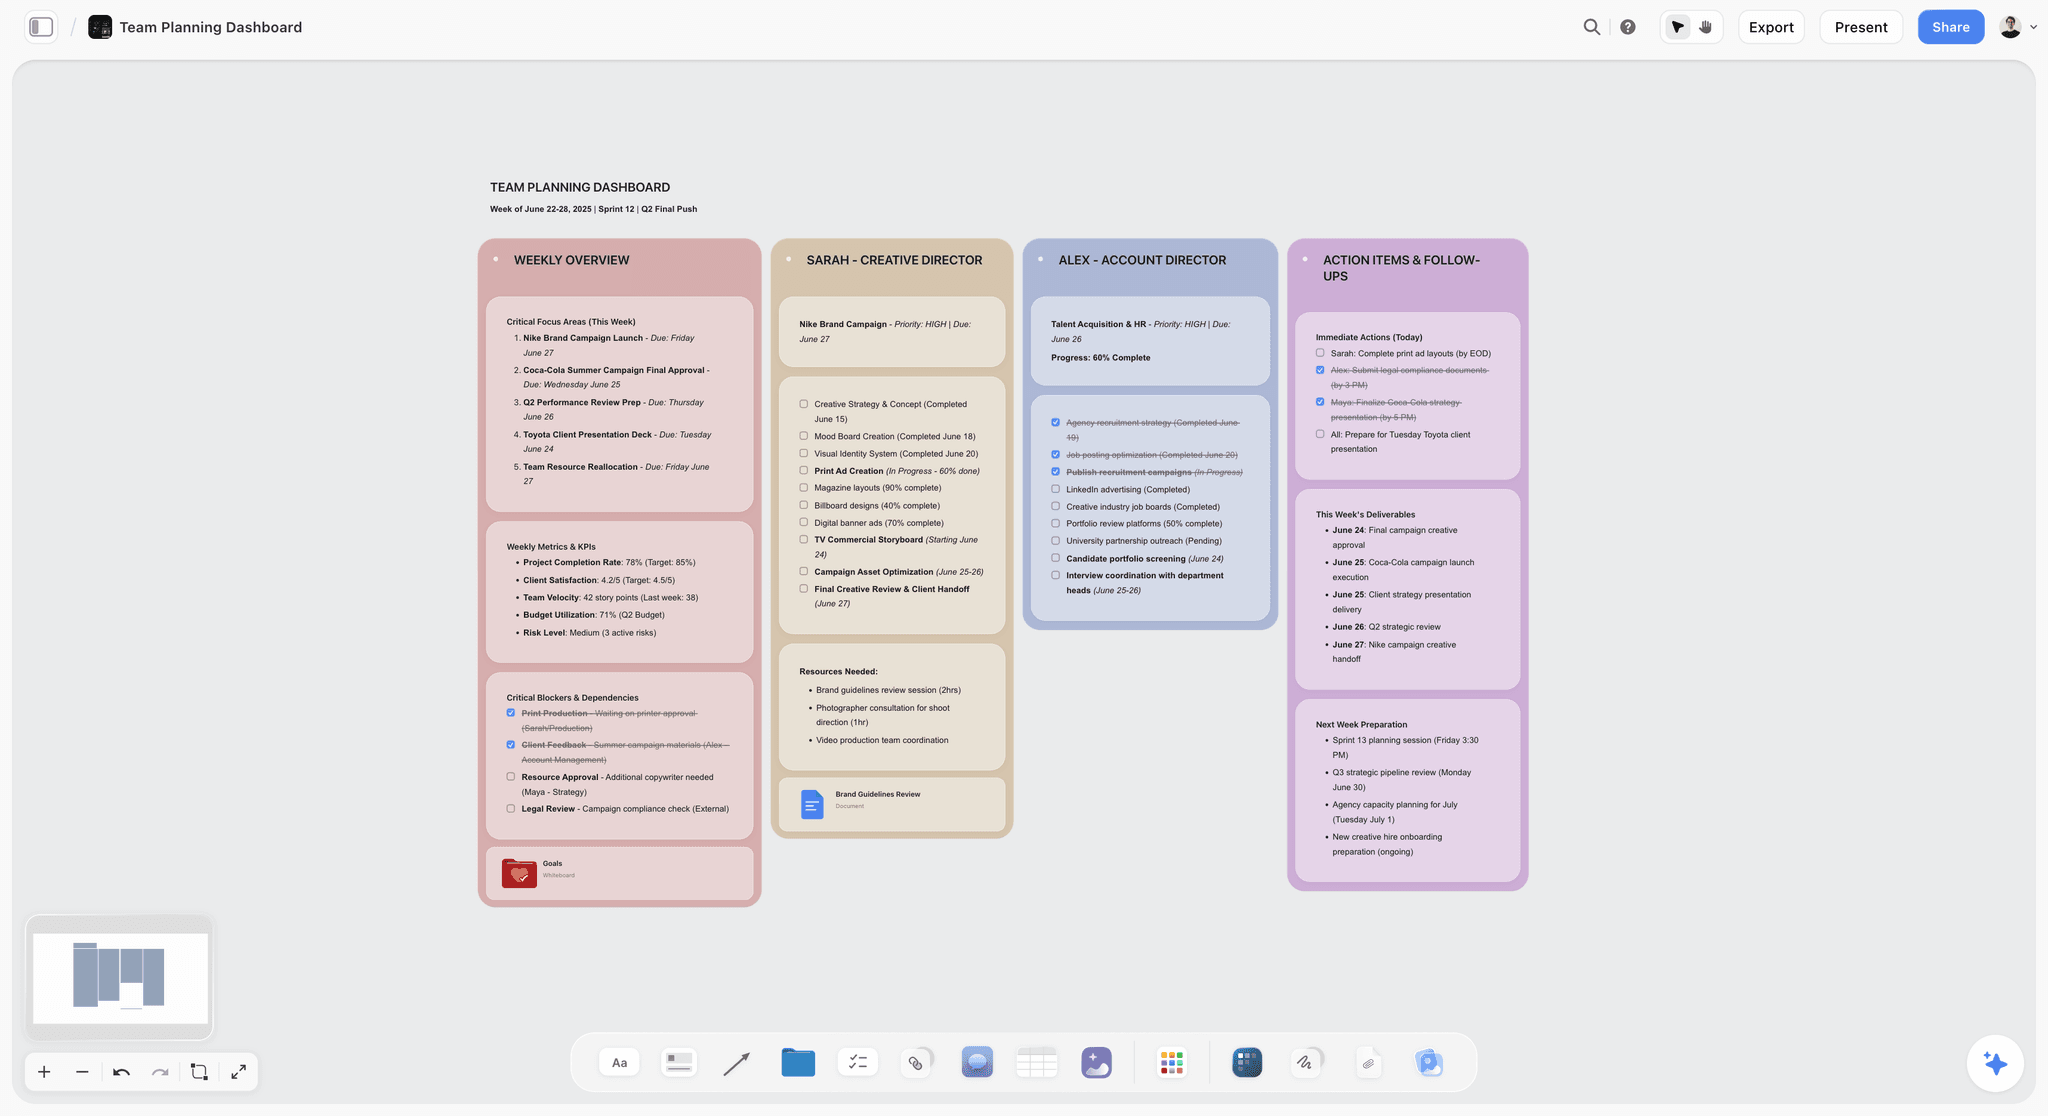
Storyflow filmmaking beat sheet board with the story laid out in beats, the structure a client storyboard's panels are chosen from.
Build your first client storyboard panel
Make one wall per panel with the line, labels, sketch, reference frame and to-dos, then send the client a link they open with no account. Plans start at $7.99 a month billed annually.

How to Storyboard a Film for a Client in 8 Steps
Each step below has the rule, the panel from our worked example that shows it, how it is done in Storyflow and the mistake it prevents. Every step has its own deep guide; this is the whole method in order. If you have not storyboarded before and want the basics of panels and frames, start with how to make a storyboard and come back.
Step 1: Write the line before you draw anything
The rule. The pictures are not the important part of a storyboard. The words under them are. Every panel gets one line, and that line answers three questions, always in the same order: what do we see, how does the camera move, what do we hear.
The panel. A weak line for the first panel of our example reads "Girl at a mirror." A crew cannot work from that. They cannot tell how close the camera is, whether it moves, or what plays over it. The strong line reads: "Medium close-up. She breathes on the mirror and picks at the glass. Slow push in. Voice-over: there's a moment when the world sharpens." Medium close-up means chest up, as StudioBinder's guide to camera shots defines it. Push in means the camera itself moves closer, which is different from a zoom.
The test. Read the line out loud to your crew. If they can picture the shot, the line works, and if the crew can picture it, so can your client.
In Storyflow. Grab a wall from the toolbar, drop it on the board and name it with a number and a title ("01 · The mirror"). Inside the wall, add a note and type the line. That note is the spine of the panel; everything else in steps 2 to 4 hangs off it.
The mistake it prevents. Drawing first and describing later. A beautiful frame with no line under it gets judged as a drawing. A rough frame with a precise line gets judged as a shot. The order of the three questions matters too: when every line reads picture, then camera, then sound, the client learns where to look on the second panel and stops reading on the fourteenth.
We go deep on this step, with a dozen weak and strong lines, in how to write a storyboard shot description.
Step 2: Build the rest of the panel around the line
The rule. A line is for reading. A board also has to be scanned. Pull the two details anyone looks for first, the shot size and the camera move, out of the line and into labels, so a producer can glance down the row and see "close-up, close-up, wide, top-down" without reading a word. Then add three more parts under the line:
- A script note with the exact words heard over this moment, so the client reads picture and sound together.
- A why note that says why the shot is there, so the client understands the idea behind it instead of guessing.
- A to-do list of everything the shot needs before the shoot: location, props, rig, wardrobe for continuity, ticked off as you go.
The panel. Panel 01 gets two labels, "Medium close-up" and "Push in". Its why note says it is a quiet, private start, so the spark that comes next hits harder. Its to-do list reads: bathroom with green tiles, a mirror that fogs on cue, a slider for the push in, and the grey sweater for continuity.
In Storyflow. Select the line's note and click the label button to add the shot size and the camera move. Add a second note for the script and a third for the why, then a to-do list at the bottom of the wall. Any to-do can take a person and a due date from the selection toolbar, so "slider for the push in" can belong to the camera assistant by Thursday.
The mistake it prevents. A to-do list that lives in a separate spreadsheet drifts away from the shot it serves. When the list sits under the panel, the producer sees that panel 13 needs fishing wire and a paint-out in the edit while looking at panel 13.
The full anatomy, with what goes in each part and what to leave out, is in what goes in a storyboard panel.
Step 3: Get a sketch into the panel, by hand or by AI
The rule. There are three options, not two: draw it yourself, leave it blank, or let Storyflow's AI sketch it from the line. Any of the three is fine. What is not fine is a board where every sketch looks like a different film.
Keep the sketches consistent. Two habits do most of the work. End every sketch request with the same style ("loose pencil sketch with grey shading"), and describe the character the same way every time ("young woman with long dark curly hair in a grey sweater"). The character description is the easy one to skip: skip it and the woman in one panel can come out with straight hair.
If you can draw, draw. A rough sketch in your own hand does the same job as an AI sketch. The sketch only has to show framing and where things sit in the frame. Stick figures with a clear eyeline beat a polished drawing with the wrong shot size. If you cannot draw at all, our guide to storyboarding when you cannot draw covers the other routes.
In Storyflow. Select the line and ask Storyflow's AI for a pencil sketch of it. AI image generation is on the Pro and Max plans only. On Plus, or if you would rather not use AI, draw on paper or a tablet, photograph or export the sketch and drop it into the wall, or leave the picture slot empty and let the reference frame from step 4 carry the look. Our AI storyboard generator page shows the sketches side by side.
The film is the clearest way to see this step: How to Storyboard a Film So Your Client Says Yes shows the sketch for panel 01 landing in the wall from the line alone.
The mistake it prevents. Spending the budget on drawings before the lines are approved. When the sketch comes from the line, changing the line and re-sketching costs a minute. When the sketch is a two-hour illustration, nobody wants to change it, so a weak shot survives because it was expensive to draw.
Step 4: Add a reference frame that shows the light
The rule. For every panel, ask: has anyone filmed something like this before? One real frame shows the crew the light, the lens and the colour at once, which a pencil sketch cannot. The film finds them on Frameset, a library of stills from films, ads and music videos.
Search for what is in the shot, not how it feels. "Woman bathroom mirror" returns frames you can use. "Dreamy" returns frames you cannot compare. The physical description is also the same vocabulary as your line, so the search and the panel agree.
Mark it as someone else's film. The frame is another film's actor in another film's room. It is there for light and mood; the sketch is the shot you are actually making. Write in the caption which film it is from, so nobody, least of all the client, thinks it is your footage or that you are promising that actor.
When there is no frame. If nobody has filmed your shot, skip it. Two panels in our example (03, window light, and 09, the lighter) carry "No frame: sketch from the line" on their to-do lists. The sketch is enough.
In Storyflow. Copy the still, paste it into the wall, drag it under the sketch, and set its shape from the image menu. Use the same shape for every frame on the board (the film uses 4:3) so the row reads as one film. Then type the source film into the caption.
The mistake it prevents. A board of beautiful borrowed frames with no sketches. The client approves the look of somebody else's film, and the shoot cannot match it, because you do not have that actor, that room or that budget.
How to find, crop and credit reference frames, and where else to look, is in how to use reference frames in a storyboard.
Step 5: Repeat the recipe, one panel per moment
The rule. Every panel uses the same recipe: sketch, frame, line with labels, script, why, to-do list. But you do not need a panel for every shot. You need one for every moment the client needs to see. The real ad in our example has 68 shots. The board that explains it has 14 panels. A montage of six fast cuts can be one panel if the client only needs to approve the idea of the montage.
Number every panel. "Change panel eight" should mean one thing to everyone on the email. Number in the wall title, and never renumber during a review round; renumber only when you start a fresh round. A panel inserted mid-round takes a letter: the first one after 08 is 08a.
Two hard kinds of shot.
- Very fast shots. Put the speed in the line: "Under a second." Panels 04 to 07 in our example are bursts, and each line says so, so nobody storyboards a four-second hold where the edit wants a flash.
- Shots you cannot film for real. Give the line two parts: what you film on the day, and what is added later in the edit. Panel 13, the floating bedroom, reads: shoot the room locked off, hang the objects on fishing wire, then paint the wire out in post.
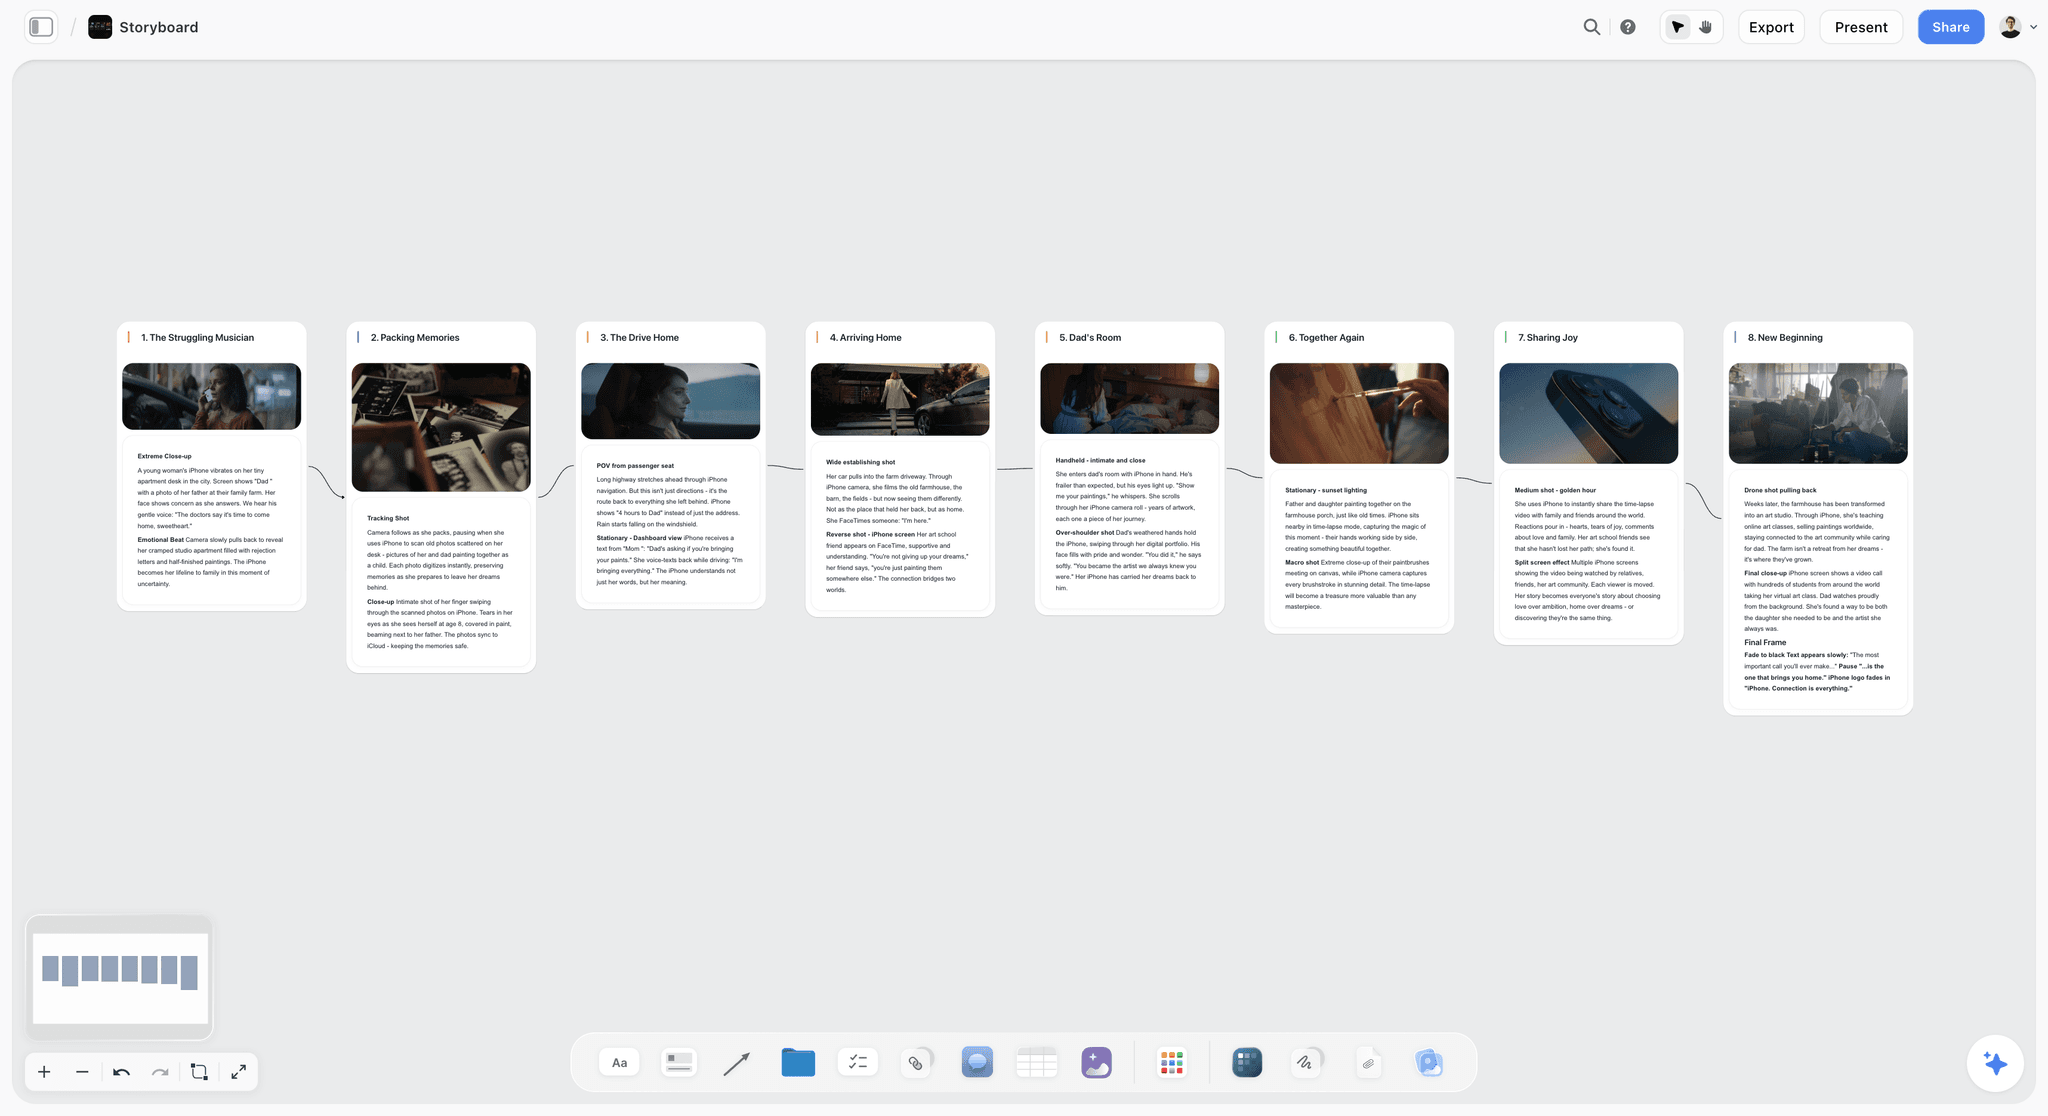
In Storyflow. Duplicate a finished wall and change its contents, so every panel keeps the same order top to bottom. The finished board is 14 walls in one row, read left to right.
The mistake it prevents. A 60-panel board for a 90-second film. The client stops reading at panel 20 and approves the rest without looking. Fewer, clearer panels get read in full.
How to decide which shots get a panel, by kind of film, is in how many panels a storyboard needs.
Step 6: Time every panel against the brief
The rule. Every line needs a fourth answer: how long does the shot last? The brief says 90 seconds, so the whole board has to fit in 90 seconds. Grab a stopwatch, act out every shot, and add the seconds to each panel as a label.
The arithmetic. In our example the seconds on the 14 panels are 9, 3, 1, 4, 3, 2, 2, 5, 7, 13, 4, 19, 14 and 6. Add them up and you get 92, two seconds over the brief. That is the situation this step exists for.
Cut the longest first. When the board runs long, take the seconds out of your longest shots before you remove a panel. The two longest here are panel 12 (the grey office, 19 seconds) and panel 13 (the floating bedroom, 14 seconds). Two seconds off a 19-second shot is a trim the client will not feel. Cutting panel 06 (two seconds of eyes in a mirror) would solve the arithmetic and lose an idea. You lose seconds, not whole ideas.
In Storyflow. The seconds are a label like the shot size, added from the same label button on the line's note. If you want the total in one place, add a small table to the board with one row per panel and the seconds beside it, kept in panel order.
The mistake it prevents. The two-minute assembly. If timing appears for the first time in the edit, the cut that brings it to 90 seconds is made by the editor, under deadline, without the client in the room. If it appears on the board, it is made by you, with the client's approval, a week before anyone shoots.
The stopwatch method, reading speeds for voice-over and what to do with music, are in how long each shot should be.
Step 7: Run the team check before the client sees anything
The rule. Before the client opens the board, the crew goes through it and comments on the panels. The director of photography reads the camera moves, the producer reads the to-do lists, the editor reads the timing. Working alone? Skip this step, and read the board once as the crew would.
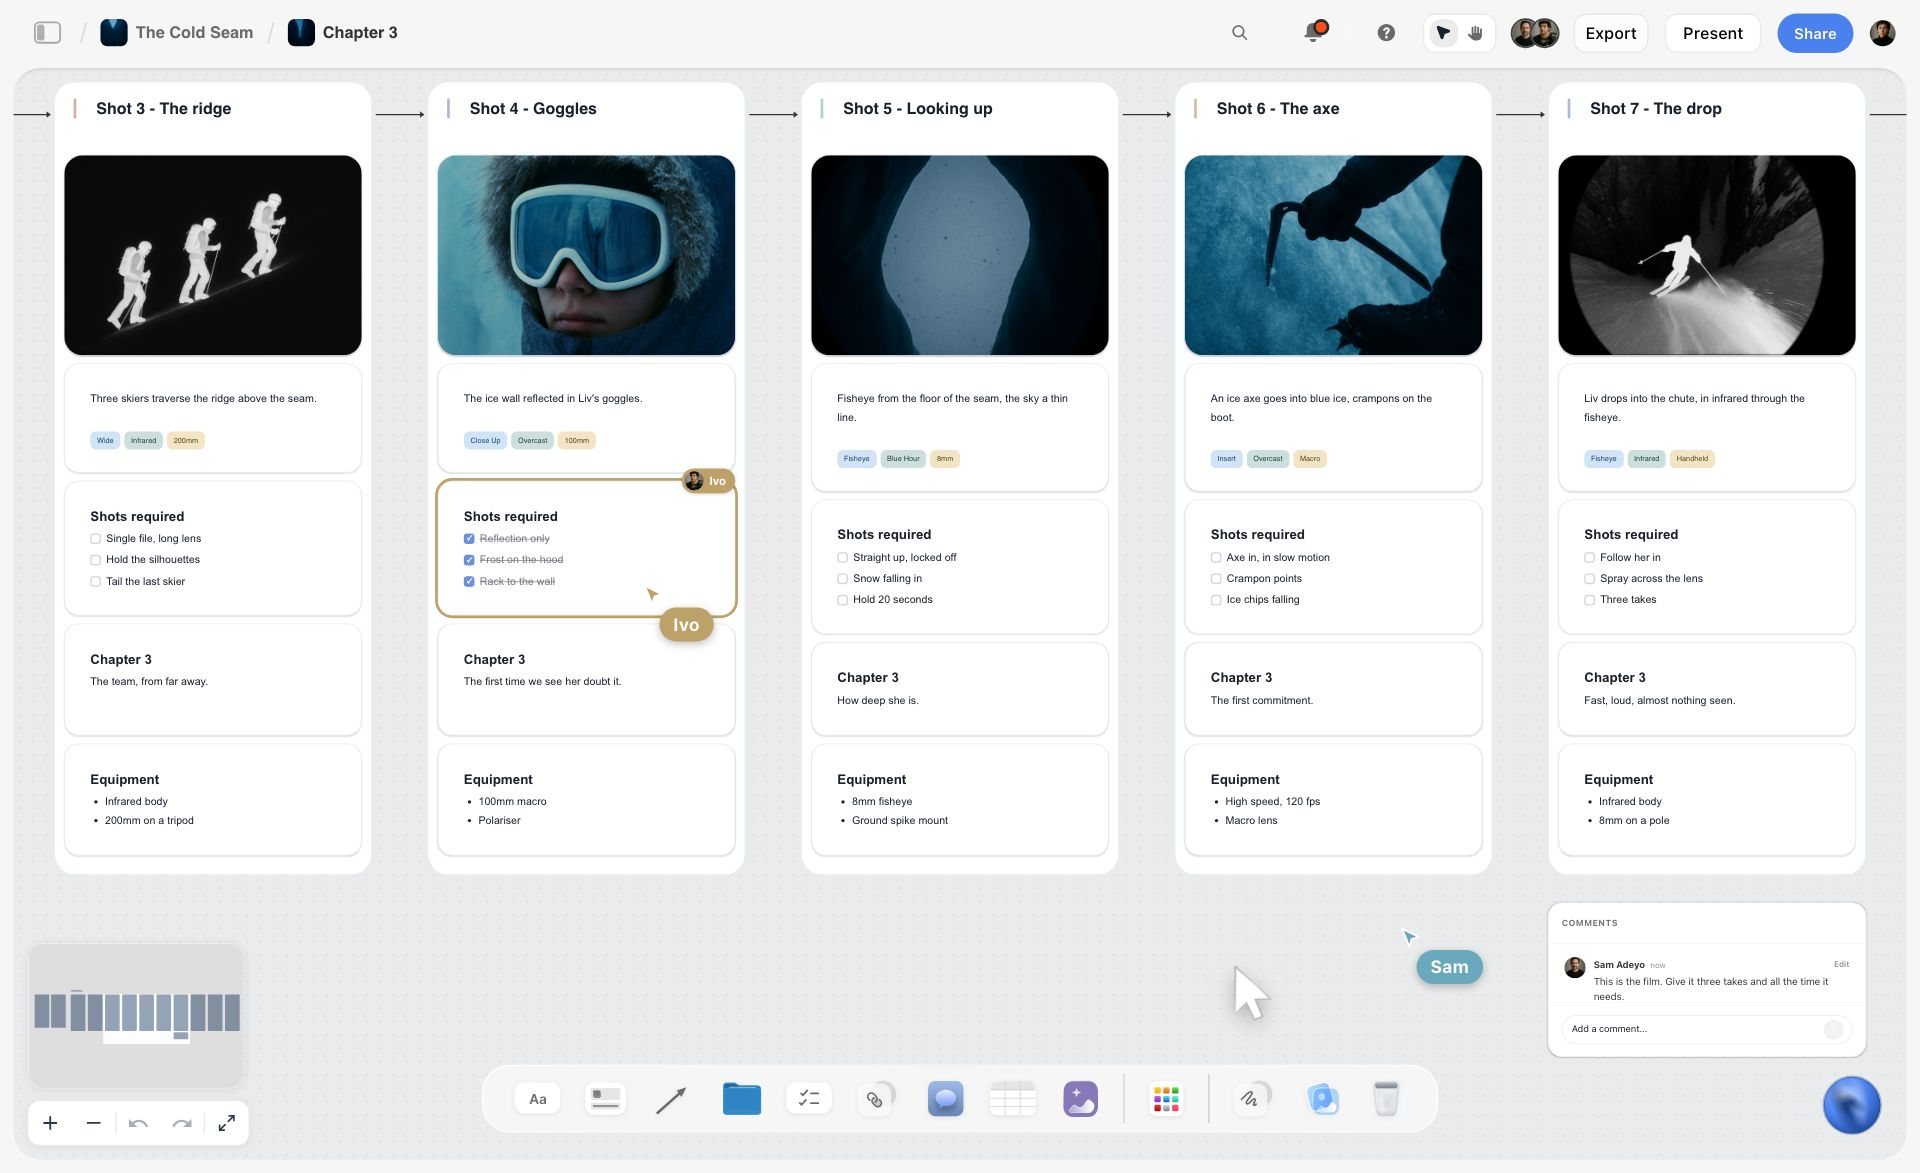
The panel. Panel 05 is fire bursting across grey ground, under a second. In the demo board a camera operator comments that the fire can only happen once. The reply on the panel is "One take, three cameras", and the to-do list for panel 05 carries a fire safety officer, a grey ground plate and that note. A problem solved before the shoot, on the panel where it belongs.
In Storyflow. Invite the crew to the board. Comments sit on the panel they are about, so "the fire can only happen once" is attached to panel 05 rather than buried in an email thread. Anyone a paid member invites to a board joins free, so the camera operator does not need a plan of their own.
The mistake it prevents. The client approves a shot the crew cannot deliver, and you have to go back and un-approve it. Going back to a client to say "we cannot do what you said yes to" costs more trust than any other note.
Step 8: Ask the client for a decision, panel by panel
The rule. Send the board to the client or walk them through it, and ask for a decision rather than an opinion. Do not ask "so, what do you think?". You get a long list of opinions back. Ask instead: approve this panel, or change one thing.
The panel. In the demo the client leaves one comment, on panel 13, the floating bedroom: can the fan and her headphones float too? One line on that panel changes, and the client approves. One comment, one change, one yes.
In Storyflow. Two routes. Send the view link: the client opens it with no account and sees the board as you built it. Leaving a comment needs a sign-in, so tell the client that in the email. Or press Present and walk them through the board one wall at a time, fullscreen, on a call or in the room. Our client review board and client presentation tool pages show both views.
The step 8 chapter of the film is the part text cannot carry: you watch the client's comment arrive on panel 13, the line change, and the yes come back, in the order it happens.
The mistake it prevents. The nine-comment reply with no yes in it. A narrow question gets a narrow answer, and a client who is asked to decide feels like a decision-maker rather than a reviewer.
What "yes" looks like without an approve button. Storyflow has no approval status per panel. Ask the client to reply "approved" in a comment on the first panel, or in the email that sent the link, and note the date on the board. If the contract needs a tracked approval per frame, that is a Boords job.
How to run the meeting, what to say on each panel and how to handle a client who wants to redesign the film on the call, is in how to present a storyboard to a client.
Worked Example: Storyboarding a 90-Second Ad in 14 Panels
Everything above is easier to see on a real board, so the film builds one for a real ad: "Your Space to Dream", a 90-second film for Cosmos. You can watch the ad itself before reading the panels.
This is not the official storyboard for that film, and Storyflow had nothing to do with making it. It is how we would plan a film like it. The sketches were made from our written lines only, never from the film's shots. The reference frames come from other films, found on Frameset and credited on the board. The camera operator and the client in the comments are made up for the demo. We do not know how the real film was planned or shot, and nothing here describes that.
The brief and the constraint
The brief is a 90-second ad about protecting your sense of wonder. The finished ad has 68 shots. The board has 14 panels, one for each moment a client would need to approve. On the real board every line ends with the words heard over that moment, and a separate note on each panel holds the script; those words are the ad's own copy, so below we quote only panel 01's fragment and describe the sound on the rest.
The 14 panels
| # | Panel | Seconds | The line (picture and camera) | Labels | Why the shot is there |
|---|---|---|---|---|---|
01 | The mirror | 9 | Medium close-up. She breathes on the mirror and picks at the glass. Slow push in. Voice-over: there's a moment when the world sharpens. | Medium close-up, Push in | A quiet, private start, so the spark that comes next hits harder. |
02 | Prints on the wall | 3 | Medium shot from behind. She pins prints to the wooden wall of her bedroom. Handheld. Voice-over continues. | Medium shot, Handheld | Shows what she collects: the habit the app is for. |
03 | Window light | 1 | Close-up. She turns her face toward the window light, eyes wide. Camera still. Voice-over continues. | Close-up, Still | The first change in her: an image lands. |
04 | The puddle | 4 | Top-down. A puddle shaped like a face on cracked concrete. Under a second. Voice-over continues. | Top-down, Burst | The spark itself, found somewhere ordinary. |
05 | Fire from above | 3 | Top-down. Fire bursts across grey ground. Under a second. Voice-over continues. | Top-down, Burst | Scale jumps: one image opens a whole world. |
06 | Mirror eyes | 2 | Close-up. Her eyes in a car's rear-view mirror as she tilts it. Under a second. One short voice-over line. | Close-up, Burst | The montage starts to speed up. |
07 | Tyre smoke | 2 | Low and close. A tyre spins in white smoke. Under a second. One short voice-over line. | Low angle, Burst | Peak energy, right before the turn. |
08 | Bedroom floor | 5 | Wide. Her messy bedroom, she lies on the floor among her pictures. Locked off. Voice-over continues. | Wide, Locked off | The calm before making: her space, her things. |
09 | The lighter | 7 | Extreme close-up. Her hands flick a red lighter above a rainbow sleeve, the flame lights her face. Voice-over continues. | Extreme close-up, Still | The film's idea in one gesture: seeing, not scrolling. |
10 | Paper cuts | 13 | Top-down. A small cut on skin, then the same cut repeated into a grid. Locked off. Voice-over continues. | Top-down, Locked off, VFX | The turn: how the spark gets worn down. |
11 | Strip mall | 4 | Extreme close-up. A cursor clicks a search button on an old computer screen. Voice-over continues. | Extreme close-up, Still | What wears the spark down: a feed that sells you nothing. |
12 | Grey office | 19 | Wide. A grey office where a man slumps on his desk holding the same red lighter. Locked off. Voice-over continues. | Wide, Locked off | The same lighter, no spark: the contrast. |
13 | Floating bedroom | 14 | Wide. Her bedroom lifts off and pictures and objects float around her as she looks up. Shoot the room locked off, hang the objects on fishing wire, then paint the wire out in post. Voice-over continues. | Wide, Locked off, VFX | The payoff: protecting inspiration lifts the whole room. |
14 | Space to dream | 6 | Top-down. She lies on her flowered bedspread and smiles up at us. Locked off. Voice-over: the brand line. Logo after. | Top-down, Locked off | End on her smile, then the logo. |
Read down the labels column and the shape of the film is visible without reading a line: a slow start, four bursts, a calm wide, then two long locked-off shots that carry the turn. That is what step 2's labels are for.
What each panel needs before the shoot
The to-do lists are where the board stops being a pitch and starts being a plan. Five of the fourteen, as they sit on the board:
| Panel | To-do list |
|---|---|
01 The mirror | Bathroom with green tiles; mirror that fogs on cue; slider for the push in; grey sweater, for continuity |
05 Fire from above | Fire safety officer on set; grey ground plate; one take, three cameras |
09 The lighter | Red lighter, hero prop; rainbow sleeve; no frame: sketch from the line |
12 Grey office | Grey office location; same red lighter; actor for the slumped man |
13 Floating bedroom | Fishing wire and rigging; list of floating props; paint out the wire in post |
Notice two things. The red lighter appears on panels 09 and 12, and the board makes the continuity visible: it has to be the same prop. And panel 05's list carries the crew's answer from step 7, so the fix is recorded where the shot is.
The timing check
The seconds add up to 92 against a 90-second brief. Step 6's rule says the two seconds come out of the longest shots: panel 12 at 19 seconds or panel 13 at 14. The board shows the 92; the point of the exercise is that you see the overrun on the board, a week before the edit, and decide where it comes from while the client can still weigh in.
The comments
One comment from the crew, on panel 05, answered on the panel. One comment from the client, on panel 13, about the fan and the headphones. One line changed. That is the whole review. The full shot-by-shot walkthrough, including how the board compares with the finished ad, is in our 90-second ad storyboard example.
Before and After: Rewriting Weak Panel Lines
Every weak line is missing one or more of the three answers, and the rewrite adds a shot size, a camera move and a sound rather than adjectives. "Man at desk." becomes "Wide. A man alone at a desk in an empty open-plan office, monitor glow on his face. Locked off. Sound: air conditioning hum, no music." "Product shot." becomes "Close-up. The bottle turns on a black plinth as a light sweeps across the label. Slow orbit left. Music: the theme's first bar." Both are our own teaching lines for imagined films, not from the ad above. Our guide on how to write a storyboard shot description has more pairs across genres, plus the two hard cases.
A Storyboard Panel Template You Can Copy
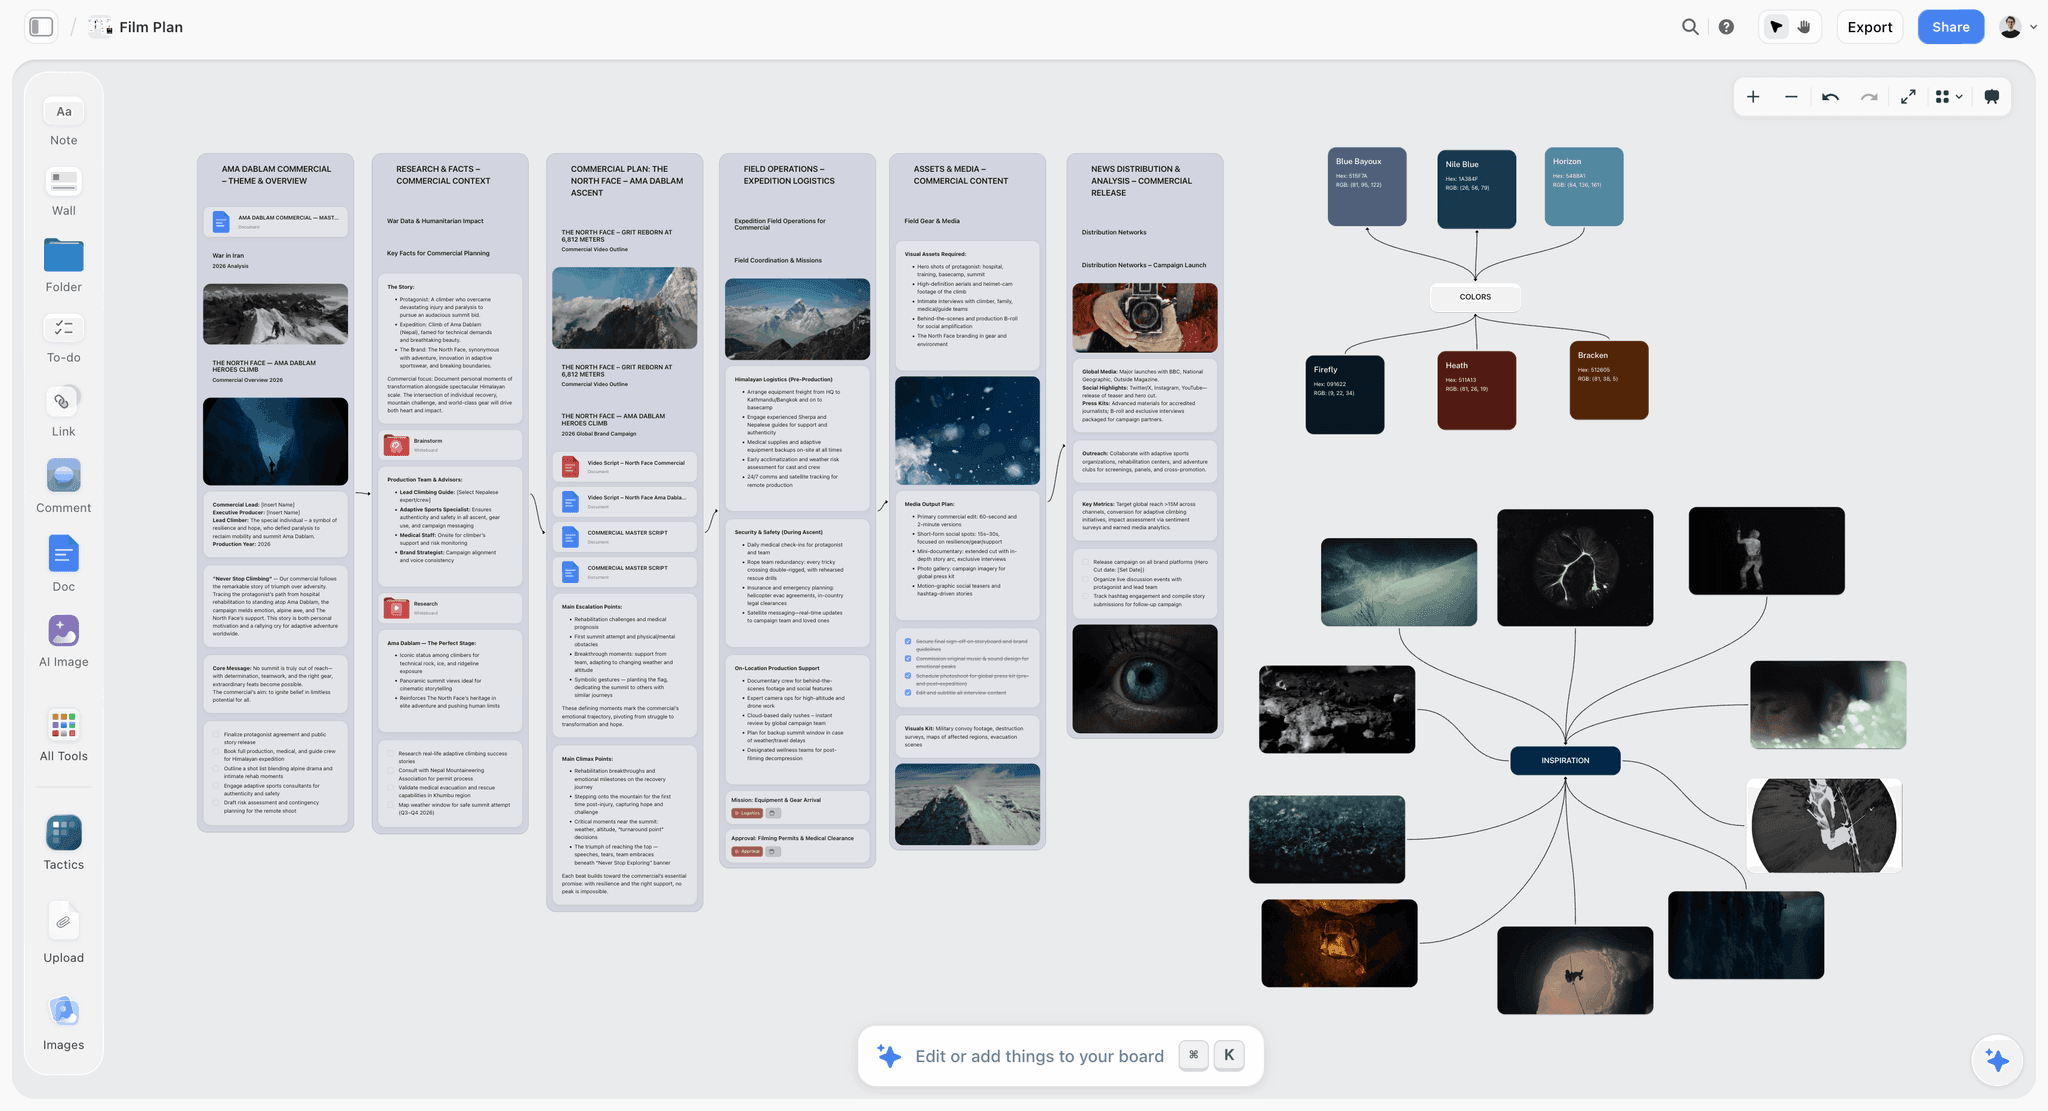
The template is the panel recipe from steps 1 to 6, top to bottom, the way it sits in a Storyflow wall: number and name, sketch, reference frame, the line, labels (shot size, camera move, seconds), script, why, and the to-do list. Our guide to what goes in a storyboard panel fills in each part from panel 01 and has a blank panel to copy. If you would rather start from a board than a list, our storyboard template page has one laid out in walls, and storyboard examples shows finished ones.
The Client Storyboard Checklist
Run this before each gate. Each line is a check you can do in a minute, and each one maps back to a step.
Before the team check
- Every panel has a number and a name
- Every line answers what we see, how the camera moves and what we hear, in that order
- Shot size and camera move are labels, not only words in the line
- Every fast shot says "Under a second." in the line
- Every effects shot has a day half and an edit half
- Every sketch uses the same style words and the same character description
- Every reference frame is the same shape and names its source film in the caption
- Every panel has a why note and a to-do list
Before the client sees it
- The seconds labels add up to the brief, or you know exactly where the overrun comes from
- Every crew comment has a reply on its panel
- To-do items that came out of the crew check are on the list
- Internal notes (budget, alternates, "we might not get this location") are off the client's board
- The email says the link opens with no account and that commenting needs a sign-in
In the meeting or the email
- Ask for a decision on each panel: approve, or change one thing
- Never ask "what do you think?"
- Write each change on the panel it belongs to, while the client watches
- Record the yes with a date, on the board and in the email
The Tools, Placed Honestly
Five tools matter for this job. Our own product first, then the rest by the job each does best. Each rival below keeps the job it wins.
1. Storyflow
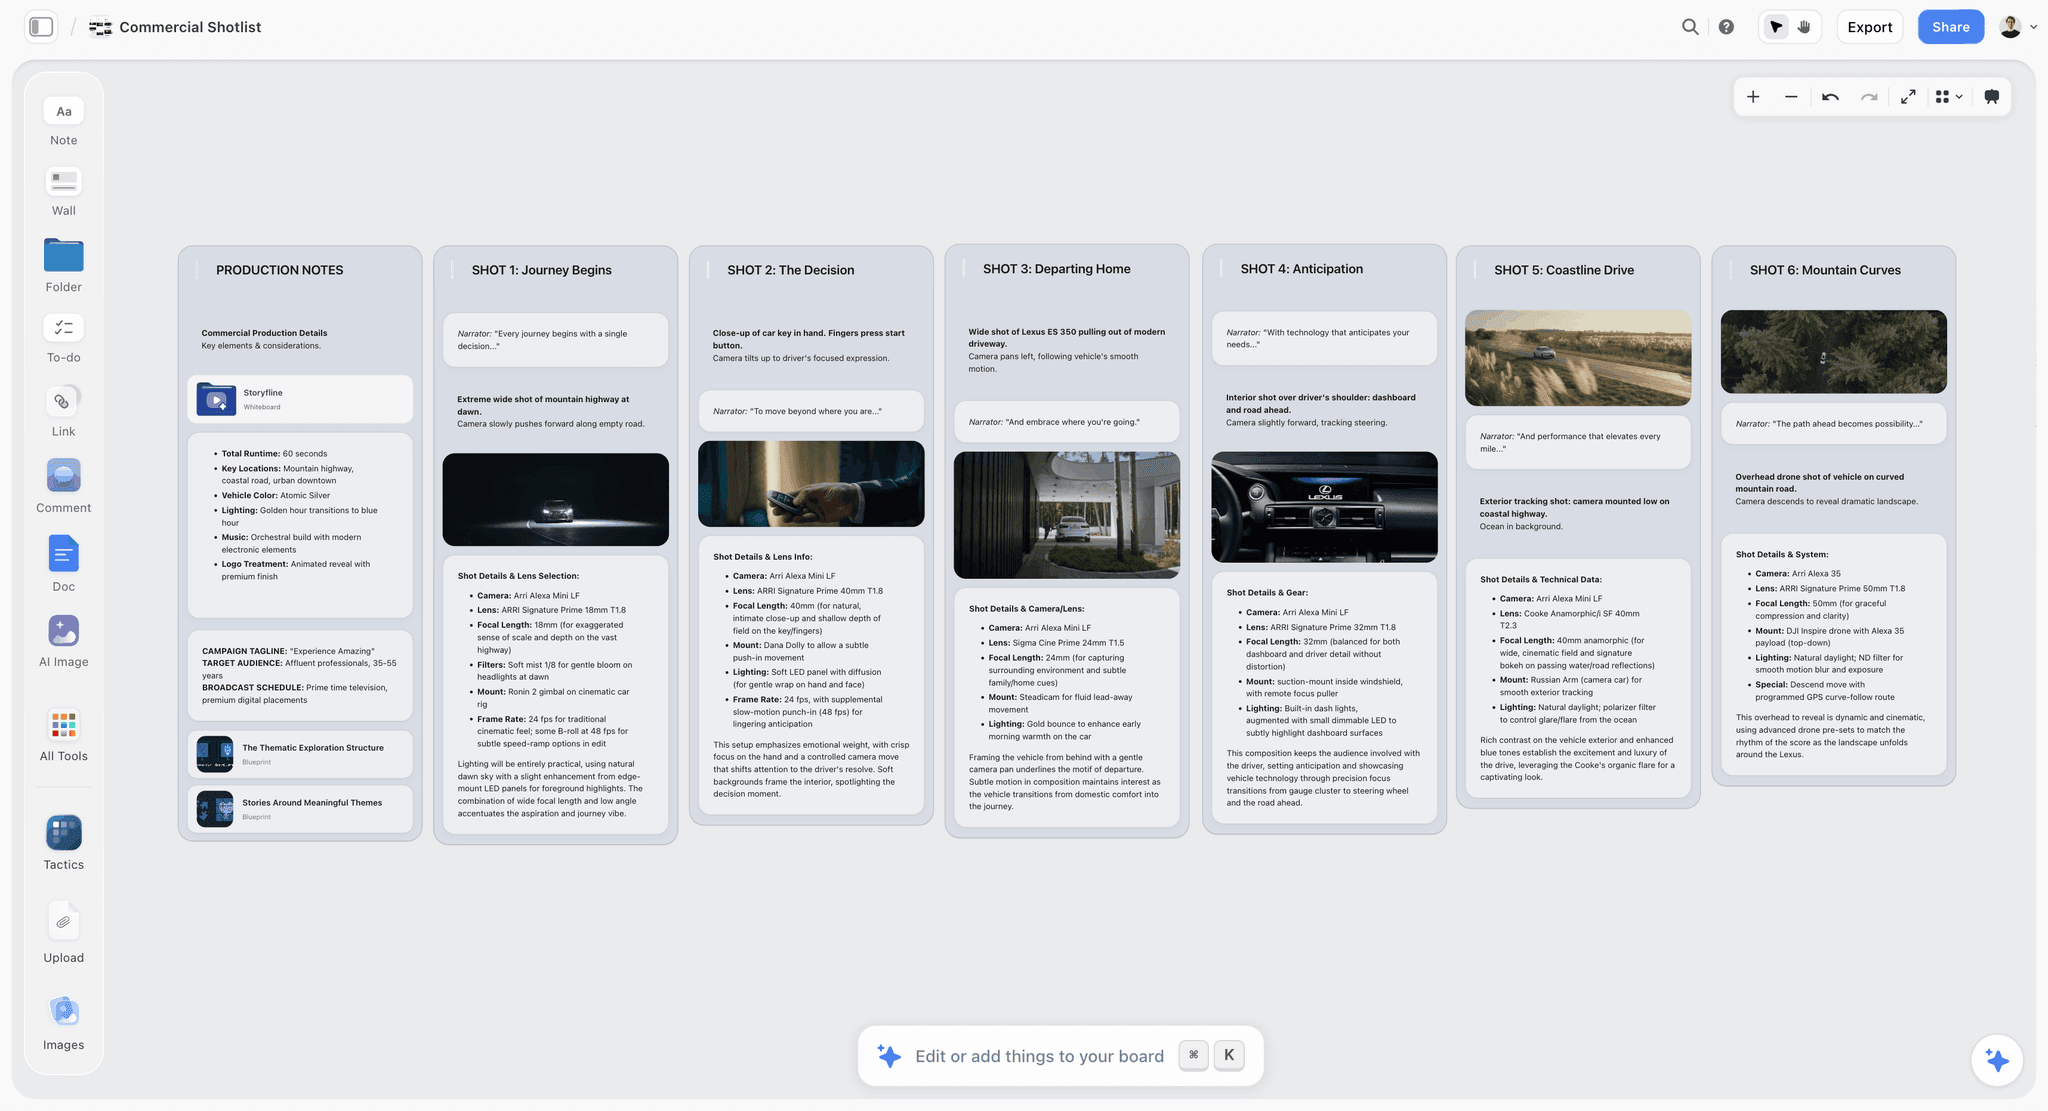
Verdict: the place to build the whole eight-step client board, because each panel is a wall that holds the line, labels, script, why, sketch, frame and to-do list, and the client opens it by link.
Best for: directors, producers and freelance videographers who pitch a film to a client and then have to shoot what the client approved.
Pricing: Plus $7.99 a month billed annually ($9.99 monthly); Pro $14 ($19 monthly) adds AI image generation, which the AI sketches in step 3 need; Max $39 ($49 monthly) adds a team workspace with roles and permissions. Storyflow is paid-only during early access; its Free plan launches before the end of 2026, and anyone a paid member invites to a board joins free now. See pricing.
Storyflow is an AI visual workspace for planning creative projects: an infinite canvas with notes, to-dos, tables, documents, images and walls, plus an AI agent that reads the board and builds storyboards, shot lists, mood boards and decks onto it. For a client storyboard that means the board in the film: 14 walls in a row, each built from the same recipe. The AI can also read a script you attach (PDF and Final Draft .fdx included) and lay out a first pass of walls from it, which our script to storyboard page shows. If you already work in Claude or ChatGPT, the Storyflow MCP connector lets that assistant read and build on the same board.
- One wall per panel, with the line, labels, script, why, sketch, frame and to-dos in a fixed order
- AI pencil sketches from the line, in one style, on Pro and Max
- To-dos with a person and a due date
- Crew comments on the panel they are about; invited collaborators join free
- View link with no account for the client, plus Present mode one wall at a time
Limitations: no animatic, no timed playback and no MP4 export; no approve button or approval status per panel; no version history; no drawing tools for boards drawn by hand; browser only, with no native desktop or mobile app and no offline mode; AI sketches are not on Plus; no free plan during early access.
2. Boords
Verdict: the strongest dedicated storyboard and animatic tool, and the right pick when the client signs off the animatic or needs a tracked approval per frame.
Best for: agencies and studios whose deliverable is the storyboard or the animatic itself.
Pricing: a free plan with 5 active storyboards, 3 active scripts and 8 one-off sample AI image credits; Solo $26 a month billed yearly ($39 monthly) for one user; Pro $50 billed yearly ($75 monthly) for up to 5 users; Team $85 billed yearly ($125 monthly) for up to 10 users, per Boords pricing, checked 11 October 2026.
Boords is built around the frame. Each frame takes custom fields, and the storyboard software page lists frame-level comments, statuses that show what is approved at a glance, version history that keeps comments, passphrase-protected presentation links and export to PDF, images, shot lists and MP4. The animatic tool times frames on a timeline against an uploaded soundtrack or voice-over and exports an MP4.
- Animatics with audio and MP4 export
- Approval statuses per frame and version history
- Passphrase-protected client links
Limitations: the storyboard lives apart from the brief, the mood board and the shoot paperwork; AI images are capped per plan; multi-user plans are priced by seat band.
Against Storyflow: Boords wins the sign-off itself (statuses, versions, the animatic), and Storyflow wins the board that holds the panel, its to-do list and the rest of the plan on one canvas. Choose Boords when the client contract asks for an animatic or a per-frame approval record.
3. Frameset
Verdict: a library of stills from films, ads and music videos, and the source the film uses for step 4.
Best for: finding the one real frame that shows the crew the light, the lens and the colour.
Pricing: a free tier with limited searching and one project; Pro is $15.99 per member a month, and annual billing saves 32%, as of October 2026. See Frameset for current plans.
Frameset is a reference tool, not a storyboard tool. Search it for what is physically in the shot, copy the still, and paste it into the panel under the sketch with the source film in the caption.
- Stills from films, ads and music videos
- Searchable by what is in the shot
Limitations: no panels, no lines, no client review; it feeds one step.
Against Storyflow: Frameset finds the frame and Storyflow holds it in the panel. Use both; choose Frameset whenever a panel needs a real-world reference for light and colour.
4. Storyboarder
Verdict: the free drawing tool for directors who sketch their own panels.
Best for: anyone who draws and wants a fast, free desktop app for boards.
Pricing: free and open source, for Mac, Windows and Linux, per Wonder Unit.
Storyboarder lets you draw boards quickly and add dialogue, action, timing and shot type to each. It exports a PDF contact sheet, an animated GIF, or a sequence for Premiere, Final Cut and Avid, and it can show an animatic.
- Free, with real drawing tools
- Timing and shot type per board
- Export to editing software
Limitations: no built-in client review or comments; the client gets a PDF; no to-do lists or production notes beside the panel.
Against Storyflow: Storyboarder is where you draw, Storyflow is where the client and crew read and comment. Choose Storyboarder if you draw every panel and send the client a PDF.
5. Frame.io
Verdict: the review tool for after the shoot, when the client comments on the cut rather than the plan.
Best for: editors and producers collecting frame-accurate client notes on video.
Pricing: Free for up to 2 members and 2GB of storage; Pro $15 and Team $25 per member a month, per Frame.io pricing, checked 11 October 2026.
Frame.io puts comments on video, images and documents, and its Premiere integration places frame-accurate notes in the editor's timeline.
- Frame-accurate comments on video
- Integration with the edit
Limitations: not a storyboard tool; nothing to build panels with.
Against Storyflow: Storyflow gets the yes on the plan, Frame.io gets the notes on the cut. Choose Frame.io the moment there is footage to review.
How the Method Changes by Kind of Film
The eight steps hold for every kind of film. What changes is how many panels you need, what the line stresses and what the client is really deciding.
Ads and commercials
The brief is a hard number: 15, 30, 60 or 90 seconds. Step 6 is non-negotiable, and the pack shot and end card get their own panels and their own seconds. The client often has a brand team and a legal team; give them one board and one question per panel. Our commercial storyboard page and how to storyboard a commercial go further on spots and cutdowns.
Music videos
The track sets the timing, so step 6 is done with the song, not a stopwatch: mark panels to sections (verse, chorus, bridge). The line's sound part names the section. Performance and story panels alternate, and labelling them as such lets the artist's team scan the balance. See our music video storyboard page.
Corporate and brand films
The client is often a committee. Fewer panels, a stronger why note on each, and the interview shots as one panel with the framing written out. The why note does the heavy lifting here, because the committee is approving a message, not a look.
Short films
There is no client in the agency sense, but there is a producer, a funder or a festival application. The line and the to-do lists matter more than the sketches, because the board is mostly for the crew. Panel count follows scenes and key moments, not every shot.
Documentaries
You cannot storyboard what has not happened. Board the parts you control: the opening, interview setups, recreations and the end. Leave the observational scenes as one panel each with a line that says what you hope to capture and how you will cover it. Our documentary storyboard page shows the shape.
Social and vertical videos
The frame is 9:16, so set every reference frame and sketch to the same vertical shape. The first panel carries the hook in the first second, and the line's sound part says whether the panel still works on mute, so the client knows what a viewer with the sound off will get.
How the Method Changes by Role
Who builds the board changes which steps get the most time.
The director
You own steps 1, 3 and 4: the lines, the sketches and the frames. Write the lines yourself even if someone else sketches; the line is the director's voice on the board.
The producer
You own steps 2, 6 and 7: the to-do lists, the timing and the crew check. Give every to-do a person and a date, and make the seconds add up before anyone sends a link.
The freelance videographer
You are all of the roles. Skip step 7 if there is no crew, but read the board once as a camera operator would. Spend your time on step 8: a client who approves panel by panel does not come back after the shoot with a new idea.
The agency creative
You sell the board twice: to your creative director and then to the client. Keep the internal notes on a separate board and send the client only the clean one.
Common Mistakes When You Storyboard a Film for a Client
Each of these maps to a step, and each has a fix you can make on the board in minutes.
Mistake 1: Pictures with no words under them
The client critiques the drawing. Fix: write the line first (step 1), and put the sketch above it, not instead of it.
Mistake 2: Lines that skip the camera or the sound
"She walks into the room" leaves the crew guessing. Fix: three answers in the same order on every panel.
Mistake 3: A different-looking character on every panel
The client asks why she changed. Fix: one style phrase and one character description, pasted into every sketch request (step 3).
Mistake 4: Borrowed frames presented as the plan
The client approves another film's actor and room. Fix: sketch first, frame under it, source film in the caption (step 4).
Mistake 5: A panel for every shot
Sixty panels for a 90-second film. Fix: one panel per moment the client needs to see (step 5), and say in the header that the edit will have more shots.
Mistake 6: No seconds on the board
The edit runs long and the cut is made without the client. Fix: a seconds label on every panel, totalled against the brief (step 6).
Mistake 7: "So, what do you think?"
A list of opinions with no decision. Fix: ask for approve or one change, panel by panel (step 8).
When Storyflow Is Not the Right Choice
Storyflow builds the board in this method. It does not do everything around it, and these are the jobs to give to another tool.
The client signs off an animatic
Storyflow has no animatic, no timed playback with audio and no MP4 export. If the deliverable is a moving storyboard timed to the voice-over, build it in Boords, which times frames against audio and exports MP4, or cut the panels in your editing software. Our guide to making an animatic covers both routes.
The contract needs a tracked approval per panel
Storyflow has no approve button, no approval status per panel and no version history. Boords has statuses and versions. In Storyflow, the honest workaround is a comment or email that says "approved" with a date, which is fine for most freelance work and not enough for a contract that specifies per-frame sign-off.
You need frame-accurate review of the cut
That is a video review job. Frame.io puts notes on exact frames of the edit.
You need a shooting schedule and call sheets
Storyflow does not build stripboards or send call sheets. StudioBinder and dedicated scheduling tools do. Our shot list template and video pre-production pages show what Storyflow does hold for the shoot.
You draw every panel by hand
Storyflow has no drawing tools. Draw in Storyboarder, Procreate on iPad or Photoshop, then drop the drawings into the walls if you want the board and the review in one place.
You need it offline or as an app
Storyflow runs in the browser only. It has no offline mode, and there is no native app for a desktop or a phone. Storyboarder is a free desktop app that works offline.
What It Costs to Storyboard a Film for a Client
The method needs one tool to hold the board. Here is what each costs, as checked on 11 October 2026.
| Tool | Plan for this job | Price | What the plan adds for this job |
|---|---|---|---|
Storyflow | Plus | $7.99 a month billed annually ($9.99 monthly) | Walls, notes, labels, to-dos, comments, view link, Present; upload your own sketches |
Storyflow | Pro | $14 a month billed annually ($19 monthly) | Adds AI image generation, so the AI sketches panels from their lines |
Storyflow | Max | $39 a month billed annually ($49 monthly) | Adds a team workspace with roles and permissions |
Boords | Free | $0 | 5 active storyboards, 3 active scripts, 8 sample AI image credits |
Boords | Solo | $26 a month billed yearly ($39 monthly) | One user, 250 AI images a month, animatic, version history |
Frameset | Free tier; Pro $15.99 per member a month | Annual billing saves 32% | Reference stills for step 4 |
Storyboarder | Free | $0 | Drawing, timing, PDF and editing-software export |
Frame.io | Pro | $15 per member a month | Frame-accurate review of the cut |
Storyflow is paid-only during early access; its Free plan launches before the end of 2026, and anyone a paid member invites to a board joins free now, which covers your crew and the client's team. The cheapest full route for a solo director who draws is Storyboarder plus a PDF. The route in the film, with AI sketches, is Storyflow Pro.
The Bottom Line
A client says yes to a storyboard when it reads as a set of decisions: one line per panel that a crew can picture, labels anyone can scan, seconds that add up to the brief, problems the crew has already solved, and one question per panel. Drawing was never the hard part; writing the lines is. Storyflow holds that board as one wall per panel, with the line, sketch, frame and to-dos together and a link the client opens with no account; Boords is the pick when the sign-off is an animatic or a tracked approval. Watch How to Storyboard a Film So Your Client Says Yes to see all 14 panels built and the client's yes arrive, then build your first panel on the film storyboard page.
FAQ: How to Storyboard a Film for a Client
How do you storyboard a film step by step?
Write one line per panel (what we see, how the camera moves, what we hear), add labels, a script note, a why note and a to-do list, then a sketch and a reference frame. Repeat for every moment the client needs to see, time each panel against the brief, let the crew comment, and ask the client to approve each panel or change one thing. That is eight steps, in that order.
What should a storyboard for a client include?
A numbered panel for every key moment, each with a sketch, an optional reference frame credited to its source, one line covering picture, camera and sound, labels for shot size, camera move and seconds, the script heard over it, a sentence on why the shot is there, and what the shot needs before the shoot. Keep budget notes and alternates off the client's copy.
How many panels does a storyboard need for a 90-second film?
As many as there are moments the client needs to see, not one per shot. In our worked example a 90-second ad with 68 shots is explained in 14 panels. Fast montages can share a panel; a shot the client will argue about gets its own. If the board passes about 20 panels for 90 seconds, look for panels the client does not need to decide on.
Do I need to draw to make a storyboard?
No. You can draw it yourself, leave the picture empty and let a reference frame carry the look, or have Storyflow's AI sketch the panel from its line on the Pro or Max plan. If you can draw, a rough sketch in your own hand does the same job. What matters most is the line under the picture.
How do I write the description under a storyboard panel?
Answer three questions in the same order: what do we see, how does the camera move, what do we hear. "Medium close-up. She breathes on the mirror and picks at the glass. Slow push in. Voice-over: there's a moment when the world sharpens." Read it out loud to your crew; if they can picture it, it works.
How do I keep AI storyboard sketches consistent?
End every sketch request with the same style phrase, such as "loose pencil sketch with grey shading", and describe each character the same way every time, such as "young woman with long dark curly hair in a grey sweater". Changing either between panels is what makes characters drift. Generate from the line, not from a new description each time.
Where do I find reference frames for a storyboard?
Search a still library such as Frameset for what is physically in the shot ("woman bathroom mirror"), not a mood ("dreamy"). Paste the frame under the sketch, set every frame to the same shape, and write the source film in the caption. If nobody has filmed your shot, skip the frame and rely on the sketch.
How do I time a storyboard?
Act out every shot with a stopwatch and add the seconds to each panel as a label. Add them up against the brief. If the total runs over, take seconds from the longest shots before removing any panel. In our example the panels total 92 seconds against a 90-second brief, and the two longest panels are 19 and 14 seconds.
How do I present a storyboard to a client?
Send a link or walk them through it panel by panel, and ask for a decision on each: approve it, or change one thing. Avoid "what do you think?", which returns a list of opinions. In Storyflow, Present mode shows one wall at a time fullscreen, and the view link opens with no account.
Can a client comment on a Storyflow storyboard without an account?
The client can open and view the board with no account. Leaving a comment needs a sign-in, and anyone a paid member invites to a board joins free. Tell the client both halves in the email that sends the link, so the first comment does not stall at a sign-in screen.
Can Storyflow record client approval on a storyboard?
Not as a status. Storyflow has no approve button, no approval status per panel and no version history. Ask the client to reply "approved" in a comment or the email, and note the date on the board. If a contract needs a tracked approval per frame, use Boords, which has statuses and version history.
Can Storyflow make an animatic from a storyboard?
No. Storyflow has no animatic, no timed playback and no MP4 export. Build the animatic in Boords, which times frames against audio and exports MP4, or in Storyboarder, or cut the panels in your editing software using the seconds labels from the board as the timing.
Is Storyflow free for storyboarding?
Not during early access. Storyflow is paid-only for now, starting at $7.99 a month billed annually on Plus; its Free plan launches before the end of 2026, and anyone a paid member invites to a board joins free now. AI sketches need Pro at $14 a month billed annually. Storyboarder is free if you draw.
What is the difference between a storyboard and a shot list?
A storyboard shows the client what the film will look like, in story order, one panel per key moment. A shot list tells the crew every setup, in shooting order. One storyboard panel can become several shots. Build the board first, get the yes, then break it into the shot list on the same board.
Table of Contents
- Key Takeaways
- Why Client Storyboards Stall Before Anyone Shoots a Frame
- Tools for Each Step: What You Need to Storyboard a Film for a Client
- How to Storyboard a Film for a Client in 8 Steps
- Step 1: Write the line before you draw anything
- Step 2: Build the rest of the panel around the line
- Step 3: Get a sketch into the panel, by hand or by AI
- Step 4: Add a reference frame that shows the light
- Step 5: Repeat the recipe, one panel per moment
- Step 6: Time every panel against the brief
- Step 7: Run the team check before the client sees anything
- Step 8: Ask the client for a decision, panel by panel
- Worked Example: Storyboarding a 90-Second Ad in 14 Panels
- Before and After: Rewriting Weak Panel Lines
- A Storyboard Panel Template You Can Copy
- The Client Storyboard Checklist
- The Tools, Placed Honestly
- How the Method Changes by Kind of Film
- How the Method Changes by Role
- Common Mistakes When You Storyboard a Film for a Client
- When Storyflow Is Not the Right Choice
- What It Costs to Storyboard a Film for a Client
- The Bottom Line
- FAQ: How to Storyboard a Film for a Client
- Related Reading
Templates to check out for this topic


Filmmaking templates you can use in Storyflow
Skip the blank canvas. Open one of these filmmaking boards in Storyflow and the AI builds on the structure that is already there, from research through the shot list.


See Storyflow in Action
A visual AI workspace where every feature lives inside one canvas. No tab-switching, no context lost.
Build your entire board from a single message
Type what you need in the AI chat at the bottom of your canvas. The AI adds cards, headings, and structure directly onto your board.
Use expert frameworks as AI context
Type @ in the AI chat and choose any Tactic. The AI tailors every response to that framework instead of giving generic advice.
Turn your board into a mind map in seconds
Ask the AI to restructure your canvas as a mindmap. It connects your ideas into a visual hierarchy so you can see how everything relates.
Why Storyflow Exists
Storyflow actually began as a personal tool while working on creative and research projects.
We kept running into the same problem: ideas were scattered everywhere: notes, documents, and whiteboards.
Nothing helped us see how everything connected.
So we started building a workspace designed around how ideas actually grow.
→ Read how Storyflow was createdStoryflow Team
Product & Research Team
Published: 2026-10-11
Extremely simple, seriously capable


See how easy it is to get started
Watch a real project come together, from a blank board to a finished plan, clicked through step by step.
Start creating with AI and become more productive
Transform your creative workflow with AI-powered tools. Generate ideas, create content, and boost your productivity in minutes instead of hours.