
Extremely reliable pre-production
Plan the light
before the truck is loaded.
Diagram every setup, pin the frame you are matching right beside it, and list the fixtures, power, and grip each position needs.


Creatives working for these brands already got early access
- Red Bull
- Canon
- Artlist
- Porsche
See how easy it is to get started
Watch a real project come together, from a blank board to a finished plan, clicked through step by step.
Start from a ready-made template
Pick a board to see what you can build, then let AI fill it in. Every template is a real, editable starting point on the same infinite canvas.

Pre-Production
Pull the brief, script, shot list, and moodboard into one pre-production hub so the whole shoot is planned in one place.
What is a lighting plan?
A lighting plan is a per-setup record of where the light comes from, what makes it, and what the result is supposed to look like. Storyflow is an AI visual workspace that holds a shoot's lighting plan on one infinite canvas: a diagram of each setup, the reference frame pinned beside it, and the fixtures, power and grip each position needs. A lighting plan is usually drawn as an overhead diagram with the camera, the subject, and each fixture marked, along with modifiers, distances, and heights. Its purpose is not documentation for its own sake. It is to make a lighting idea transferable, so that what the DP is imagining and what the gaffer rigs are the same thing, and so that a look established on Tuesday can be recreated on Friday.
The reason lighting benefits from planning more than almost anything else on a shoot is that it is the slowest thing to change and the hardest to fix later. Reblocking a scene costs minutes. Relighting it costs an hour, sometimes more once you count moving stands, re-running cable, and re-balancing for the change. That asymmetry means the value of deciding in advance is unusually high here, and the cost of discovering on the day that the look requires a fixture nobody brought is unusually painful.
Storyflow is an AI-native infinite canvas that fits this well because a lighting plan is a drawing plus a list plus a picture, and those three things normally live in three places. Sketch the overhead with the pen tool, pin the reference frame you are chasing directly beside it so the intent is unambiguous, and write the fixture list, power draw, and grip requirements on a card attached to the same setup. Because there is no object cap, a shoot with thirty lighting setups sits on one board.
A lighting plan is worth building in four layers. The intent layer is the reference: the actual frame you are trying to match, which settles arguments that adjectives cannot. The diagram layer is the overhead showing key, fill, backlight, and practicals with their positions, heights, and modifiers. The kit layer is what each setup physically requires in fixtures, stands, modifiers, gels, and cable, which is what turns a plan into a truck load. And the practical layer is the constraints that decide feasibility: available power and where it comes from, how long the setup takes to rig, and whether the room has the ceiling height and the space the diagram assumes.
Ultra fast from brief to board
From a reference frame to a plan the gaffer can rig.
Draw the diagram, pin the reference, list the kit.
01
Open a canvas
Sign up in seconds. No download. Your infinite planning canvas opens straight in the browser.
02
Pin the look you are chasing
Grab a frame from a YouTube or Vimeo reference or drop in a still, so the intent for each setup is a picture rather than a description. This is the single biggest reduction in misunderstanding.
03
Draw the diagram
Sketch the overhead with the pen tool: camera, subject, key, fill, backlight, and practicals, with heights, distances, and modifiers marked. Draw over the recce photo when you have one.
04
List the kit and share it
Attach the fixtures, modifiers, gels, stands, and power each setup needs, then send a view-only link to your gaffer or export as a PDF for the truck.
The diagram, the reference, and the kit list together.
Everything a gaffer needs to rig a setup, attached to that setup.
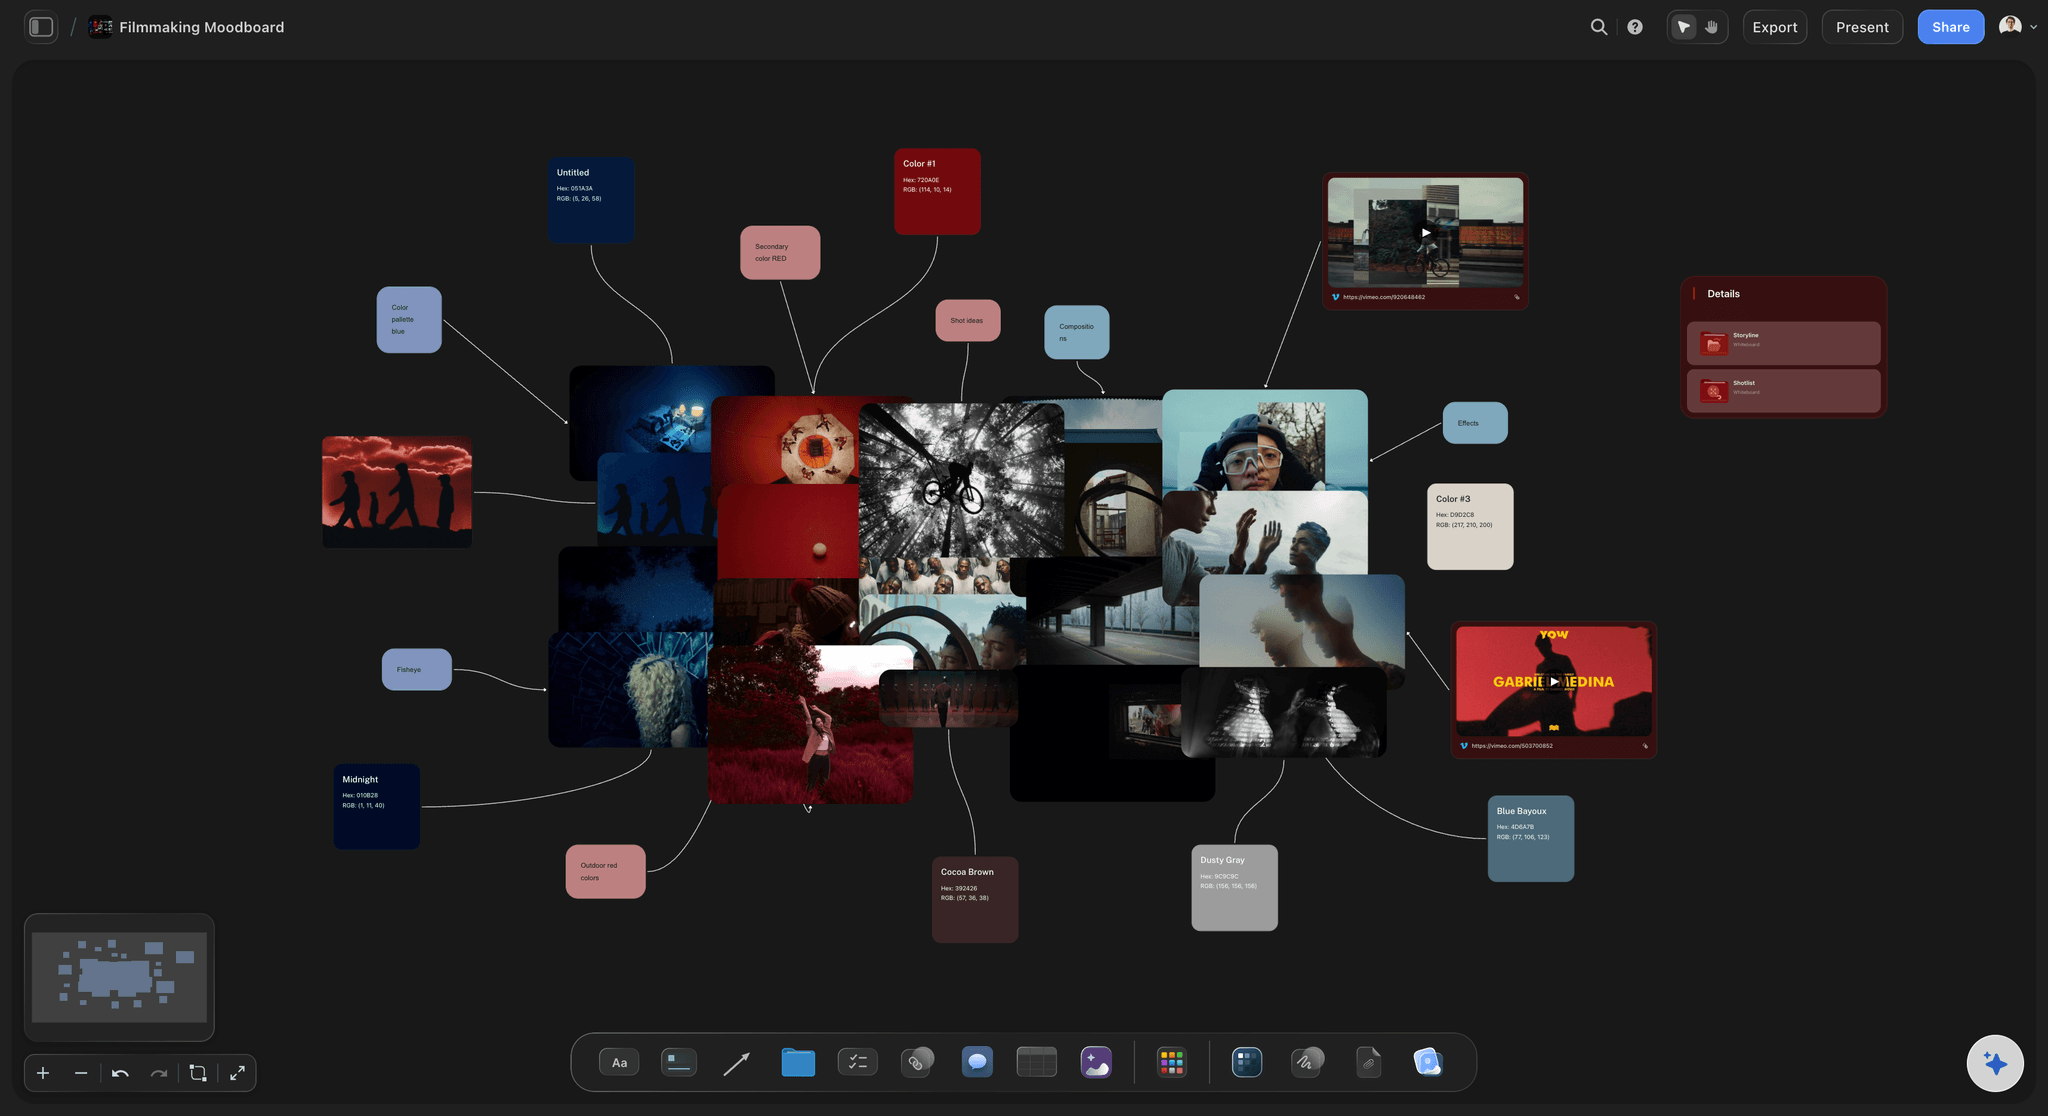
The reference frame pinned beside the diagram
Show the look, do not describe it
Grab the exact frame you are matching from a reference video and put it next to the diagram. Moody and soft mean different things to different people; a frame means one thing.
See the film lookbook →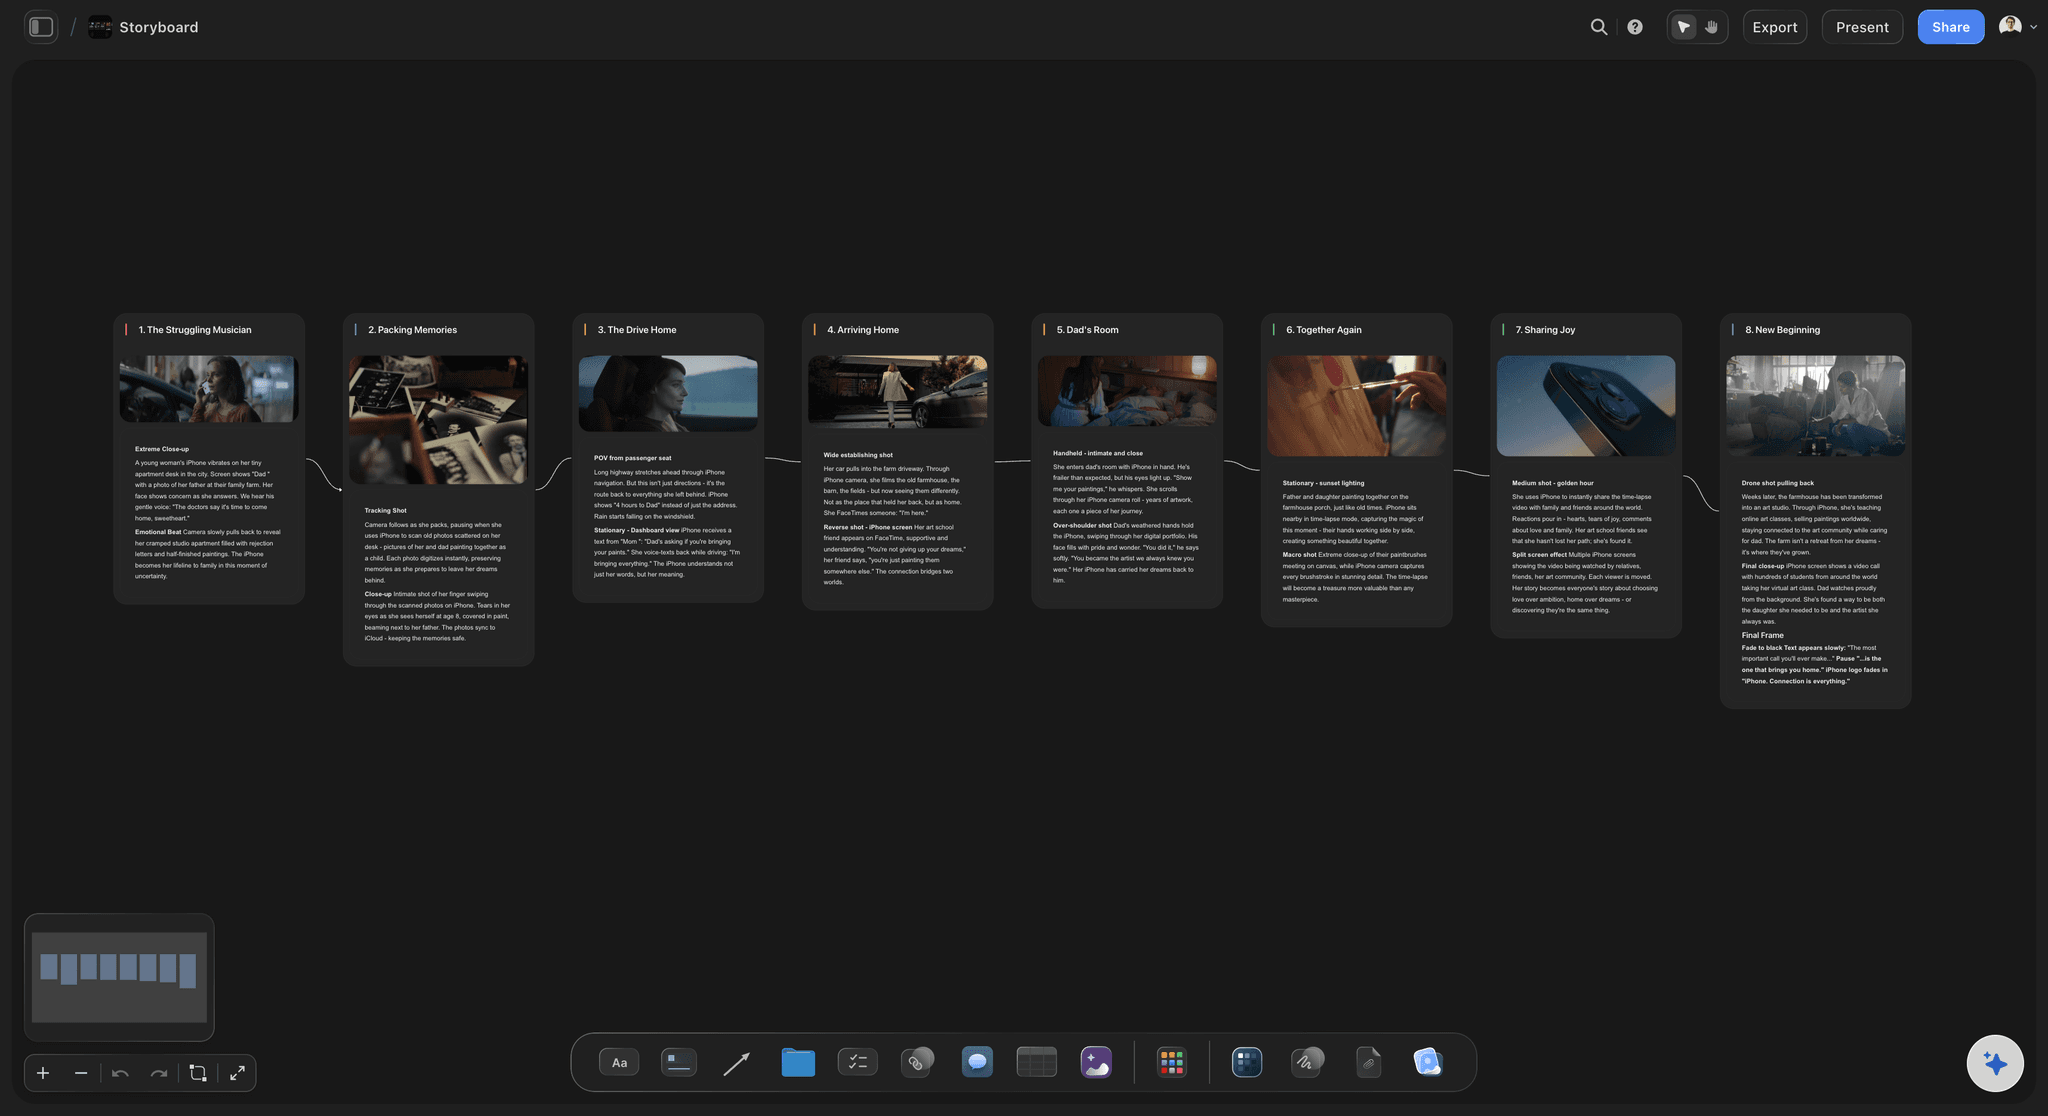
Draw overhead diagrams with the pen tool
Sketch each setup by hand
Draw the camera, subject, key, fill, and backlight with heights and modifiers the way you would on paper. Drop the recce photo underneath so the plan respects the actual ceiling and the actual windows.
See the free infinite canvas →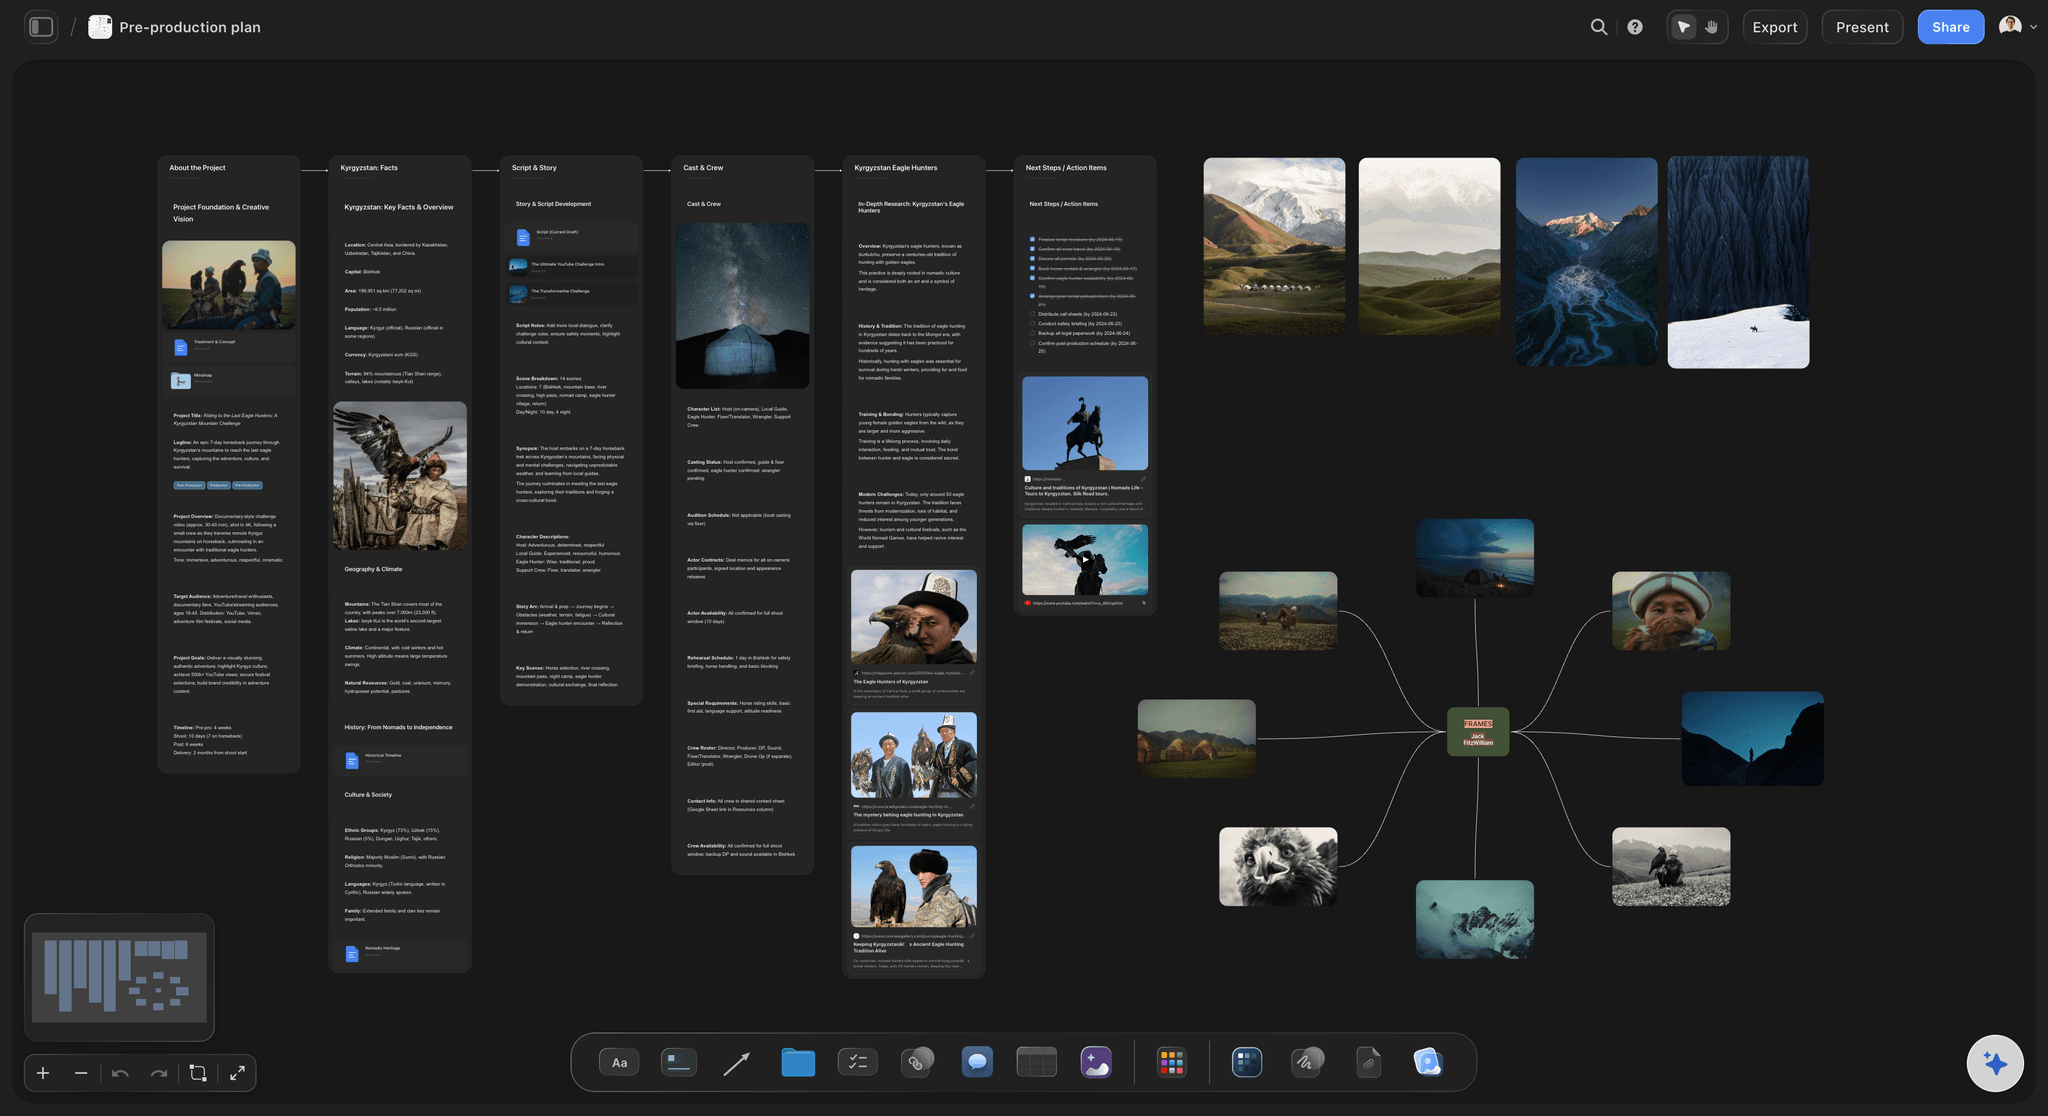
Fixtures, power, and grip listed per setup
Turn the plan into a truck load
Attach the fixture list, modifiers, gels, stands, and power draw to each setup. Listing kit per setup rather than per production is what catches the one light needed for a single shot.
See the equipment list maker →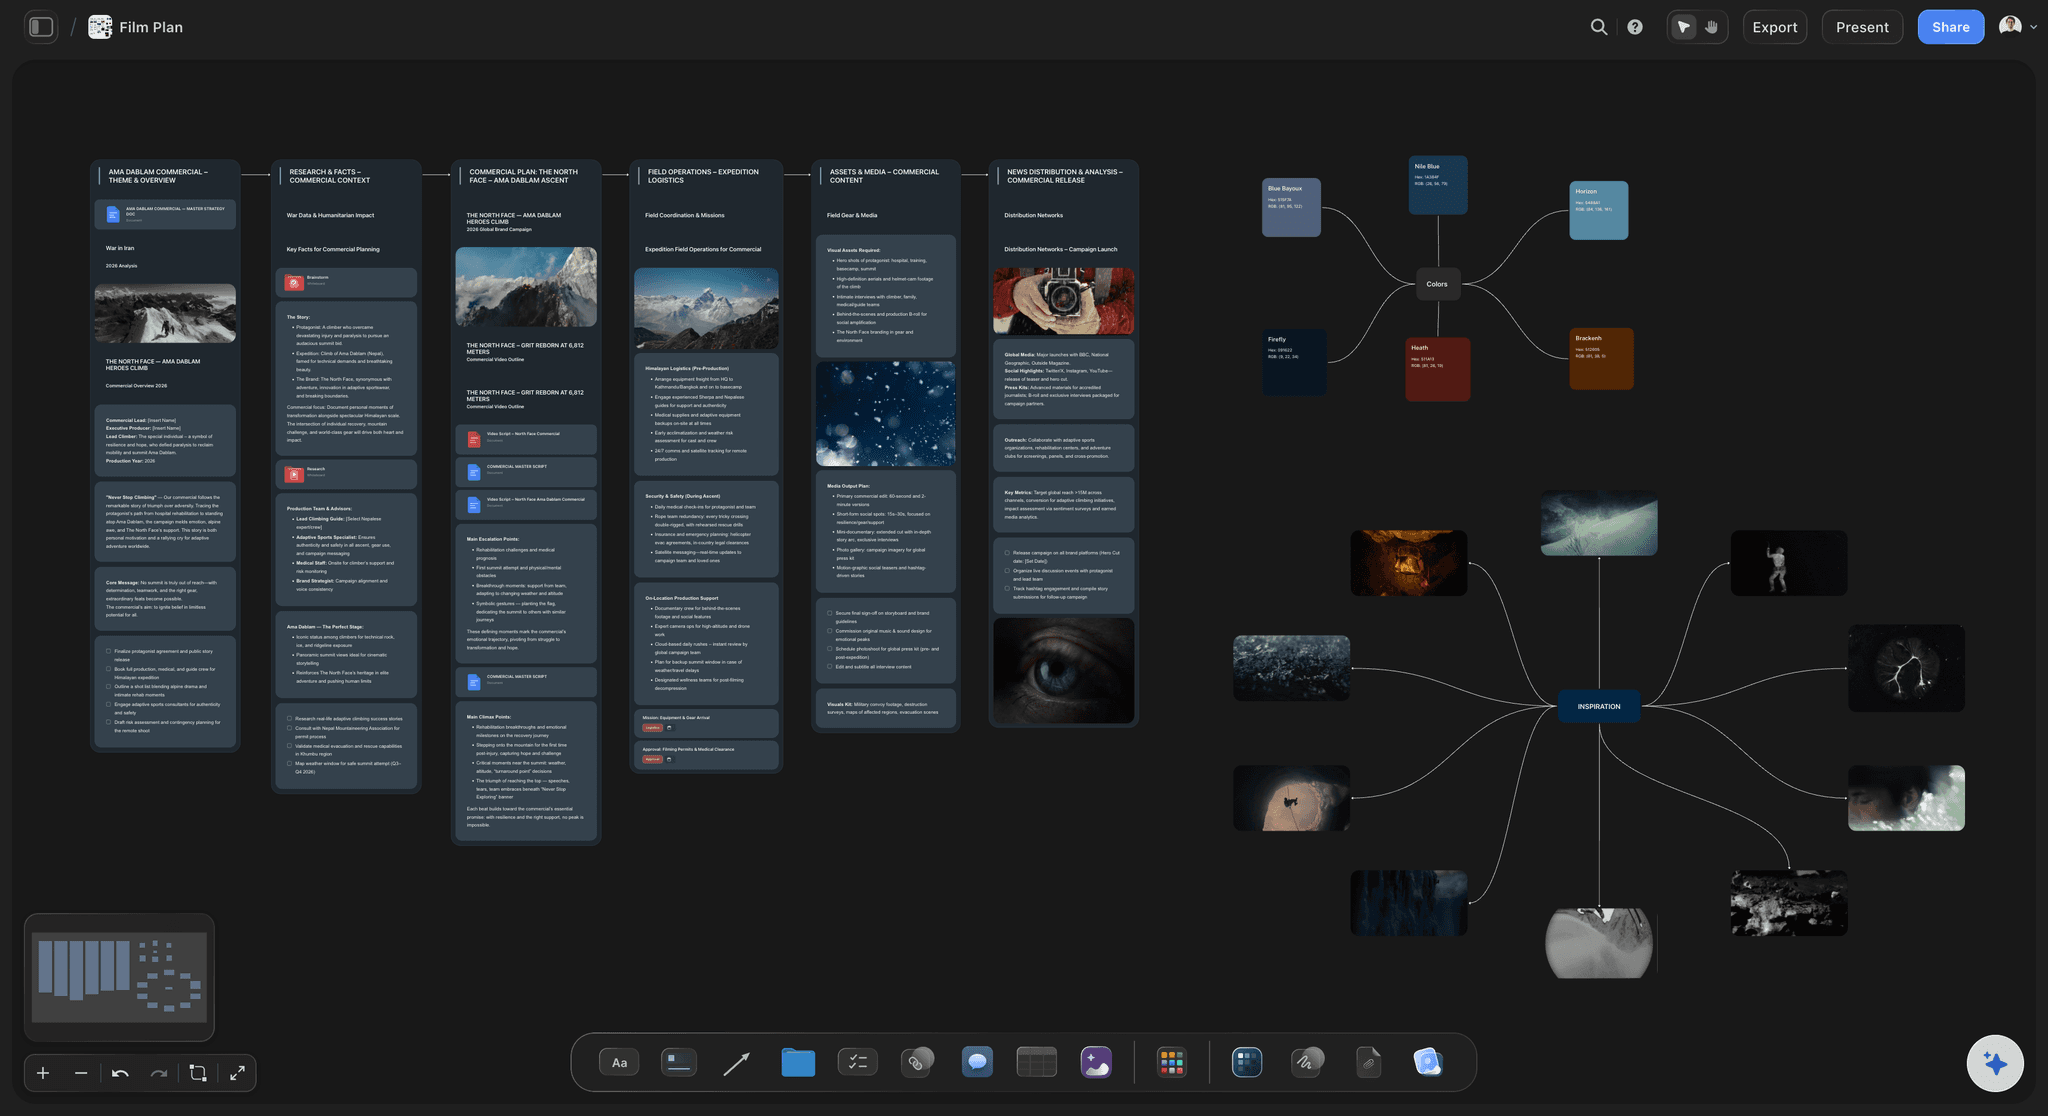
Lighting plans beside blocking and the schedule
See what the light costs you in time
Rig time is the most under-estimated number on a schedule. Keeping the lighting plan next to the blocking and the shoot day makes an ambitious setup visible as an hour rather than as a drawing.
See the scene blocking tool →Unlimited boards. No object cap.
Open a canvas, pin your references, and draw the setups. Storyflow is paid-only during early access, with plans from $9.99 a month, and a Free plan launches before the end of 2026.
Unlimited lighting plans on an infinite canvas
Pen tool for sketching diagrams by hand
Basic AI usage to generate boards from prompts
Share view-only links with your gaffer and crew
Built for people with taste
More than a diagram in a notebook.
A diagram alone does not say what look it produces or what kit it needs. All three belong together.
Intent, diagram, kit, and practical constraints
Build the plan in four layers
Intent: the frame you are matching: Every setup should carry the actual reference image. This is the layer most often skipped and the one that prevents the most disagreement, because a picture is not open to interpretation in the way a description is.
Diagram: positions, heights, modifiers: Key, fill, backlight, and practicals marked with distances, heights, and what is on them. Height is the detail most often omitted and the one that most changes the result.
Kit: what this setup physically needs: Fixtures, stands, modifiers, gels, diffusion, and cable listed per setup rather than per production. Per-setup listing is what catches the specialist fixture needed for two shots.
Practical: power, time, and the room: How much power the setup draws and where it comes from, how long it takes to rig, and whether the ceiling height and floor space actually allow it. A beautiful plan the room cannot accommodate is not a plan.
AI that can see the board you have already built
Structure the plan with AI, light it yourself
Lay out a setup per scene: Describe the shoot and the AI builds a board with a section per setup to fill in. It reads the active canvas as context, so it works with the structure you have already made.
It cannot judge light: The AI cannot tell you whether a ratio will look right, how a fixture behaves at a given distance, or what a room will do to bounced light. That knowledge is craft learned in rooms, and the plan is where you record it rather than derive it.
Draft the kit list from your diagram: Once the setups are drawn, ask it to enumerate the fixtures and grip each implies. It is a reasonable first pass on a tedious task, and you check it against what you actually own.
Frames, photos, plans, and documents on one canvas
Everything the setup refers to
Grab frames from reference films: Pull the exact frame from a YouTube or Vimeo reference onto the board. For lighting in particular this is the difference between a shared understanding and four different ones.
Draw over the recce photo: Drop the location photo underneath your diagram so the plan accounts for the real windows, the real ceiling height, and where the power actually is.
Keep the spec sheets attached: Drop fixture spec PDFs and rental links onto the setup card, so power draw and rental substitutions are answerable without leaving the board.
Share with the gaffer, DP, and rental house
One plan from prep to the truck
View-only links: Send a link and your gaffer sees the diagrams, the references, and the kit list in a browser with no account. A gaffer who has seen the reference frame in prep rigs closer to the intent first time.
Plan together: Invite your DP and gaffer onto the board so the plan reflects what the kit can actually do. Live multi-editor presence with cursors is on the Max plan.
Export for the day: Export as a high-quality image or PDF for the truck or the rental order. Printed diagrams survive a set better than a phone screen in daylight.
Explore templates for your project
Every template opens as a real, editable board on the infinite canvas. Pick the closest fit and make it your own.
Pre-Production
Pull the brief, script, shot list, and moodboard into one pre-production hub so the whole shoot is planned in one place.
One app instead of five
Storyflow vs paper, Set.a.light 3D, and a notes app.
For simulating the actual result, a dedicated 3D tool wins outright. Here is the split.
Storyflow
Recommended
Reference frame pinned beside the diagram
Kit and power listed per setup
Draw over the real recce photo
Simulates the resulting image
Accurate fixture and falloff modelling
Sits beside blocking, shot list, and schedule
Paper
Reference frame pinned beside the diagram
Kit and power listed per setup
Draw over the real recce photo
Simulates the resulting image
Accurate fixture and falloff modelling
Sits beside blocking, shot list, and schedule
Set.a.light 3D
Reference frame pinned beside the diagram
Kit and power listed per setup
Draw over the real recce photo
Simulates the resulting image
Accurate fixture and falloff modelling
Sits beside blocking, shot list, and schedule
Notes app
Reference frame pinned beside the diagram
Kit and power listed per setup
Draw over the real recce photo
Simulates the resulting image
Accurate fixture and falloff modelling
Sits beside blocking, shot list, and schedule
What creators are saying
Join early creators getting structured workspaces and AI that remembers their projects
“Storyflow has sped up my workflow by at least 3x, which means more flow state and more projects I can actually ship. It truly changed the way me and my team create.”

Reilin Joey
Director & YouTuber
“One prompt gets me a structured board. But the tactics are my favorite. I run my YouTube scripts through them and my intros and retention got better. It's amazing.”

Justkay
YouTuber & Freelance Filmmaker
“I used to juggle five apps to plan a project. Now I describe what I am making and get boards, lists, and a schedule. All in one place.”

George
@fernwehchronicles
Lighting plan questions, answered.
How to build one, what to include, and where a simulation tool beats a diagram.
Work in four layers per setup. Start with intent: pin the actual reference frame you are trying to match, because a picture removes the ambiguity that words like moody or soft always carry. Then draw the diagram as an overhead, marking the camera, the subject, and each fixture with its position, height, distance, and modifier. Height is the detail most often left out and the one that most changes the result. Then list the kit that setup needs, meaning fixtures, stands, modifiers, gels, diffusion, and cable, keeping the list per setup rather than per production so specialist items are not lost. Finally record the practical constraints: power draw and where it comes from, expected rig time, and whether the room's ceiling height and floor space actually allow what you have drawn.
It depends on whether you need to predict the result or communicate the intent. Tools like Set.a.light 3D actually simulate the image, modelling fixtures, falloff, and shadows, which is genuinely valuable for studio and product work where you want to solve the look before you touch a light. Storyflow does not do that and does not pretend to. What it does is faster and more shareable: a hand-drawn diagram with the reference frame pinned next to it and the kit list attached, sitting beside your blocking, shot list, and schedule. If your problem is predicting light, use a simulator. If your problem is that the gaffer rigged something different from what you pictured, use a board with the picture on it.
Not during early access. Storyflow is paid-only right now, with plans starting at $9.99 a month, and a Free plan launches before the end of 2026. Anyone a paid member invites to a board joins free today, so your gaffer can view the plans without paying. If you want a free option this minute, a notebook and a pencil have produced most of the lighting plans in the history of cinema, and photographing the page to send it works well enough.
At minimum the camera position, the subject, and every source with its position marked. What separates a useful diagram from a decorative one is the detail: the height of each fixture, its approximate distance from the subject, what modifier is on it, and any gel. Also mark the practicals in shot and any available light you are working with or against, since those are part of the picture whether you planned them or not. If the setup depends on something being blocked, such as a window negative-filled or a wall flagged off, draw that too, because it is invisible in the result and expensive to rediscover.
Because lighting is the slowest thing on a set to change. Reblocking a scene costs minutes; relighting it costs an hour once you account for moving stands, re-running cable, and re-balancing everything else. That asymmetry means advance decisions pay off more here than almost anywhere else on a shoot. The other reason is procurement: a look you invent on the day can only use the fixtures already on the truck, whereas a look planned in prep can shape the rental order. Discovering at nine in the morning that the plan needs a fixture nobody brought is the specific failure a plan exists to prevent.
Yes. There is a pen tool for sketching directly on the canvas, so you can draw overheads by hand the way you would on paper. The useful addition over paper is that you can drop the location recce photo or a floor plan underneath and draw over it, so the plan respects the real windows and the real ceiling, and you can pin the reference frame beside the diagram so intent and execution are in one view.
No. Storyflow does not model fixtures, falloff, shadows, or exposure, and it cannot render a preview of your setup. If simulating the resulting image is what you need, a dedicated 3D lighting tool is the right choice and worth the learning curve. Storyflow's role is communication and organisation: making the intent unambiguous with a reference frame, the diagram shareable, and the kit list derivable, all sitting next to the rest of the shoot plan.
Yes, and doing it this way round is what makes the list accurate. List the fixtures, modifiers, stands, gels, and cable each setup needs on that setup's card, then collate across setups for the rental order. Building the kit list per setup rather than as one production-wide list is what catches the specialist fixture required for a single shot, which is exactly the item that gets forgotten when the list is written from memory at the end of prep.
Yes. Share a view-only link and your gaffer opens the diagrams, references, and kit lists in a browser with no account. This is the highest-value share on the whole board, because a gaffer who has seen the reference frame during prep rigs much closer to the intent on the first attempt, which saves the expensive part of the day. If you want them to contribute, invite them so the plan reflects what the kit can actually do.
Yes, and the three genuinely belong together. Blocking determines where the light has to come from, the lighting plan determines how long the setup takes to rig, and the schedule is where that time has to fit. Keeping all three on one canvas is how you notice that the day with the most ambitious lighting is also the day with the company move, which is the kind of collision that otherwise gets found at about four in the afternoon.
Decide the light while changing it is still free.
Open a canvas, pin your reference, and draw the setups. No download.