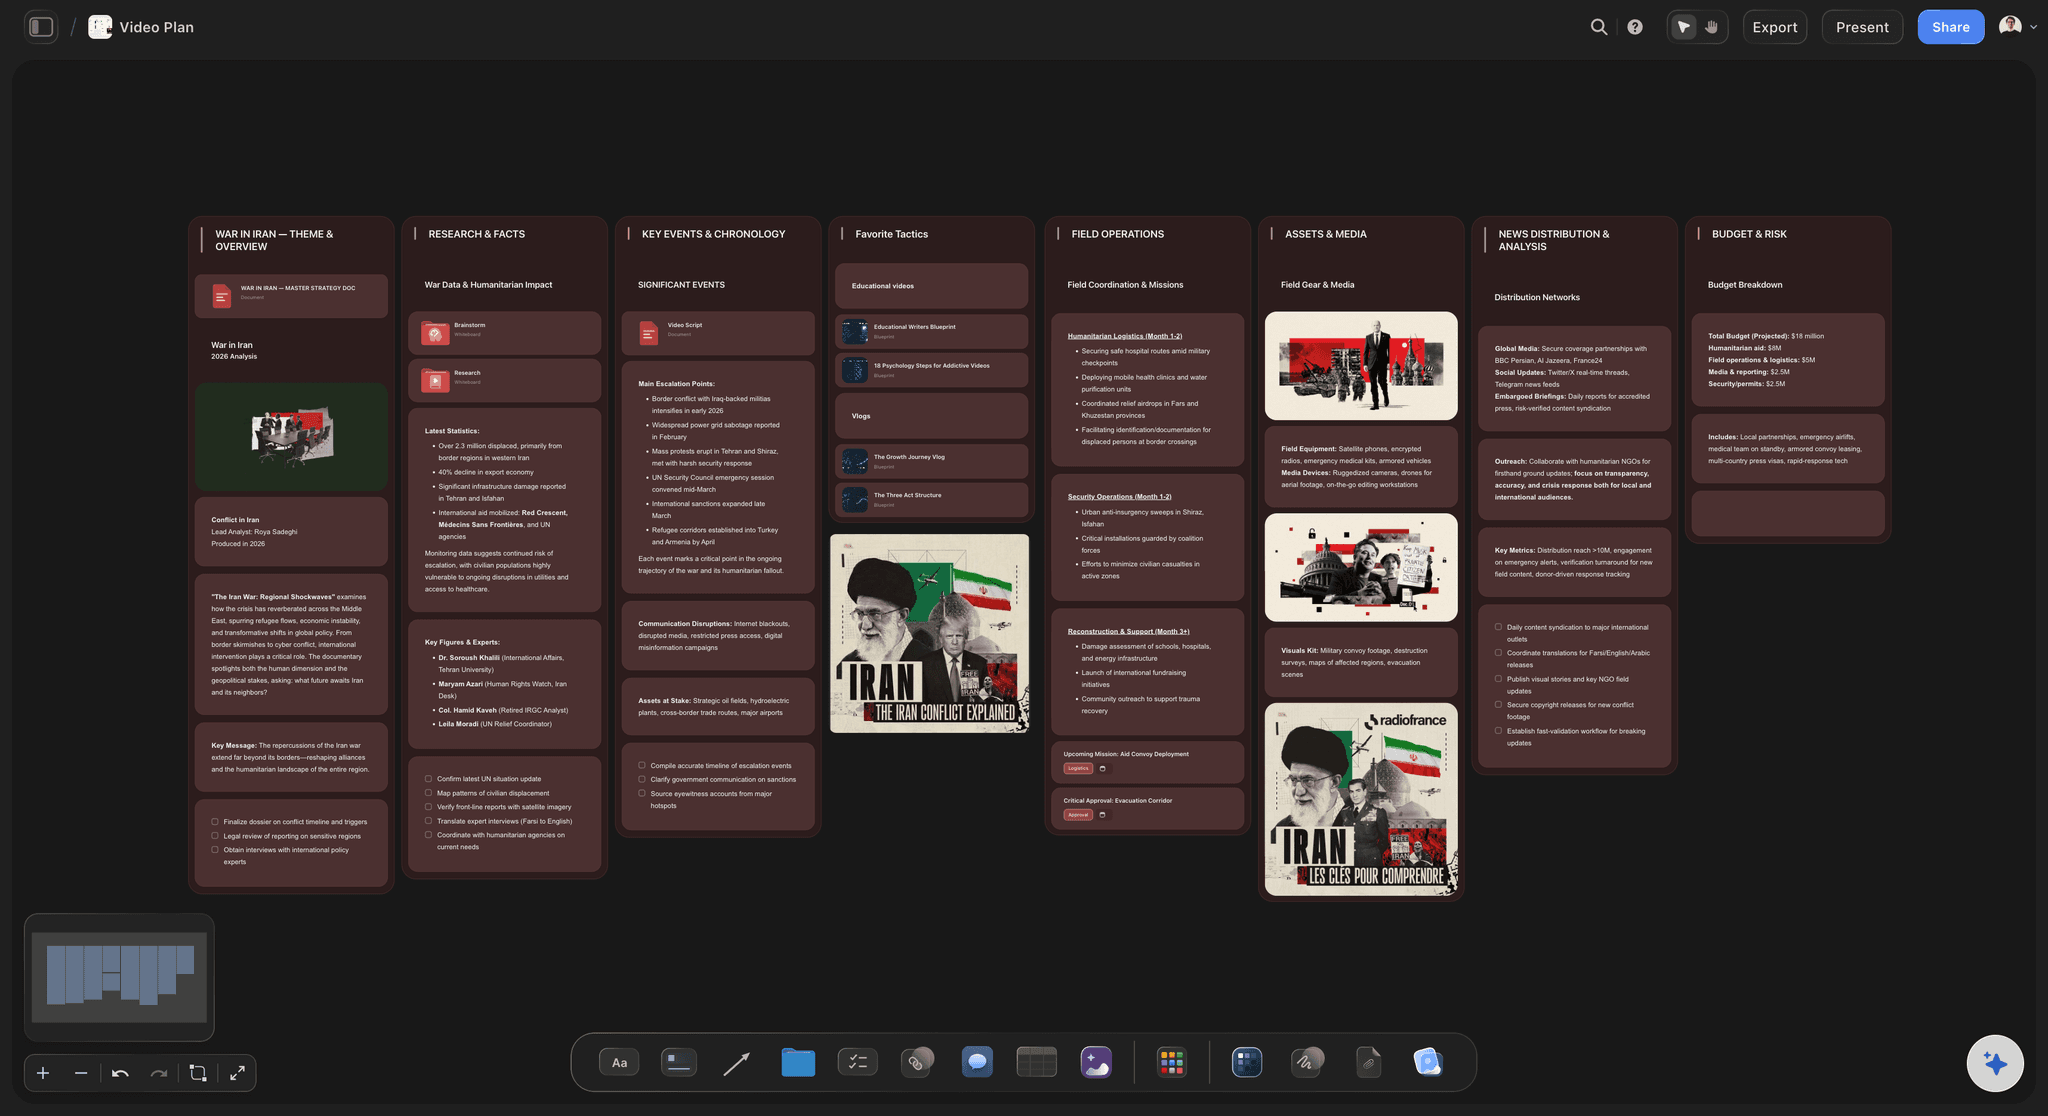
HOW TO MAKE A STORYBOARD
How to make a storyboard,
minus the busywork.
Five steps take any idea from script to shareable board: write it, break it into scenes, lay out frames, add notes, export. Storyflow's AI handles the layout, so the whole process takes minutes. Free forever, no credit card.
Free plan
No credit card
No drawing skills needed

How do you make a storyboard?
Make a storyboard by writing or pasting your idea, breaking it into scenes, laying out a frame per key moment, adding action and dialogue notes, then exporting or sharing. Storyflow's AI handles the layout on an infinite canvas in minutes. Boords suits numbered panels, and Storyboarder is a free app for hand-drawn frames.
Used by creative professionals at:
Artlist
Pixar
Nike
Red Bull
The North Face
Porsche
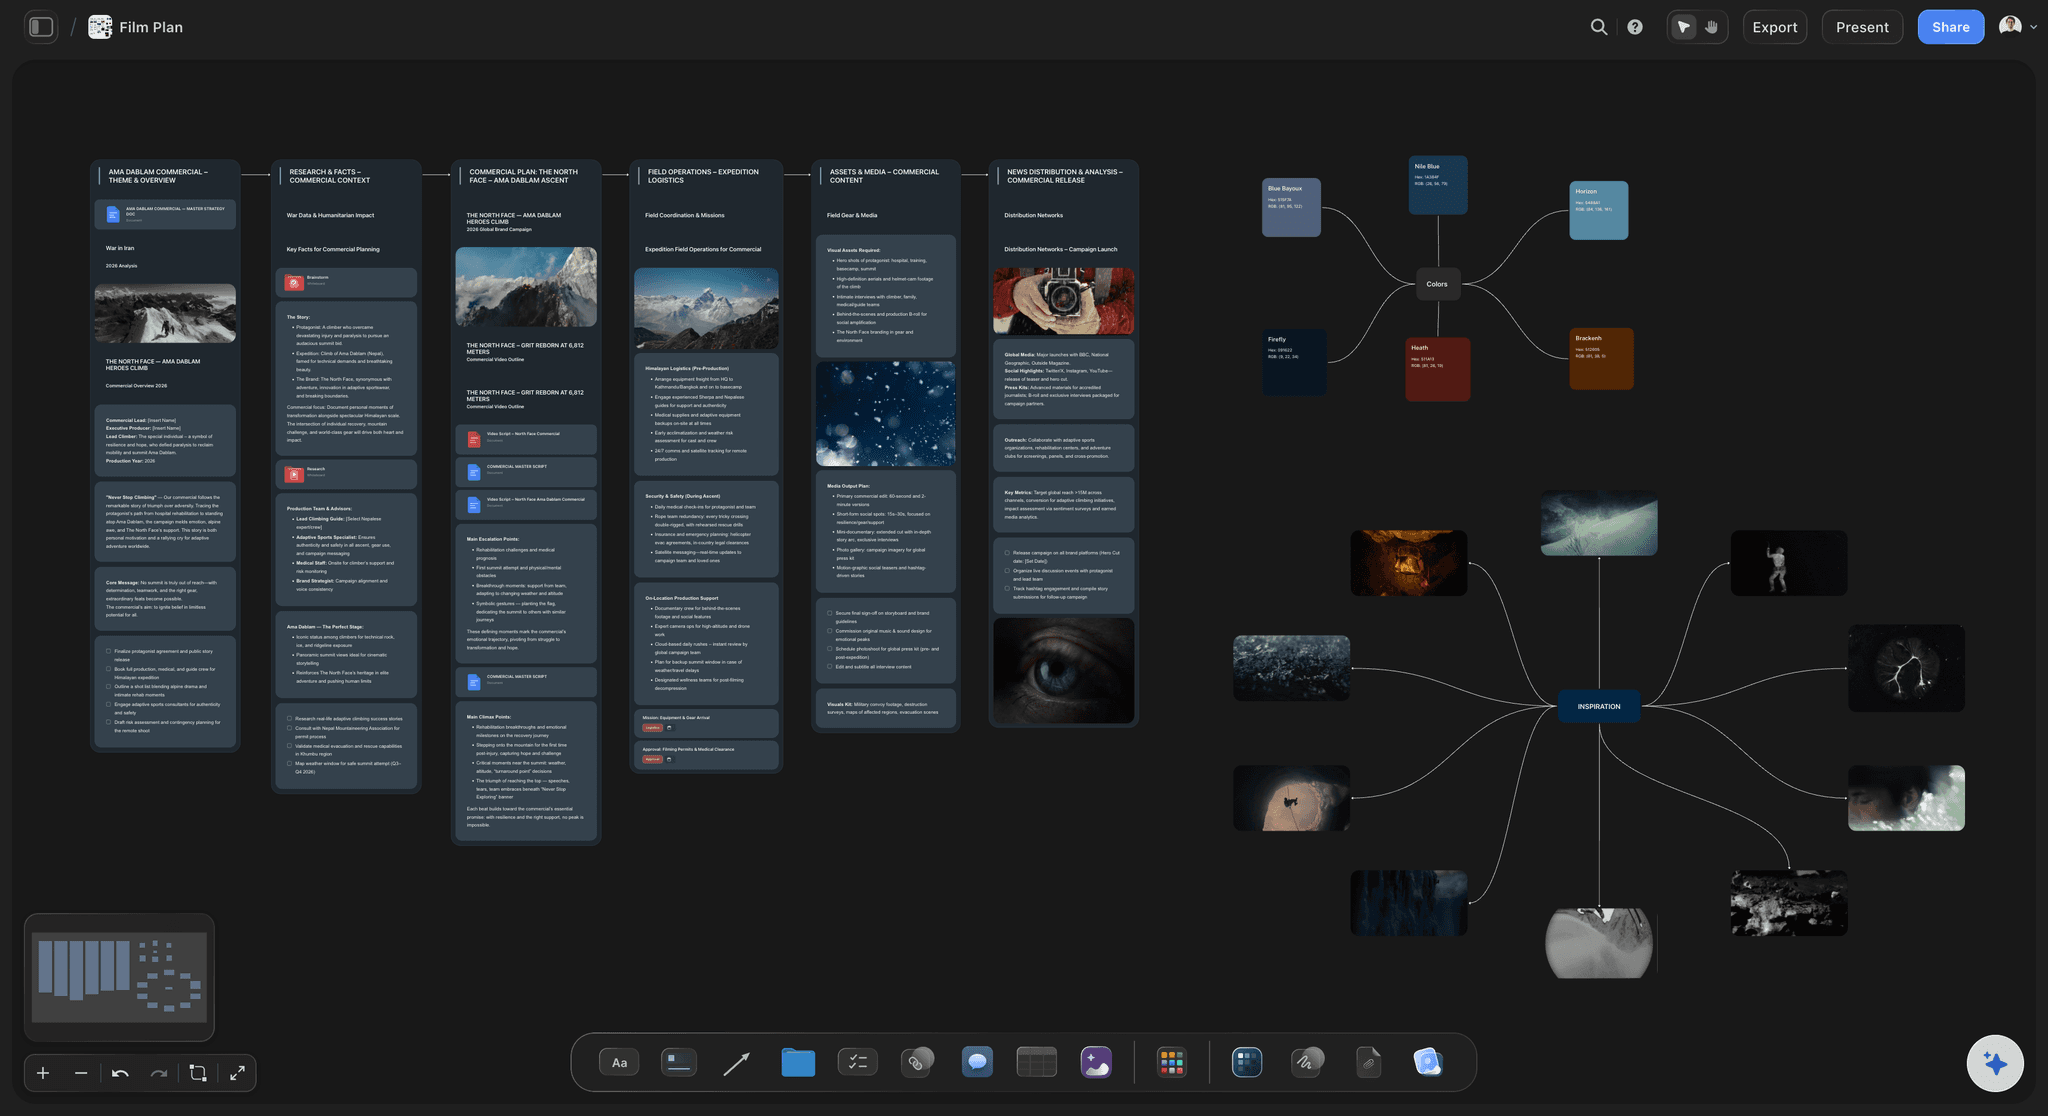
Start from a ready-made template
Pick a board to see what you can build, then let AI fill it in. Every template is a real, editable starting point on the same infinite canvas.
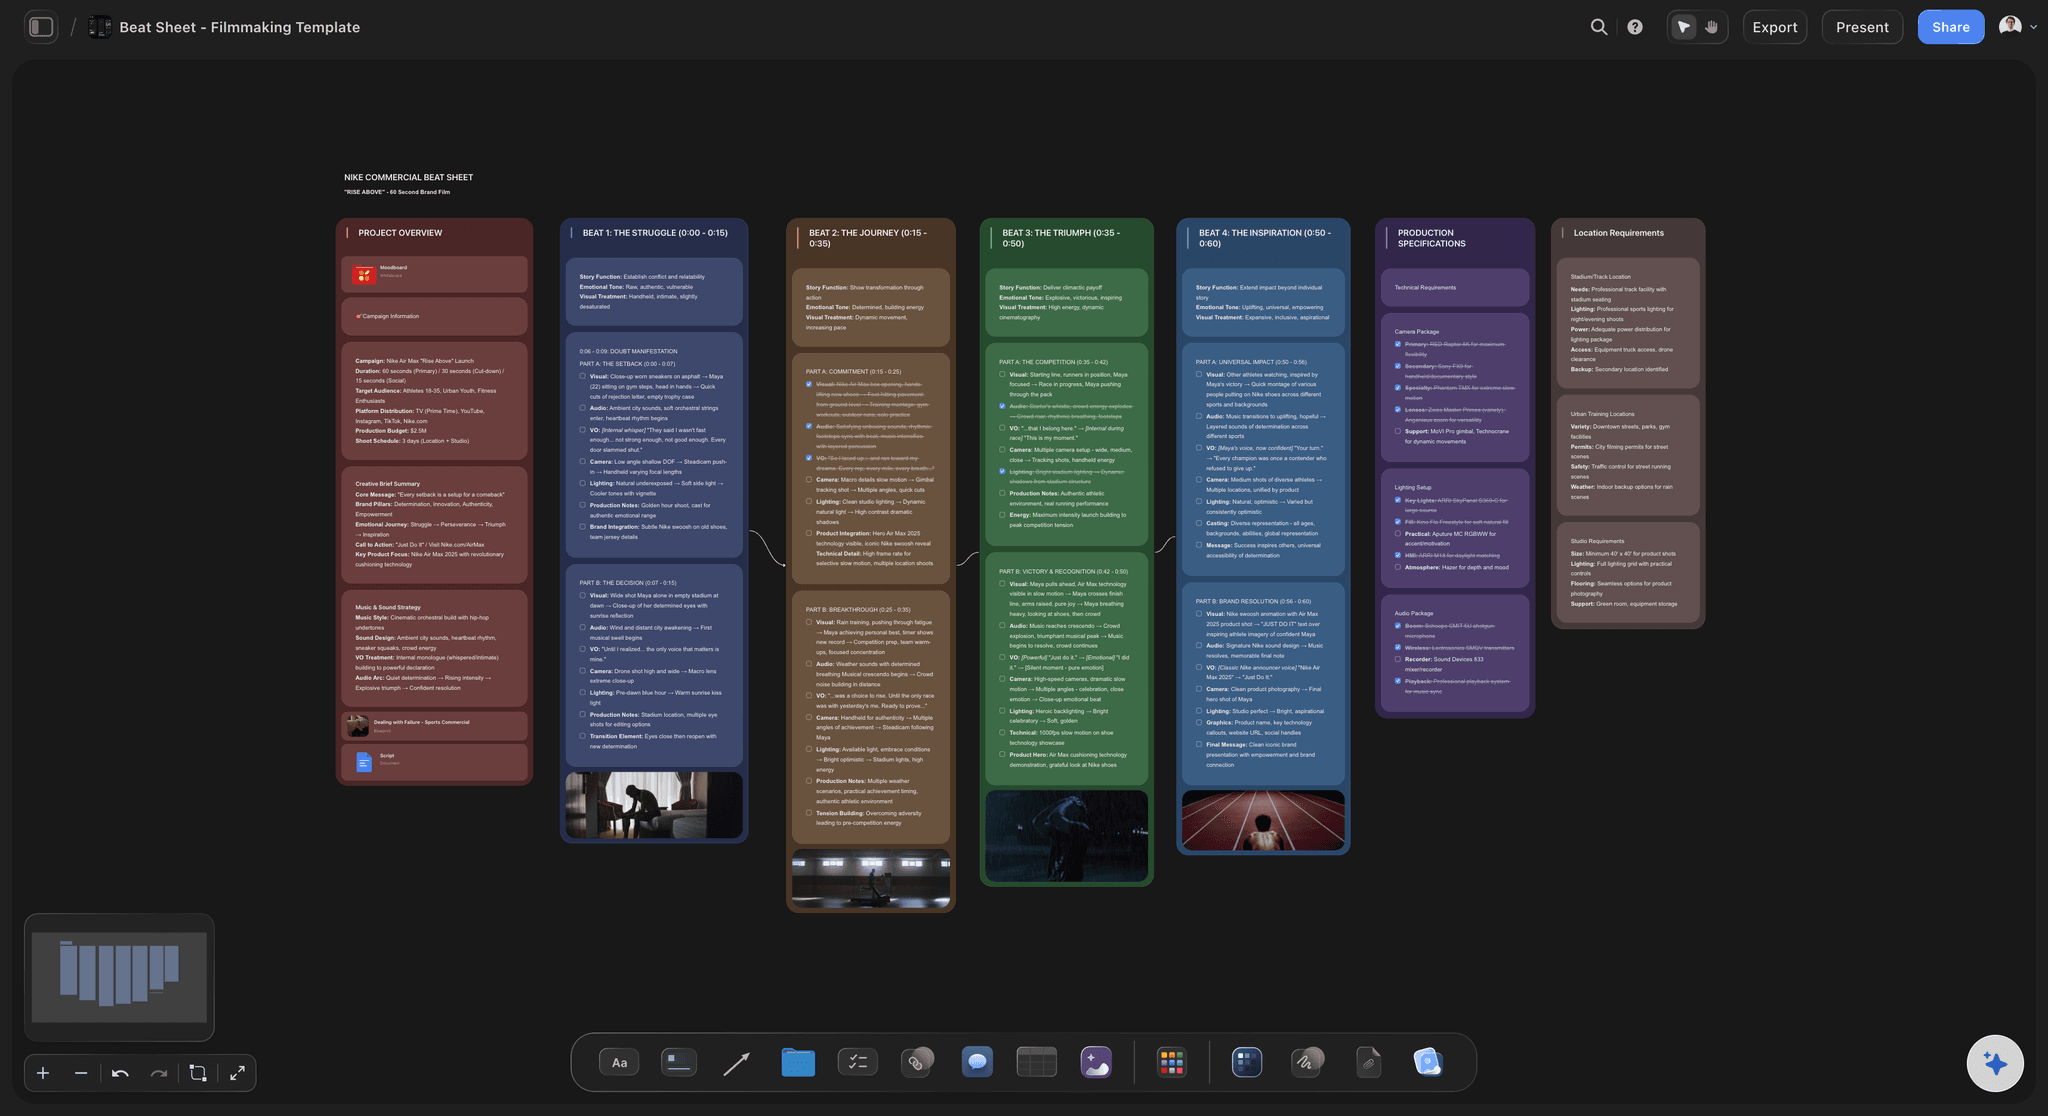
Storyboard
Lay out your shots frame by frame with images and notes, then reorder them until the sequence reads like the finished cut.
How to make a storyboard, explained.
To make a storyboard, write or paste your idea or script, break it into scenes, then lay out one frame for each key moment. Add notes for action, dialogue, and camera under every frame, and finish by sharing the board or exporting it as an image or PDF. That is how to make a storyboard, whether you are boarding a film, a YouTube video, or an ad.
The reason most people never learn how to make a storyboard is the middle part. Splitting a story into scenes and building frames one by one takes hours on paper and not much less in a slide deck. Storyflow compresses it: describe the story or paste a script, and the AI lays out the storyboard for you, with scenes, structure, and notes arranged on an infinite canvas.
From there, learning how to create a storyboard becomes learning how to refine one. Drag frames into a new order, sketch over key moments with the pen tool, pin reference images and video next to scenes, and re-prompt the AI until the board matches the film in your head.
STEP BY STEP
How to make a storyboard in five steps.
The same five steps professionals use, with the slow parts handled by AI on a free canvas.
01
Write or paste your idea
Open a free canvas in the browser, no credit card needed. Type a description of your story, paste your script, or drop it on the canvas as a PDF.
02
Break it into scenes
Decide where the story turns. In Storyflow the AI does this pass for you, splitting the script into scenes and suggesting a structure or framework.
03
Lay out the frames
Give every key moment its own frame in story order. The AI arranges the board on the canvas, and you drag frames around until the flow reads right.
04
Add notes and references
Under each frame, note the action, dialogue, and camera. Pin reference images, grab stills from YouTube or Vimeo, and sketch over frames with the pen tool.
05
Share and export
Send a view-only link so anyone can review the board in the browser, or export the finished storyboard as an image or PDF for the shoot.
Tools that make a storyboard faster to make.
Each step of the process has a shortcut built into the canvas.
Step one and two, automated
Let AI do the scene breakdown
The hardest part of making a storyboard is turning a script into scenes. Prompt the AI and it lays out the whole board with structure and notes.
See the AI storyboard generator →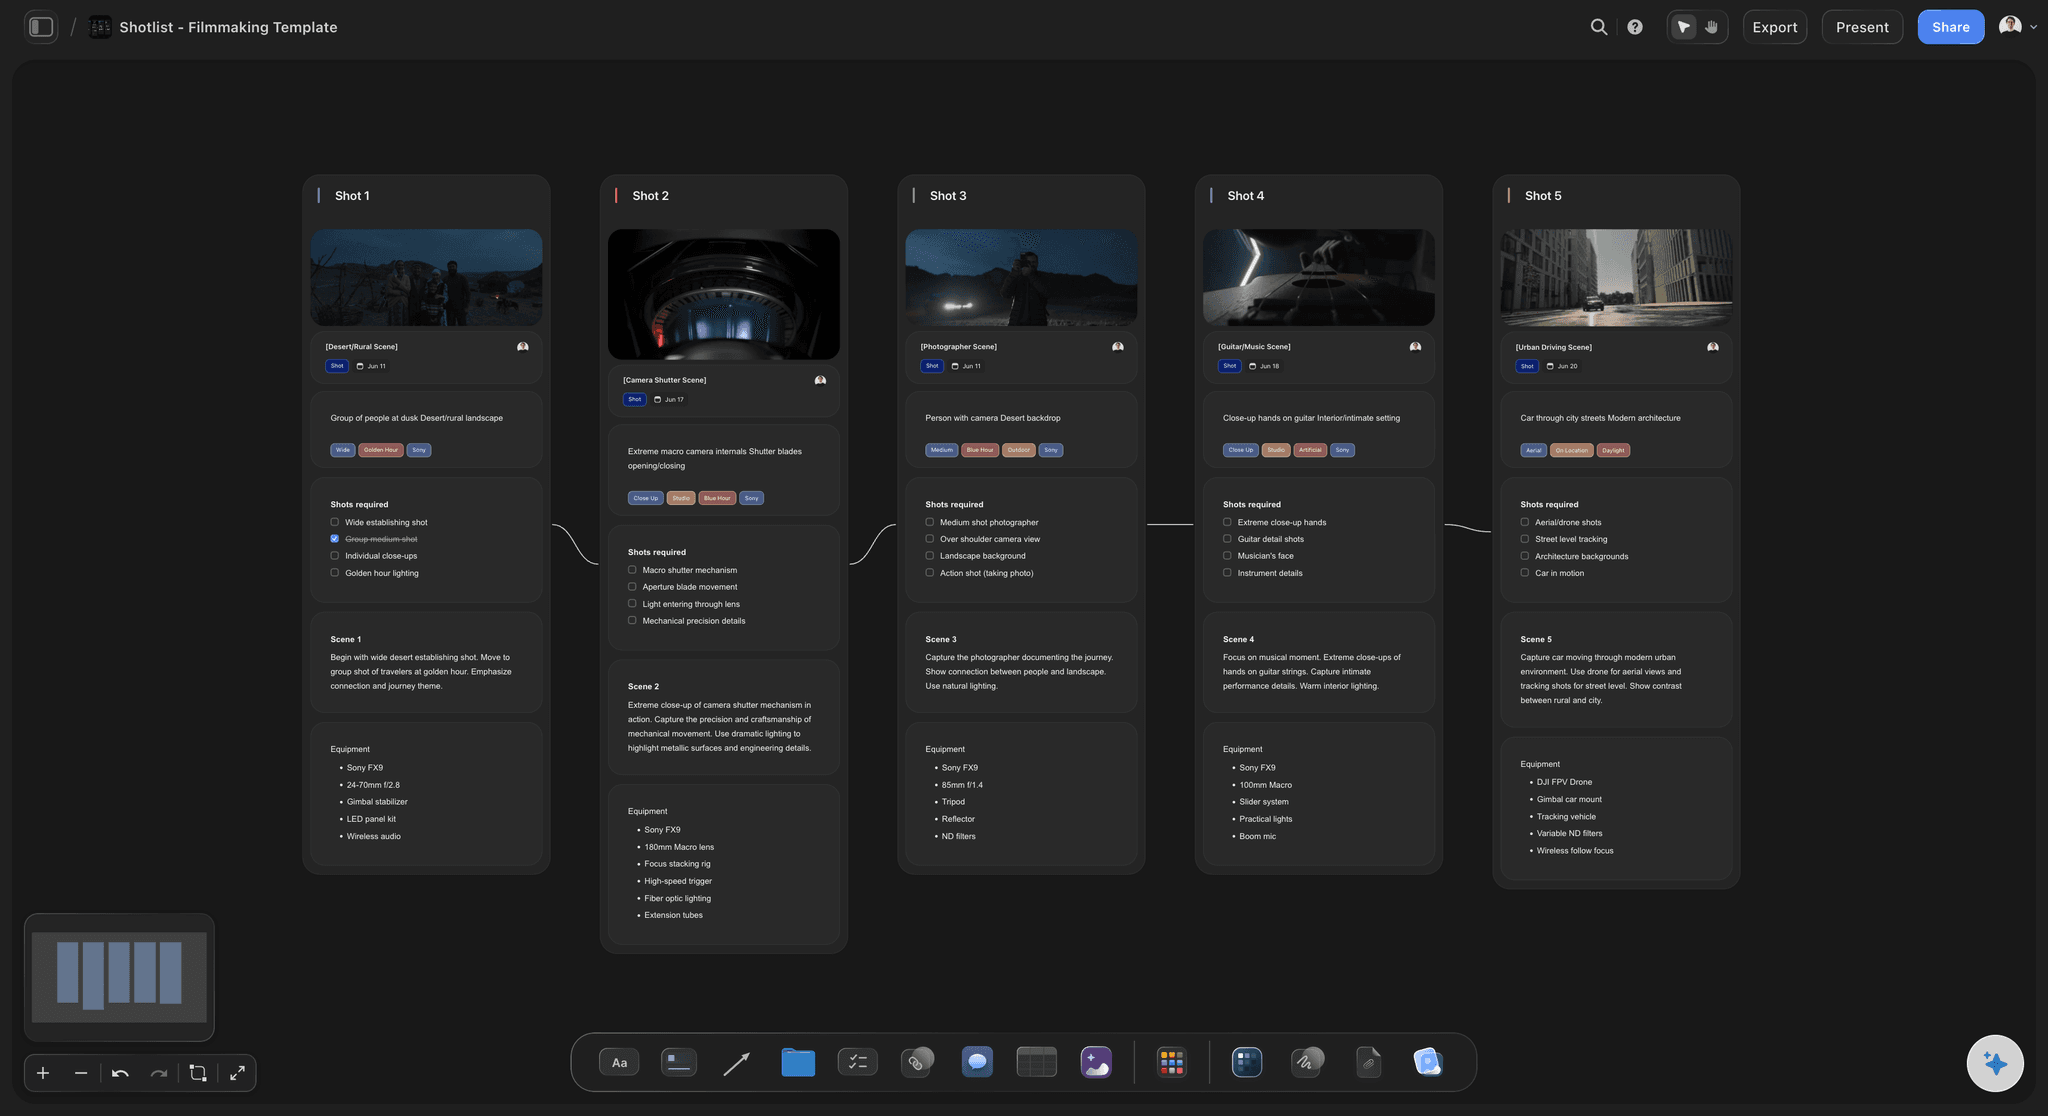
From frames to camera plan
Turn the board into a shot list
Once the frames are set, break them into shots on the same canvas: sizes, angles, and movement next to the scenes they cover.
Try the AI shot list generator →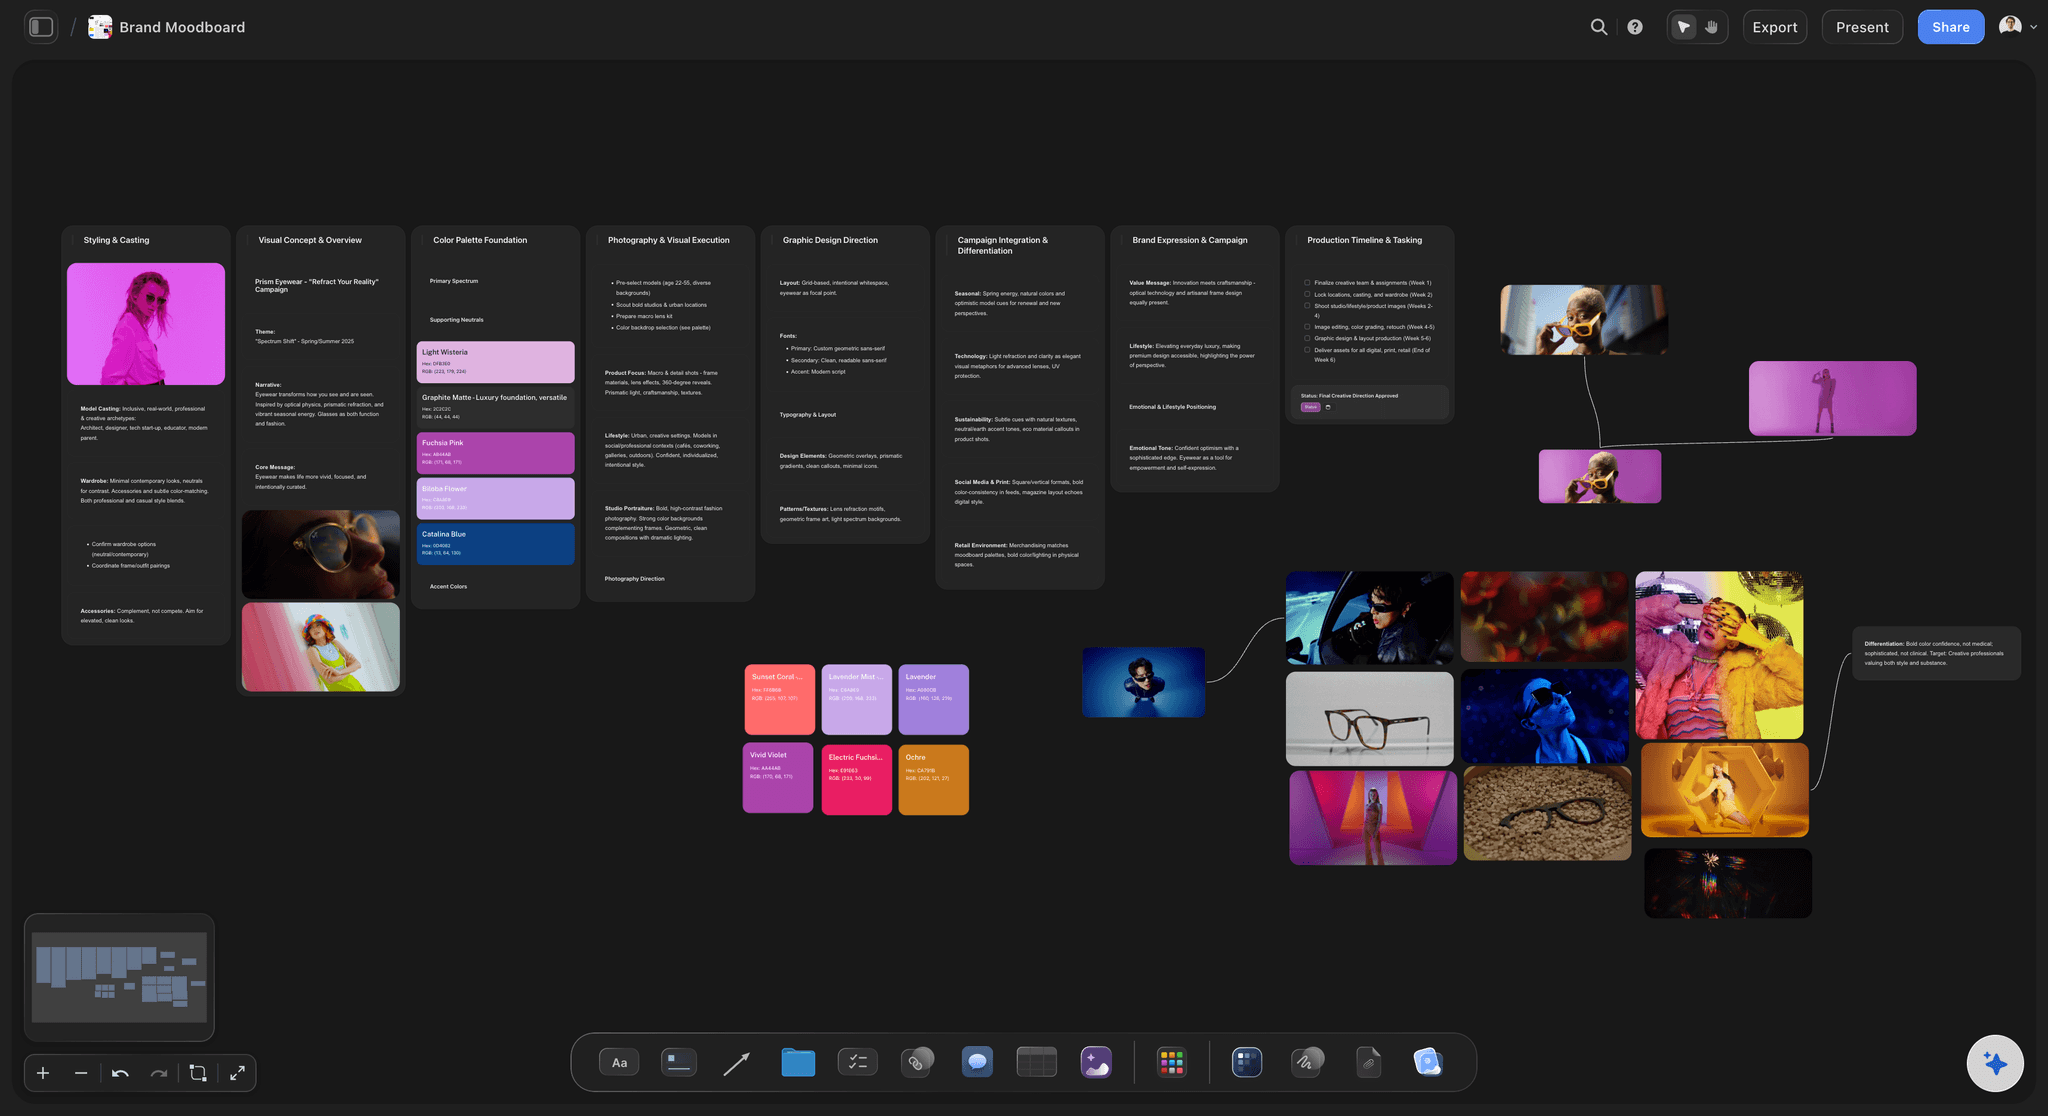
References do the drawing for you
Make a storyboard without drawing
Grab frames from YouTube or Vimeo references, drop in images, and write what the camera sees. A readable board does not require sketches.
Try the free storyboard maker →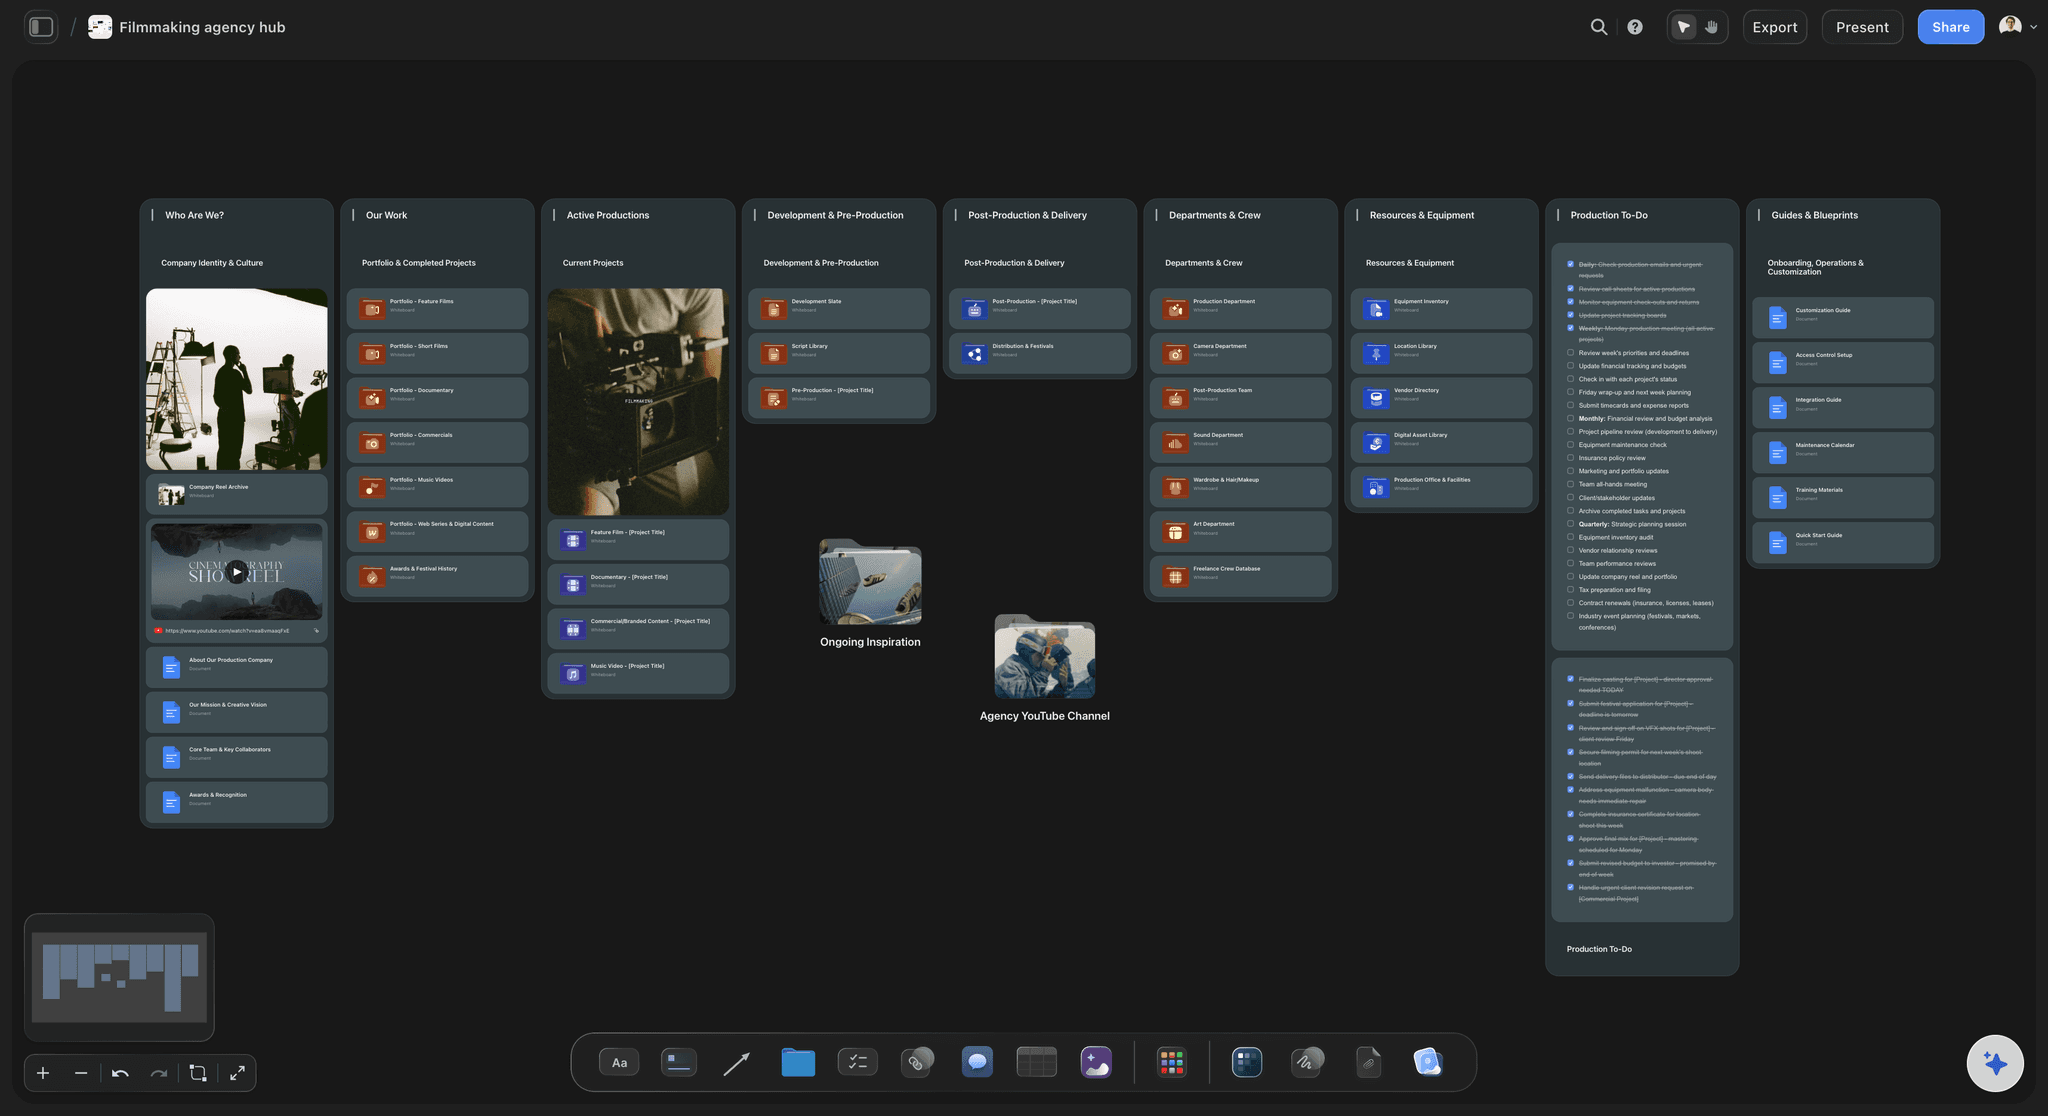
Step five, handled
Share the board, get sign-off
Send view-only links to clients, teachers, or crew, then export a clean image or PDF when the storyboard is approved.
See script to storyboard →Learn on a plan that stays free.
Make your first storyboard today and your hundredth next year, on the same free plan. No credit card, no time limit.
Practice on as many storyboards, boards, and projects as you need
Basic AI usage for scene breakdowns and layout
3 starter frameworks to structure your story
Show your work: free collaborator invites and view-only links
DO IT WELL
What separates a useful storyboard from a pretty one.
Making a storyboard is easy. Making one your shoot can actually follow takes a few habits.
One frame per key action or camera change
Frame the moments that matter
Key actions get frames: Every entrance, reveal, and reaction the audience must see deserves its own frame.
Camera changes get frames: New angle, new size, or a move? Add a frame, so the editor and DP can read the coverage at a glance.
Skip the filler: Frames that repeat the previous one slow the board down. Cut anything that does not change the picture.
Notes carry the information drawings cannot
Write the frame, not just the picture
Action and dialogue: A line under each frame describing what happens and what is said keeps the board readable without the script.
Camera direction: Note the shot size, angle, and movement so the storyboard doubles as a coverage plan.
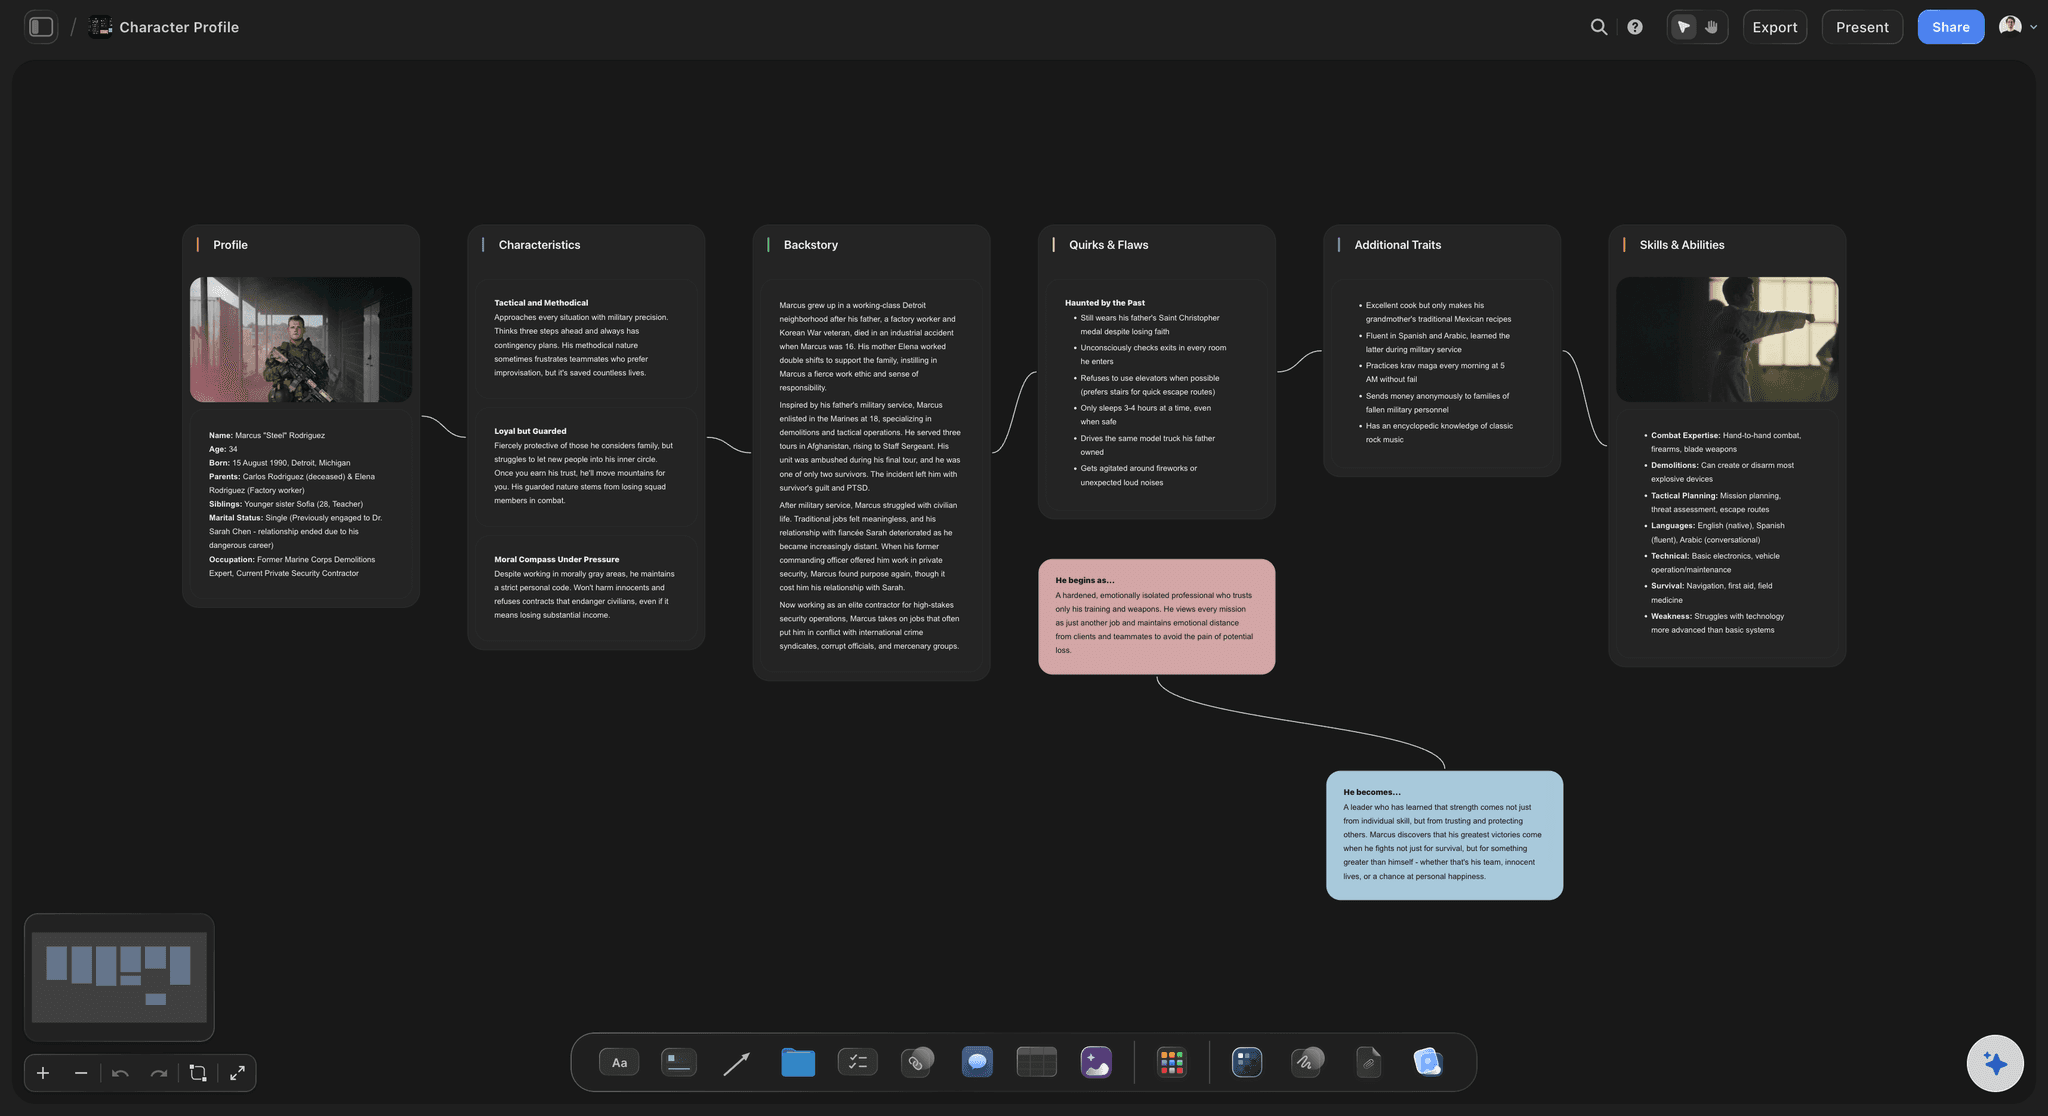
Characters and continuity: Keep character profiles and props on the same canvas so details stay consistent across scenes.

References beat blank imagination
Surround the board with the look
Moodboard beside the frames: Tone, color, and lighting references sit next to the storyboard instead of in a separate file.
Frame grabs from real films: Capture stills from YouTube or Vimeo straight onto the canvas to show exactly the shot you mean.
Drag in anything: Images, video, GIFs, PDFs, and links all live on the board, so the visual language stays with the plan.
A storyboard is a team document
Make it once, show it everywhere
View-only review links: Clients and collaborators open the board in a browser and see the latest version, no account needed.
Bring the crew in: Bring editors, DPs, and producers onto the project on the free plan so feedback lands on the board itself.
Export as image or PDF: Print the board for set or drop it into a deck. Export as a high-quality image or PDF anytime.
Explore templates for your project
Every template opens as a real, editable board on the infinite canvas. Pick the closest fit and make it your own.
Storyboard
Lay out your shots frame by frame with images and notes, then reorder them until the sequence reads like the finished cut.
What creators are saying
Join early creators getting structured workspaces and AI that remembers their projects
“Storyflow has sped up my workflow by at least 3x, which means more flow state and more projects I can actually ship. It truly changed the way me and my team create.”

Reilin Joey
Director & YouTuber
“One prompt gets me a structured board. But the tactics are my favorite. I run my YouTube scripts through them and my intros and retention got better. It's amazing.”

Justkay
YouTuber & Freelance Filmmaker
“I used to juggle five apps to plan a project. Now I describe what I am making and get boards, lists, and a schedule. All in one place.”

George
@fernwehchronicles
How to make a storyboard, answered.
The questions people ask when they make their first board.
Write or paste your idea or script, break it into scenes, lay out one frame per key moment, add notes for action and camera, then share or export the board. In Storyflow the AI does the breakdown and layout from a single prompt, so you start refining a full board within minutes instead of building it frame by frame.
You know the five steps. Skip four of them.
Paste your idea, let the AI lay out the board, and spend your time directing instead of formatting. Free plan, no credit card.