Moodboards That Drive Projects Forward: Complete Guide (2025)
Learn to create strategic moodboards that move projects forward, not just pretty pictures. Complete guide covering visual thinking science, step-by-step processes, and niche-specific techniques for filmmakers, designers, marketers, and writers.

Category
Moodboards
Author

Sara de Klein
Head of Product at Storyflow
Topics
December 8, 2025
•
22 min read
•
MoodboardsTemplates to check out for this topic


How do you create moodboards that drive projects forward?
Strategic moodboards have 5 elements: a clear objective, organized categories (color, texture, tone), annotations explaining why each image is there, connections linking inspiration to execution documents, and evolution as the project develops. Tools like Storyflow connect the moodboard directly to the execution plan.
Moodboards are one of the strongest creative tools - when used correctly. But most people treat them as digital scrapbooks: pretty pictures with no strategic direction. This guide will show you how to create moodboards that don't just inspire, but actually drive your projects forward, accelerate decisions, and align teams around a shared vision.
Whether you're a filmmaker crafting the visual language of your next project, a designer defining a brand identity, a marketer developing campaign aesthetics, or a writer building world atmosphere - you'll learn proven techniques to transform visual inspiration into actionable project momentum.
Table of Contents
Why Most Moodboards Fail to Drive Projects Forward
The Science Behind Visual Thinking and Decision-Making
What Makes a Moodboard Strategic (Not Just Pretty)
How to Create Effective Moodboards: Step-by-Step Process
For Filmmakers: Visual Language and Cinematic Moodboards
For Designers: Brand Identity and Design System Moodboards
For Marketers: Campaign Aesthetics and Audience Resonance
For Writers: World-Building and Atmospheric Moodboards
Using Storyflow's Moodboard Tools
AI-Assisted Moodboarding Techniques
Advanced Moodboarding Strategies
Frequently Asked Questions
Why Most Moodboards Fail to Drive Projects Forward
Walk into any creative meeting and you'll see the same problem: beautiful moodboards that inspire everyone for five minutes, then gather digital dust in a forgotten folder. The issue isn't with moodboards themselves - it's how we create and use them.
The Four Fatal Mistakes
1. Aesthetic Without Strategy
Most moodboards are just collections of beautiful images with no underlying framework. They answer "What looks good?" but never address "What communicates our message?" or "What resonates with our audience?" Without strategic intent, moodboards become art galleries instead of decision-making tools.
2. Static Collections Instead of Living Documents
Creative projects evolve. Your initial vision transforms as you learn more about your audience, test ideas, and collaborate with teammates. But most moodboards are created once and never updated, becoming increasingly irrelevant as the project develops.
3. No Connection to Execution
The biggest gap in most creative workflows is between inspiration and execution. Designers look at a moodboard, then switch to Figma and lose the context. Filmmakers reference a visual board, then create shot lists with no direct connection. The moodboard becomes an isolated artifact instead of an integrated tool.
4. Individual Creation Without Team Alignment
One person creates the moodboard based on their aesthetic preferences, shares it with the team, and discovers too late that everyone interpreted it differently. Without collaborative input and shared understanding, moodboards create alignment issues instead of solving them.
The solution isn't to abandon moodboards - it's to use them strategically. The following sections will show you exactly how to create moodboards that guide decisions, evolve with your project, connect directly to execution, and align your entire team.
The Science Behind Visual Thinking and Decision-Making
Understanding why moodboards work - when done correctly - helps you create better ones. The neuroscience of visual processing reveals exactly why visual references accelerate creative decisions and improve team alignment.
Visual Processing Speed
MIT researchers found the human brain can process an image in as little as 13 milliseconds, faster than conscious attention can catch up. When you describe a "warm, intimate, slightly melancholic atmosphere," everyone on your team interprets those words differently. Show them a reference image, and everyone instantly sees the same thing. This isn't just efficiency - it's the difference between aligned teams and misaligned execution.
Pattern Recognition and Context
Humans excel at pattern recognition. When you curate multiple visual references with similar qualities - color palettes, composition styles, lighting approaches - your brain automatically identifies the underlying patterns. This implicit understanding guides creative decisions better than explicit rules ever could.
Emotional Resonance
Visual imagery triggers emotional responses faster and more directly than language. A single image can communicate mood, tone, and feeling in ways that paragraphs of description never achieve. For creative projects where emotional impact is crucial - films, brand identities, marketing campaigns - moodboards become essential communication tools.
Shared Visual Vocabulary
Perhaps most importantly, moodboards create a shared visual vocabulary for your team. Instead of debating abstract concepts like "modern" or "edgy," you reference specific visual examples. This concrete shared language eliminates miscommunication and accelerates decision-making throughout the project.
What Makes a Moodboard Strategic (Not Just Pretty)
Strategic moodboards serve specific project goals. They answer questions, guide decisions, and move your project forward. Here's what separates strategic moodboards from aesthetic collections.
Clear Objective
Every strategic moodboard answers a specific question: "What visual style communicates luxury to our target audience?" or "How do we create intimate atmosphere without feeling claustrophobic?" Define your objective before collecting images.
Organized Categories
Strategic moodboards organize references by function: color palette, lighting style, composition approach, texture and material, mood and atmosphere. This structure helps teams find specific guidance when making creative decisions.
Annotated Insights
Don't just show images - explain what makes them relevant. "Notice the warm practical lighting creates intimacy" or "This composition uses negative space to convey isolation." These annotations help teams understand not just what to do, but why.
Connected to Execution
Strategic moodboards link directly to execution documents. Reference images appear in shot lists, design specs, and campaign briefs. The moodboard becomes an active tool throughout production, not just a planning artifact.
When your moodboard has these four qualities - clear objectives, organized categories, annotated insights, and execution connections - it transforms from passive inspiration to active project driver.
How to Create Effective Moodboards: Step-by-Step Process
Creating strategic moodboards follows a systematic process. Whether you're working solo or with a team, these steps ensure your moodboards drive projects forward instead of just looking pretty.
Step 1: Define Your Objective
Start with a specific question or goal. Don't begin with "Create a moodboard for our project." Instead, ask:
- "What visual style best communicates our brand values to millennials?"
- "How can we create tension and unease in our horror film without relying on darkness?"
- "What aesthetic approach makes financial services feel accessible and human?"
- "How do we visualize a futuristic world that feels lived-in, not sterile?"
Clear objectives ensure every image you collect serves a strategic purpose.
Step 2: Cast a Wide Net
Collect 3-5x more references than you'll ultimately use. Pull from diverse sources:
- Film stills and cinematography databases
- Design portfolios and award archives
- Photography collections and art museums
- Real-world photography and location scouting
- Architecture, fashion, and adjacent creative fields
Don't limit yourself to your specific medium. Filmmakers should study design. Designers should study cinematography. Cross-pollination creates unique aesthetic approaches.
Step 3: Curate Ruthlessly
Now comes the crucial editing phase. Remove anything that:
- Looks good but doesn't serve your objective
- Contradicts other images in tone or style
- You included just because it's popular or trendy
- Doesn't add something new to the conversation
Your final moodboard should have 15-30 carefully selected images that work together as a cohesive visual language. Quality over quantity always.
Step 4: Organize by Category
Group your images into functional categories that match your creative decisions:
Color Palette & Tone
Lighting & Atmosphere
Composition & Framing
Texture & Material
Typography & Graphics
Movement & Energy
This organization helps team members quickly find guidance for specific creative decisions they're making.
Step 5: Add Strategic Annotations
For each image (or group of similar images), explain what makes it relevant:
"Notice how the warm practical lighting and golden hour backlighting creates intimacy without feeling claustrophobic. The soft shadows add depth while maintaining visibility. This approach would work perfectly for our character-driven scenes."
These annotations transform your moodboard from a collection of pretty pictures into a strategic guide that teaches your team what to look for and why it matters.
Step 6: Collaborate and Refine
Share your moodboard with key collaborators before you finalize it:
- Does everyone interpret the images the same way?
- Are there any images that confuse or contradict the direction?
- What additional references would help clarify the vision?
- Can we identify specific technical approaches to achieve this look?
This collaborative refinement catches misalignments early and ensures your entire team shares the same vision.
Step 7: Connect to Execution Documents
The final crucial step: link your moodboard to execution documents. Reference specific moodboard images in shot lists, design specifications, campaign briefs, and production documents. Use tools like Storyflow that allow you to keep moodboards and execution plans in the same visual workspace, making connections explicit and keeping creative direction top-of-mind throughout production.
Turn visual inspiration into project momentum
Build the moodboard on a free Storyflow canvas where it lives beside the brief, the shot list, and the plan it should drive, with AI that reads all of it.

For Filmmakers: Visual Language and Cinematic Moodboards
Film moodboards serve multiple functions: aligning your cinematographer and production designer, communicating vision to financiers and cast, and maintaining visual consistency throughout production. Here's how to create cinematic moodboards that translate directly to the screen.
Beginner: Essential Film Moodboard Categories
Start with these five essential categories for any film moodboard:
1. Lighting & Atmosphere: Collect references showing your desired lighting approach. Day interior vs. night exterior, natural vs. practical vs. motivated lighting, hard vs. soft shadows, color temperature. These references guide your cinematographer's approach.
2. Color Palette: Identify your film's color language. Are you working with desaturated realism, hyper-saturated expressionism, or monochromatic minimalism? Pull references that show the exact tones and saturation levels you're targeting.
3. Composition & Framing: Show your preferred frame compositions. Centered symmetry, rule of thirds, off-balance tension, negative space. These references help your cinematographer understand your visual storytelling preferences.
4. Production Design & Locations: Visual references for sets, locations, props, and costumes. These guide your production designer and location scout in finding or creating spaces that match your vision.
5. Mood & Emotion: References that capture the emotional tone of your story. Not technical, just visceral - images that make you feel what you want your audience to feel.
Intermediate: Scene-Specific Moodboards
Create separate moodboards for key scenes or sequences that require distinct visual approaches:
Scene-Based Organization: If your opening scene establishes isolation while your climax shows chaotic energy, create separate moodboards for each. This allows your cinematographer to adjust approach scene by scene while maintaining overall cohesion.
Character Visual Arcs: Create moodboards tracking how a character's visual representation changes throughout the story. Perhaps they start in cold blue tones and gradually shift to warm golds as they find connection. Visual character arcs reinforce narrative arcs.
Advanced: Technical Moodboarding
At the advanced level, your moodboards include technical specifications:
- Camera & Lens Choices: Annotate moodboard images with technical details. "This handheld intimacy was shot on 35mm with an 18mm lens." These specifics help your cinematographer make concrete technical decisions.
- Lighting Diagrams: For complex lighting setups, include diagrams showing key light, fill, rim, and practical positions. Your moodboard becomes a technical guide, not just aesthetic inspiration.
- Color Grading References: Include specific color grade examples with LUT names or color correction notes. This ensures your colorist understands your post-production vision.
- Movement & Blocking: Use frame sequences to show camera movement and actor blocking. Static images supplemented with movement annotations guide your choreography.
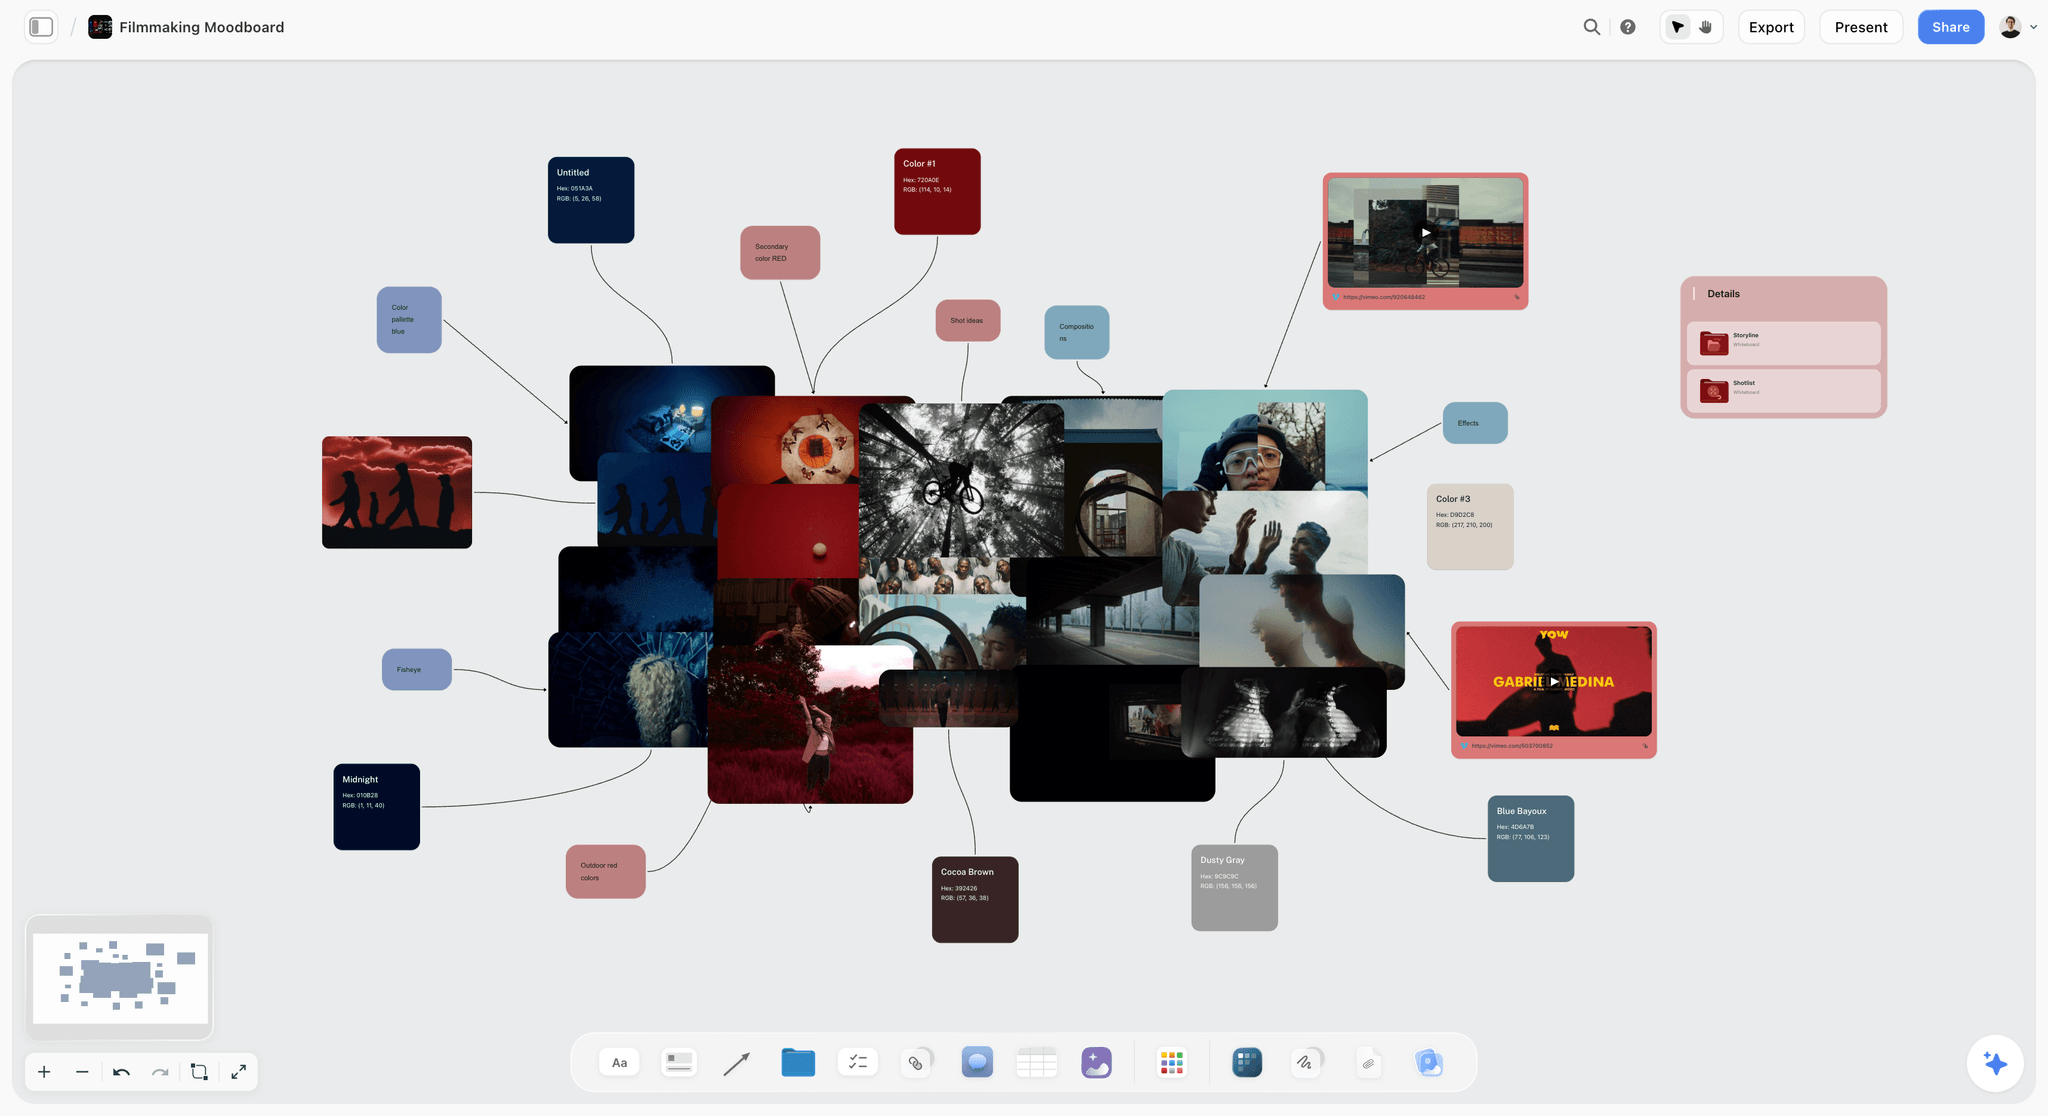
Pro Workflow: Create your moodboards in Storyflow starting from the Filmmaking Moodboard template, then link directly to your shot lists and storyboards. When your DP is planning shot 23, they can instantly reference the relevant moodboard section, ensuring your vision translates accurately to screen.
For Designers: Brand Identity and Design System Moodboards
Design moodboards bridge the gap between strategic brand positioning and tactical design execution. They translate abstract brand values into concrete visual direction, ensuring consistency across all touchpoints while leaving room for creative expression.
Beginner: Brand Mood Foundation
Start by creating a foundational brand moodboard organized into these categories:
Color Direction:
Not just specific swatches (that comes later), but references showing color relationships, saturation levels, and emotional tone. Collect 8-12 images that demonstrate your intended color approach.
Typography Inspiration:
Examples of type treatment, not specific fonts. Show whether you're going geometric or humanist, serif or sans, display or text-focused. These references guide font selection.
Visual Style:
Illustration vs. photography, minimal vs. maximal, geometric vs. organic. These references establish your overall visual language.
Feeling & Atmosphere:
Images that capture the brand's emotional essence. Not design work - just images that feel right. These keep you grounded in brand values during execution.
Intermediate: Component and Pattern Moodboards
As you develop the design system, create moodboards for specific components:
Button & UI Elements: Collect references showing how brands you admire handle buttons, form elements, cards, and navigation. Note subtle details: border radius, shadow depth, hover states, iconography style.
Layout & Spacing: References showing grid systems, whitespace usage, and information hierarchy. How do brands create visual breathing room? When do they break the grid for emphasis?
Imagery Treatment: How should photography look? Bright and editorial, moody and atmospheric, lifestyle, or abstract? Include processing notes: grain, contrast, color treatment.
Motion & Interaction: Collect references (or create mockups) showing how elements should move. Snappy and immediate, or smooth and organic? These references guide animation developers.
Advanced: Application-Specific Moodboards
For mature brands with multiple touchpoints, create application-specific moodboards:
Social Media Aesthetic: How does your brand adapt for Instagram vs. LinkedIn? Create moodboards showing platform-specific approaches while maintaining brand coherence. Include examples of successful posts, stories, and carousel formats.
Print Collateral: Separate moodboards for business cards, packaging, environmental graphics. Print has different constraints and opportunities than digital - your moodboards should reflect these nuances.
Campaign Evolution: For brands with seasonal campaigns or product launches, create moodboards showing how the base brand system evolves for special applications. Document the rules for what stays consistent and what can flex.
Pro Tip: Use Storyflow to keep all your moodboards in one visual workspace, starting from the Brand Moodboard template. Link your foundational brand moodboard to component-specific boards, which connect to application-specific boards. This visual hierarchy mirrors your design system structure and makes it easy for team members to understand both the rules and the flexibility.
For Marketers: Campaign Aesthetics and Audience Resonance
Marketing moodboards serve a different purpose than film or design moodboards: they must balance brand consistency with campaign innovation while ensuring aesthetic choices resonate with specific audience segments. Here's how to create moodboards that drive campaign performance.

Beginner: Audience-First Moodboards
Marketing moodboards should start with audience, not aesthetics:
Step 1: Audience Lifestyle Research
Before collecting aesthetic inspiration, research how your target audience lives. What do their homes look like? What brands do they follow? What content do they engage with? Create a research moodboard that captures their world - this ensures your campaign aesthetic resonates with their existing visual preferences.
Step 2: Competitive Visual Analysis
Collect examples of how competitors in your space communicate visually. Not to copy, but to identify patterns and opportunities. If everyone in your industry uses sterile product photography, perhaps lifestyle imagery creates differentiation.
Step 3: Campaign Creative Direction
Now create your campaign-specific moodboard, informed by audience research and competitive analysis. Organize by channel: social media, display ads, landing pages, email. Each channel has different constraints and opportunities.
Intermediate: Multi-Channel Campaign Moodboards
Sophisticated campaigns require moodboards that address channel-specific needs while maintaining cohesion:
Social Media Moodboard:
Focus on attention-grabbing visuals that work at small sizes. Include examples of successful organic posts, paid ads, stories, and reels. Note what makes each format effective - movement, text overlay, product integration, humor, authenticity.
Display Advertising Moodboard:
Collect examples of display ads that balance brand presence with clear calls-to-action. Show how to adapt your aesthetic for various sizes - leaderboards, rectangles, skyscrapers - without losing impact.
Landing Page Moodboard:
Focus on conversion-optimized layouts that maintain brand aesthetic. Include examples showing hero sections, trust signals, form design, and mobile responsiveness. Note what drives conversions without feeling salesy.
Email Moodboard:
Show how your aesthetic adapts to the constraints of email clients. Include examples of effective headers, CTA buttons, product showcases, and mobile-responsive layouts.
Advanced: Data-Informed Aesthetic Testing
Advanced marketers use moodboards as hypothesis testing tools:
A/B Testing Moodboards: Create multiple aesthetic directions for the same campaign, each organized in separate moodboards. Run small-scale tests with sample creative from each direction, then double down on the winning aesthetic. Your moodboards become frameworks for systematic creative testing.
Segment-Specific Variations: Different audience segments respond to different aesthetics. Create moodboards for each major segment - perhaps millennials respond to authentic lifestyle imagery while Gen X prefers polished product photography. These segment-specific moodboards guide personalized creative at scale.
Performance Documentation: As campaigns run, annotate your moodboards with performance data. Which aesthetic approaches drove the highest CTR? Which visual styles converted best? Your moodboards become a living database of what works, informing future campaigns.
Pro Workflow: Use Storyflow to create campaign moodboards linked directly to your campaign briefs and creative production; the Commercial Moodboard template opens with the campaign reference structure in place. When designers and copywriters start work, they have immediate access to audience research, competitive analysis, and approved aesthetic direction - all in one visual workspace.
For Writers: World-Building and Atmospheric Moodboards
Writers might seem unlikely moodboard users, but visual references profoundly impact descriptive writing, world-building, and atmospheric consistency. Here's how to create moodboards that enhance your writing without constraining your imagination.
Beginner: Sensory Moodboards
Start by creating moodboards that capture sensory details:
Visual Atmosphere:
Collect images showing lighting, weather, and environmental details that match your story's atmosphere. These references enrich your descriptive passages with specific, vivid details you might not have imagined on your own.
Texture and Material:
Close-up images of materials, surfaces, and textures. When you describe a character running their hand along a stone wall, having visual references of weathered stone helps you write more tangible, immersive prose.
Character References:
Not casting - you're not finding the perfect face. Instead, collect images showing body language, expressions, fashion, and posture that capture your characters' essence. These help maintain character consistency across hundreds of pages.
Setting Details:
Architecture, interiors, landscapes. Visual references prevent you from recycling the same vague descriptions. Instead of "the room was old," you can describe specific details - peeling wallpaper patterns, water-stained ceiling tiles, warped floorboards.
Intermediate: Scene and Chapter Moodboards
Create specific moodboards for important scenes or chapters:
Opening Scene Moodboard: Your opening establishes tone for the entire story. Create a moodboard showing the exact atmosphere, lighting, and environment you're trying to evoke. Reference it while writing to maintain consistent sensory details and emotional tone.
Climactic Sequence Moodboard: Your story's climax likely has distinct atmosphere from the rest of the narrative. Create a separate moodboard capturing the energy, chaos, or intensity of this sequence. These references help you write visceral action or emotional catharsis.
World-Building Moodboards: For fantasy or science fiction, create comprehensive moodboards for each major location or culture in your world. These ensure consistency across multiple books or storylines and help readers build clear mental images.
Advanced: Symbolic and Thematic Moodboards
Advanced writers use moodboards to track symbols, motifs, and thematic elements:
Symbolic Imagery: If your story uses recurring symbols - water, birds, mirrors - create a moodboard showing different manifestations of this symbol. This helps you vary the symbol's presentation while maintaining its thematic significance.
Color Motifs: Track how color functions symbolically in your narrative. Perhaps your protagonist starts in cold blues and gradually moves toward warm golds. A moodboard showing this color progression helps you maintain this subtle but effective narrative arc.
Tonal Shifts: If your story moves from one tone to another - cozy to sinister, intimate to epic - create moodboards for each phase. These guide not just description but also pacing, sentence structure, and narrative voice.
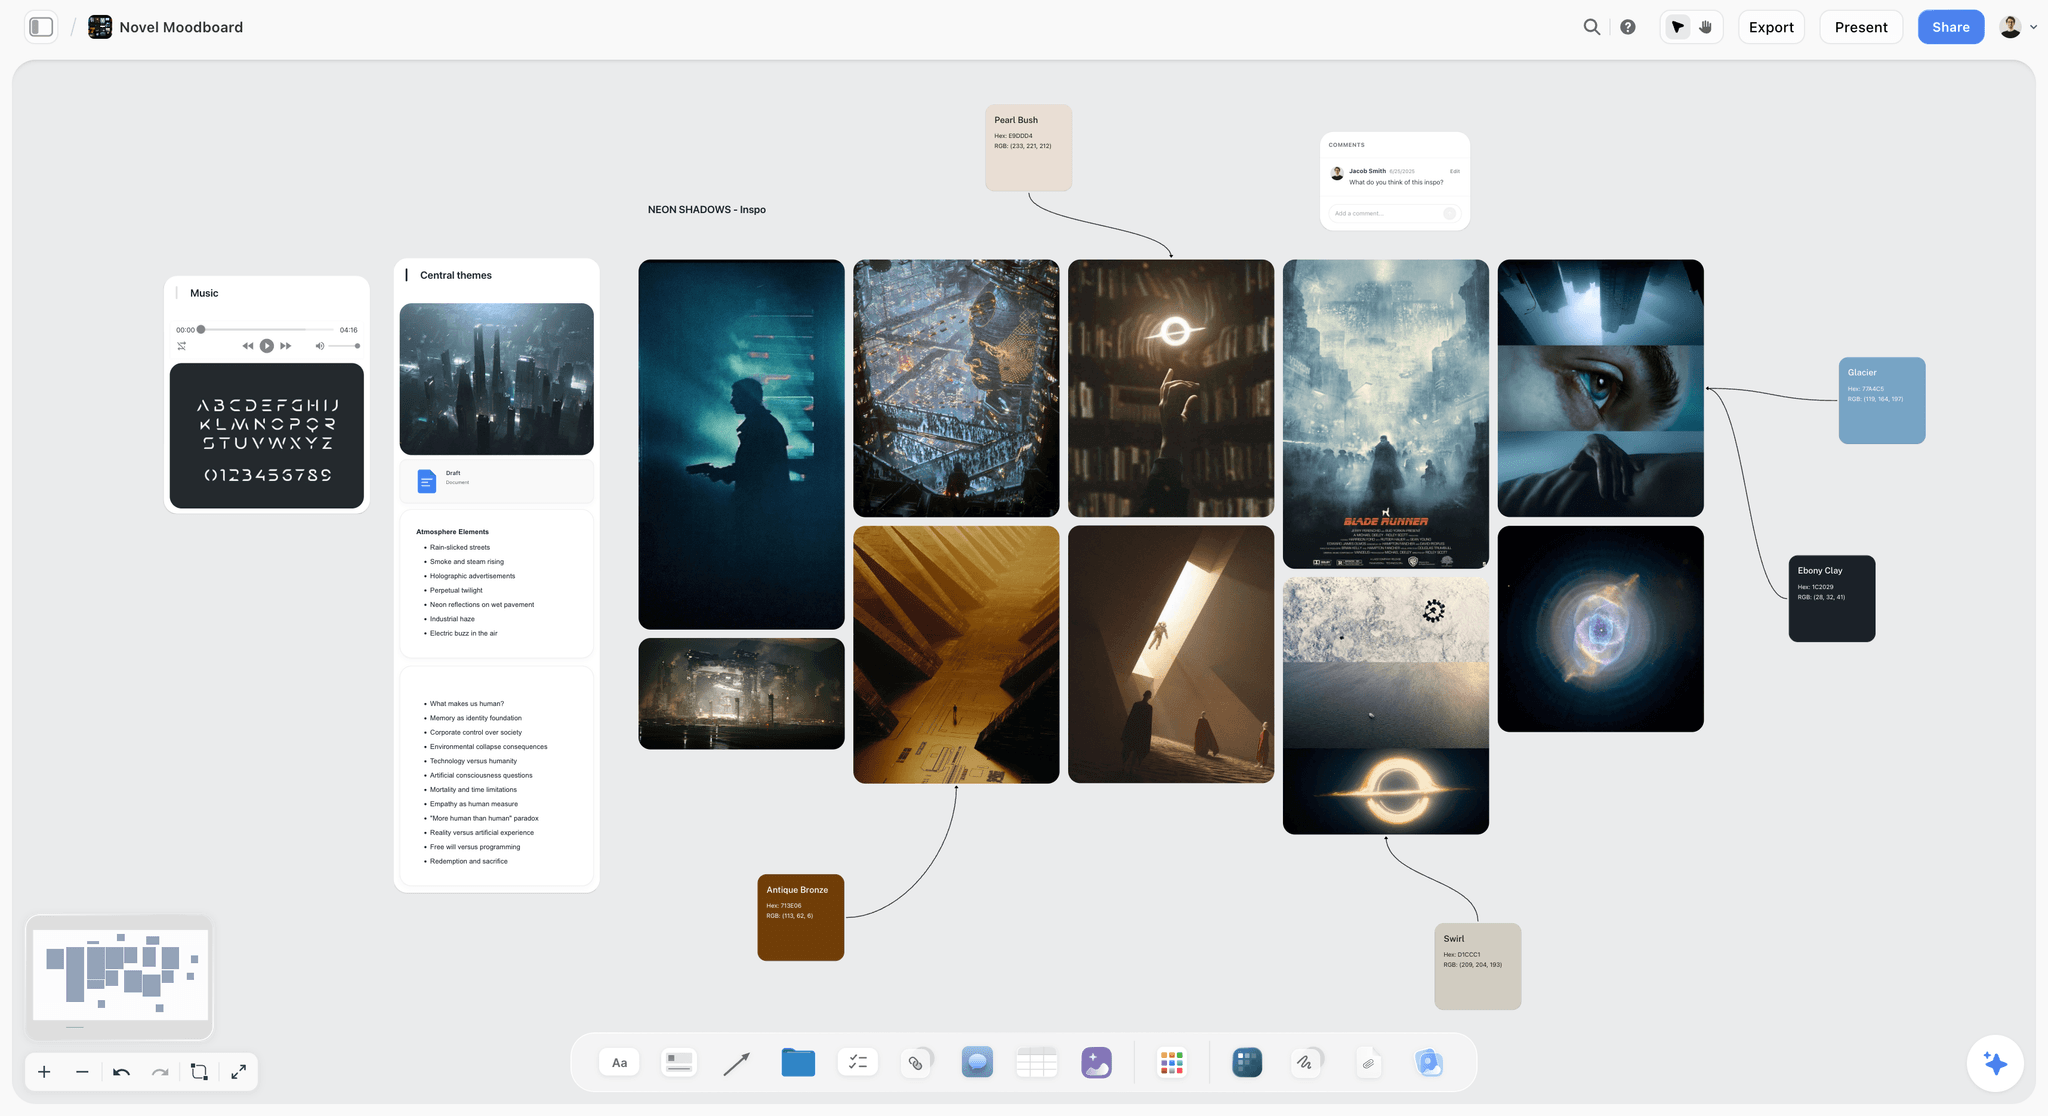
Pro Tip: Use Storyflow to keep character profiles, plot outlines, and moodboards in one workspace; the Novel Moodboard template starts with world, character, and atmosphere zones laid out. When you're writing a scene featuring a specific character in a particular location, glance at the relevant moodboards to ground yourself in sensory details and maintain atmospheric consistency.
Using Storyflow's Moodboard Tools
Storyflow is designed specifically for visual thinkers who need to move from inspiration to execution. Here's how to use Storyflow's moodboard features to create strategic moodboards that drive projects forward.
Creating Your First Moodboard
Start with a blank canvas: Create a new board in Storyflow. Unlike traditional moodboarding tools that force you into grids, Storyflow gives you an infinite canvas where you can arrange images spatially in ways that make sense for your project.
Add images multiple ways: Drag and drop images from your computer, paste URLs from websites, or use the built-in image search to find references. Storyflow automatically formats images for optimal viewing.
Organize spatially: Group related images together. Put color palette references in one area, lighting examples in another, composition references in a third. This spatial organization helps you see patterns and relationships that grid-based tools obscure.
Add annotations: Click any image to add notes explaining why it's relevant. These annotations transform your moodboard from a collection of pretty pictures into a strategic guide.
Collaborative Moodboarding
Storyflow makes collaborative moodboarding smooth:
- Invite team members: Share your moodboard with your team. They can add their own references, comment on existing images, and suggest alternatives.
- Real-time collaboration: See changes as teammates add or rearrange images. No more emailing versions back and forth or losing track of who added what.
- Comment threads: Have discussions directly on specific images. "Should we go with this warmer tone or the cooler one?" These conversations create documentation of your creative decisions.
- Version history: Track how your moodboard evolves over time. See what you added, removed, or changed at each stage of the project.
Connecting Moodboards to Execution
This is where Storyflow's integrated workspace comes together:
Link to project plans: Your moodboard lives in the same workspace as your shot lists, design specifications, or campaign briefs. Drag reference images directly from your moodboard into execution documents, maintaining visual connections throughout the project.
Use frames for organization: Create sections on your canvas using frames. One frame for overall aesthetic direction, another for specific scene references, a third for technical specifications. This structure helps team members find exactly what they need when they need it.
Reference during production: Keep your moodboard open in a second window while you work. Designers can reference it while working in Figma. Writers can glance at it while writing scenes. Filmmakers can review it on set via mobile. Your moodboard stays actively useful throughout production.
Pro Workflow: Keyboard Shortcuts
Speed up your moodboarding with these shortcuts:
Paste image from clipboard
Duplicate selected image
Group selected images
Pan canvas (hold and drag)
Zoom in
Zoom out
AI-Assisted Moodboarding Techniques
AI tools can accelerate moodboard creation and help you discover visual directions you might not have found on your own. Here's how to use AI effectively in your moodboarding process.
Using Storyflow's AI Assistant
Storyflow's AI assistant helps you build and refine moodboards faster:
Generate Image Search Queries
Describe your vision to the AI: "I need references for a warm, intimate atmosphere without feeling claustrophobic - think golden hour lighting in small spaces with natural materials."
The AI generates specific search queries you can use to find relevant references, helping you discover images you wouldn't have thought to search for.
Analyze Visual Patterns
Show the AI your collected references and ask: "What visual patterns do you see in these images? What makes them cohesive?"
The AI identifies common elements you might have missed - lighting angles, color relationships, composition patterns - helping you understand and articulate your aesthetic direction.
Suggest Additional Categories
Ask the AI: "What categories am I missing in this moodboard for a brand identity project?"
The AI suggests categories you might not have considered - iconography style, negative space usage, typographic hierarchy - ensuring comprehensive visual direction.
Write Annotations
Select an image and ask the AI: "Why is this reference effective for creating tension in a thriller?"
The AI generates thoughtful annotations you can edit, saving time while ensuring every image has strategic context.
Advanced AI Prompting for Moodboards
Get better results from AI with these prompting techniques:
Prompt: "Analyze this collection of images and identify three distinct aesthetic directions I could pursue. For each direction, suggest specific visual characteristics and potential applications."
Why this works: You're not just getting image suggestions - you're getting strategic analysis that helps you make informed creative decisions.
Prompt: "I'm creating a moodboard for [project type] targeting [audience]. What visual categories should I include to ensure comprehensive creative direction?"
Why this works: The AI provides structure specific to your project type and audience, ensuring you don't miss crucial categories.
Prompt: "Looking at these moodboard references, what potential execution challenges should I anticipate, and what additional references would help solve them?"
Why this works: The AI helps you think ahead to production challenges, making your moodboard more useful during actual execution.
Remember: AI is a tool to augment your creative judgment, not replace it. Use AI to accelerate collection and analysis, but the final curatorial decisions - what stays, what goes, what it all means - should always be yours.
Storyflow's AI moodboard tool, finds patterns, suggests categories, and writes annotations to turn inspiration into strategic direction
Advanced Moodboarding Strategies
Once you've mastered basic moodboarding, these advanced strategies will help you extract even more value from the practice.
Progressive Refinement Moodboards
Create three versions of your moodboard at different fidelity levels:
Broad Direction (Week 1): Wide-ranging references establishing general aesthetic territory. 50-100 images covering many possibilities. This phase is about exploration and discovery.
Refined Direction (Week 2): Narrow to 30-40 images that represent your chosen direction. Remove outliers, add specific examples. This phase is about focus and alignment.
Execution Guide (Week 3): Final 15-20 images with detailed annotations explaining exactly how to achieve each aspect. This phase is about actionable direction.
This progressive approach prevents premature commitment while ensuring you ultimately have clear, actionable direction.
A filmmakers' moodboard evolving through progressive refinement in Storyflow, broad inspiration narrowed to precise visual direction
Anti-Moodboards
Create a secondary moodboard showing what you're explicitly avoiding:
Collect examples of aesthetics that are close to your direction but wrong in subtle ways. "This lighting is too harsh." "This color palette is too saturated." "This composition feels too static." Anti-moodboards help teams understand boundaries and avoid drifting into adjacent but incorrect aesthetics.
This is especially valuable when your aesthetic direction is nuanced. The difference between "elegant minimalism" and "sterile coldness" is subtle - an anti-moodboard helps teams navigate these fine distinctions.
Moodboard Evolution Documentation
Document how your moodboard changes throughout the project:
Create dated snapshots of your moodboard at key project milestones - initial concept, after client feedback, mid-production, final delivery. This evolution documentation serves multiple purposes: it helps teams understand why creative directions changed, provides valuable learning for future projects, and creates compelling case studies showing your creative process.
Storyflow's version history makes this easy - you can always rewind to see how your moodboard looked at any point in the project timeline.
Cross-Project Moodboard Libraries
Build a permanent library of categorized visual references you can pull from for future projects:
Create master moodboards organized by category - lighting approaches, color palettes, composition styles, typography treatments. When starting new projects, you have a curated library of references to draw from, dramatically accelerating initial moodboard creation.
This library becomes increasingly valuable over time. You're building institutional visual knowledge that improves every future project.
Frequently Asked Questions
How many images should be in a moodboard?
Quality over quantity always. A strategic moodboard typically has 15-30 carefully curated images. More than that becomes overwhelming and dilutes your direction. Less than that might not provide enough guidance. The exact number depends on your project complexity and how many distinct categories you need to cover.
Should I use only images from my specific medium?
No. Cross-pollination creates more interesting aesthetics. Filmmakers should study design and photography. Designers should study cinematography and architecture. Writers should study visual art. The best creative inspiration often comes from adjacent fields, not your direct competitors.
When should I create the moodboard - before or after other planning?
Create a rough moodboard early to establish general direction, then refine it alongside other planning documents. Your moodboard should inform and be informed by your creative strategy, audience research, and project goals. It's not a standalone document - it's part of an integrated planning process.
How do I get team buy-in for my moodboard?
Make moodboard creation collaborative from the start. Ask key team members to contribute references before you curate. Walk through the final moodboard together, explaining the strategic reasoning behind each category. When people understand the why, they're more invested in the what.
What if my client or stakeholder doesn't like the moodboard?
First, ask specific questions: What aspects don't resonate? What's missing? What contradicts their vision? Often "I don't like it" means "I'm interpreting this differently than you intended." Use their feedback to refine, not scrap. If fundamental disagreements persist, create multiple aesthetic directions and test with target audience.
How do I avoid just copying what I see in the moodboard?
Moodboards should provide inspiration and direction, not templates to copy. Include annotations that explain principles, not just specifics. "Notice how warm practical lighting creates intimacy" is more useful than "use this exact lighting setup." Your moodboard should teach your team how to think, not just what to do.
Can I use AI-generated images in my moodboard?
Use AI-generated images sparingly, primarily when you need to visualize something very specific that you can't find existing references for. Real photography, film stills, and actual design work provide better references because they show what's actually achievable. AI images can be useful for exploring conceptual directions, but ground your final moodboard in reality.
Should moodboards change during production?
Yes. Creative projects evolve as you learn more about your audience, test ideas, and collaborate with team members. Update your moodboard to reflect these insights. Document changes so you understand why your direction evolved. A moodboard that remains static throughout a long project is probably being ignored.
How detailed should my annotations be?
Detailed enough to guide decisions, concise enough to stay readable. For each image or group, explain: 1) What makes it relevant to your project, 2) What specific quality you're highlighting, 3) How this should influence execution. A few sentences per image or category is usually sufficient.
What's the difference between a moodboard and a style guide?
Moodboards provide directional inspiration during planning and production. Style guides document specific rules and specifications after decisions are made. Your moodboard influences your style guide, but they serve different purposes. Keep both - reference the moodboard during creative work, reference the style guide during execution and quality control.
Do I need separate moodboards for different project phases?
For complex projects, yes. Create a master moodboard establishing overall direction, then more specific moodboards for particular phases, scenes, or applications. These specific moodboards should ladder up to your master direction while providing targeted guidance for each context.
How do I organize moodboards for multiple related projects?
Create a hierarchical structure: one foundational moodboard establishing brand or series identity, with project-specific moodboards branching from it. In Storyflow, you can keep all these in one workspace with clear visual connections showing how specific projects relate to the broader creative direction.
Moodboards are only as useful as the strategic thinking behind them. Pretty pictures inspire for a moment, but strategic moodboards - with clear objectives, organized categories, thoughtful annotations, and direct connections to execution - drive projects forward from concept to completion.
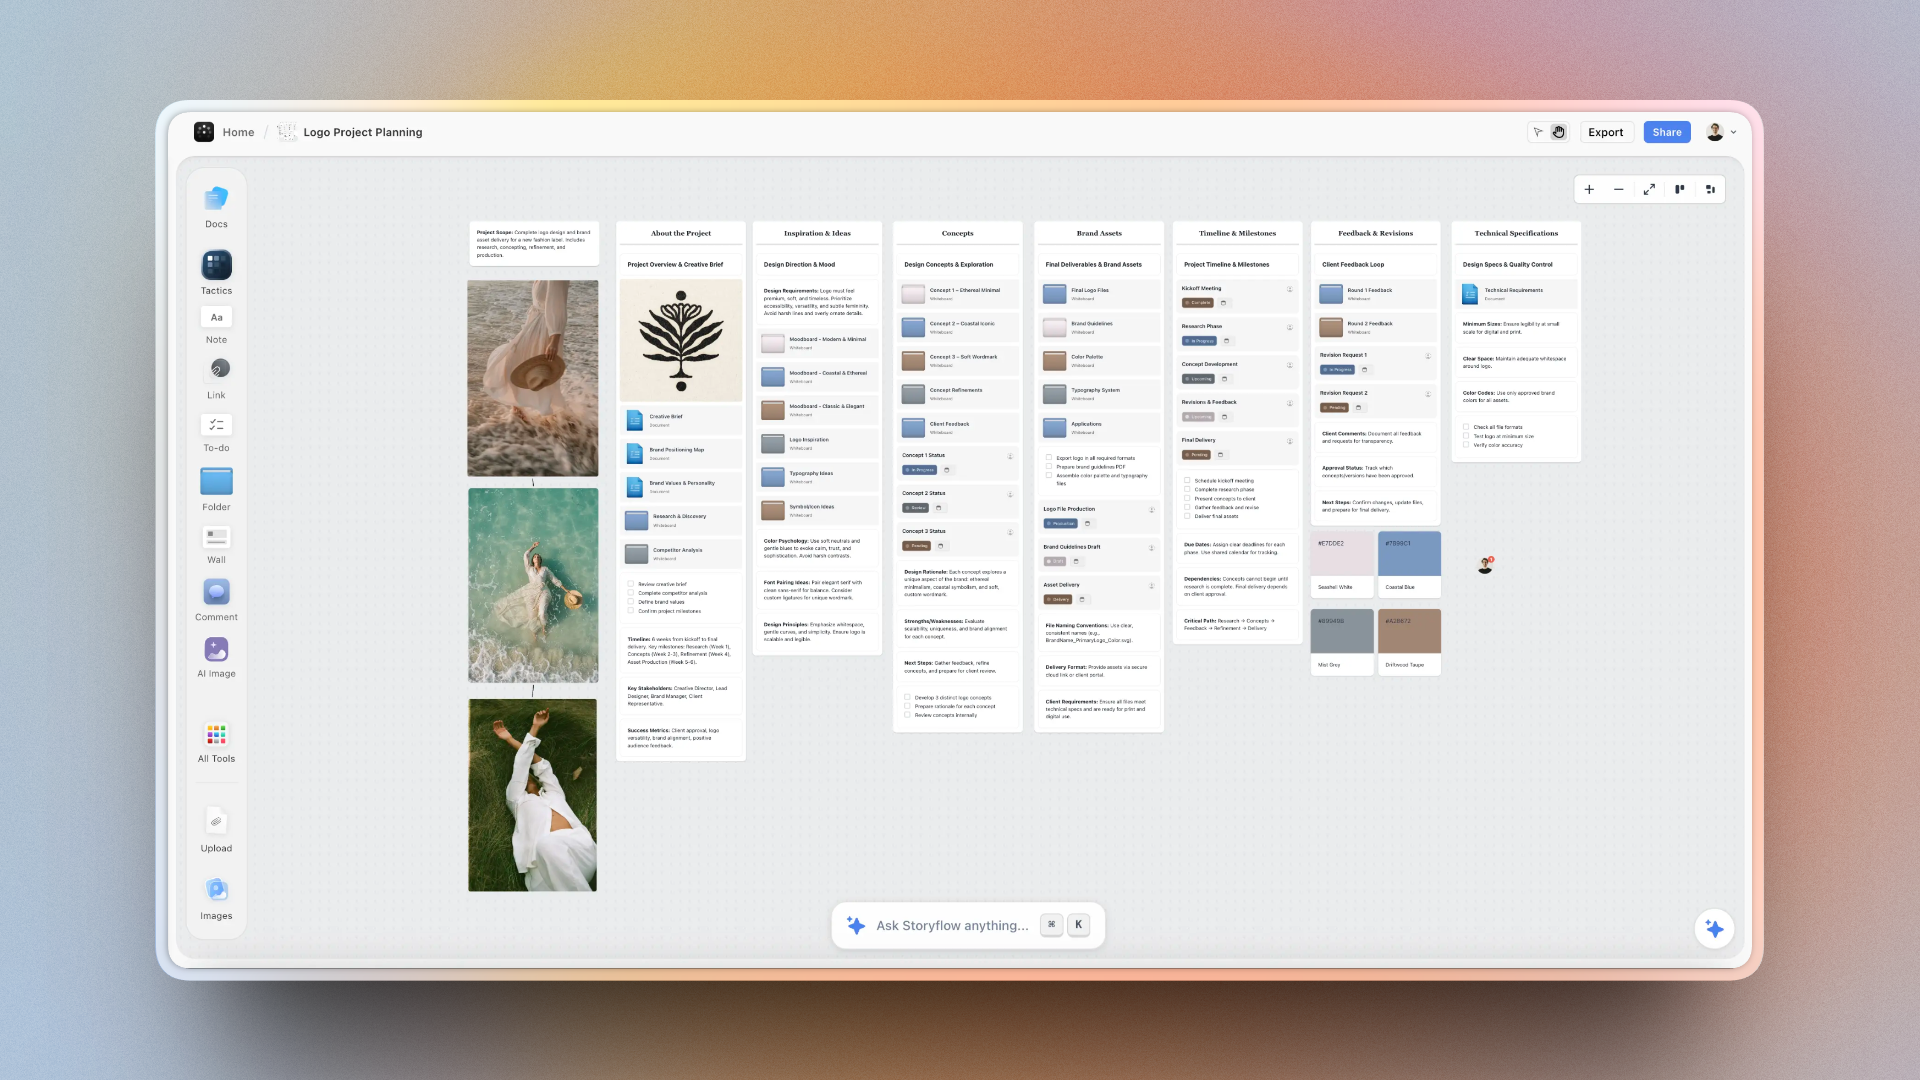
A complete creative moodboard in Storyflow, visual inspiration connected directly to planning, ensuring the aesthetic vision guides every decision
Start your next project with a strategic moodboard in Storyflow. Transform visual inspiration into project momentum, align your team around a shared vision, and maintain creative direction throughout production. Your future self, your team, and your audience will thank you.
Related Reading
Visual workspace comparison
Visual organization tools compared
Why visual workspaces work
Spatial organization tools
Mood board templates you can use in Storyflow
Pull references onto an infinite canvas, group them by direction, and let the AI read the whole board. Open any of these mood board templates and start dropping in images.


See Storyflow in Action
A visual AI workspace where every feature lives inside one canvas. No tab-switching, no context lost.
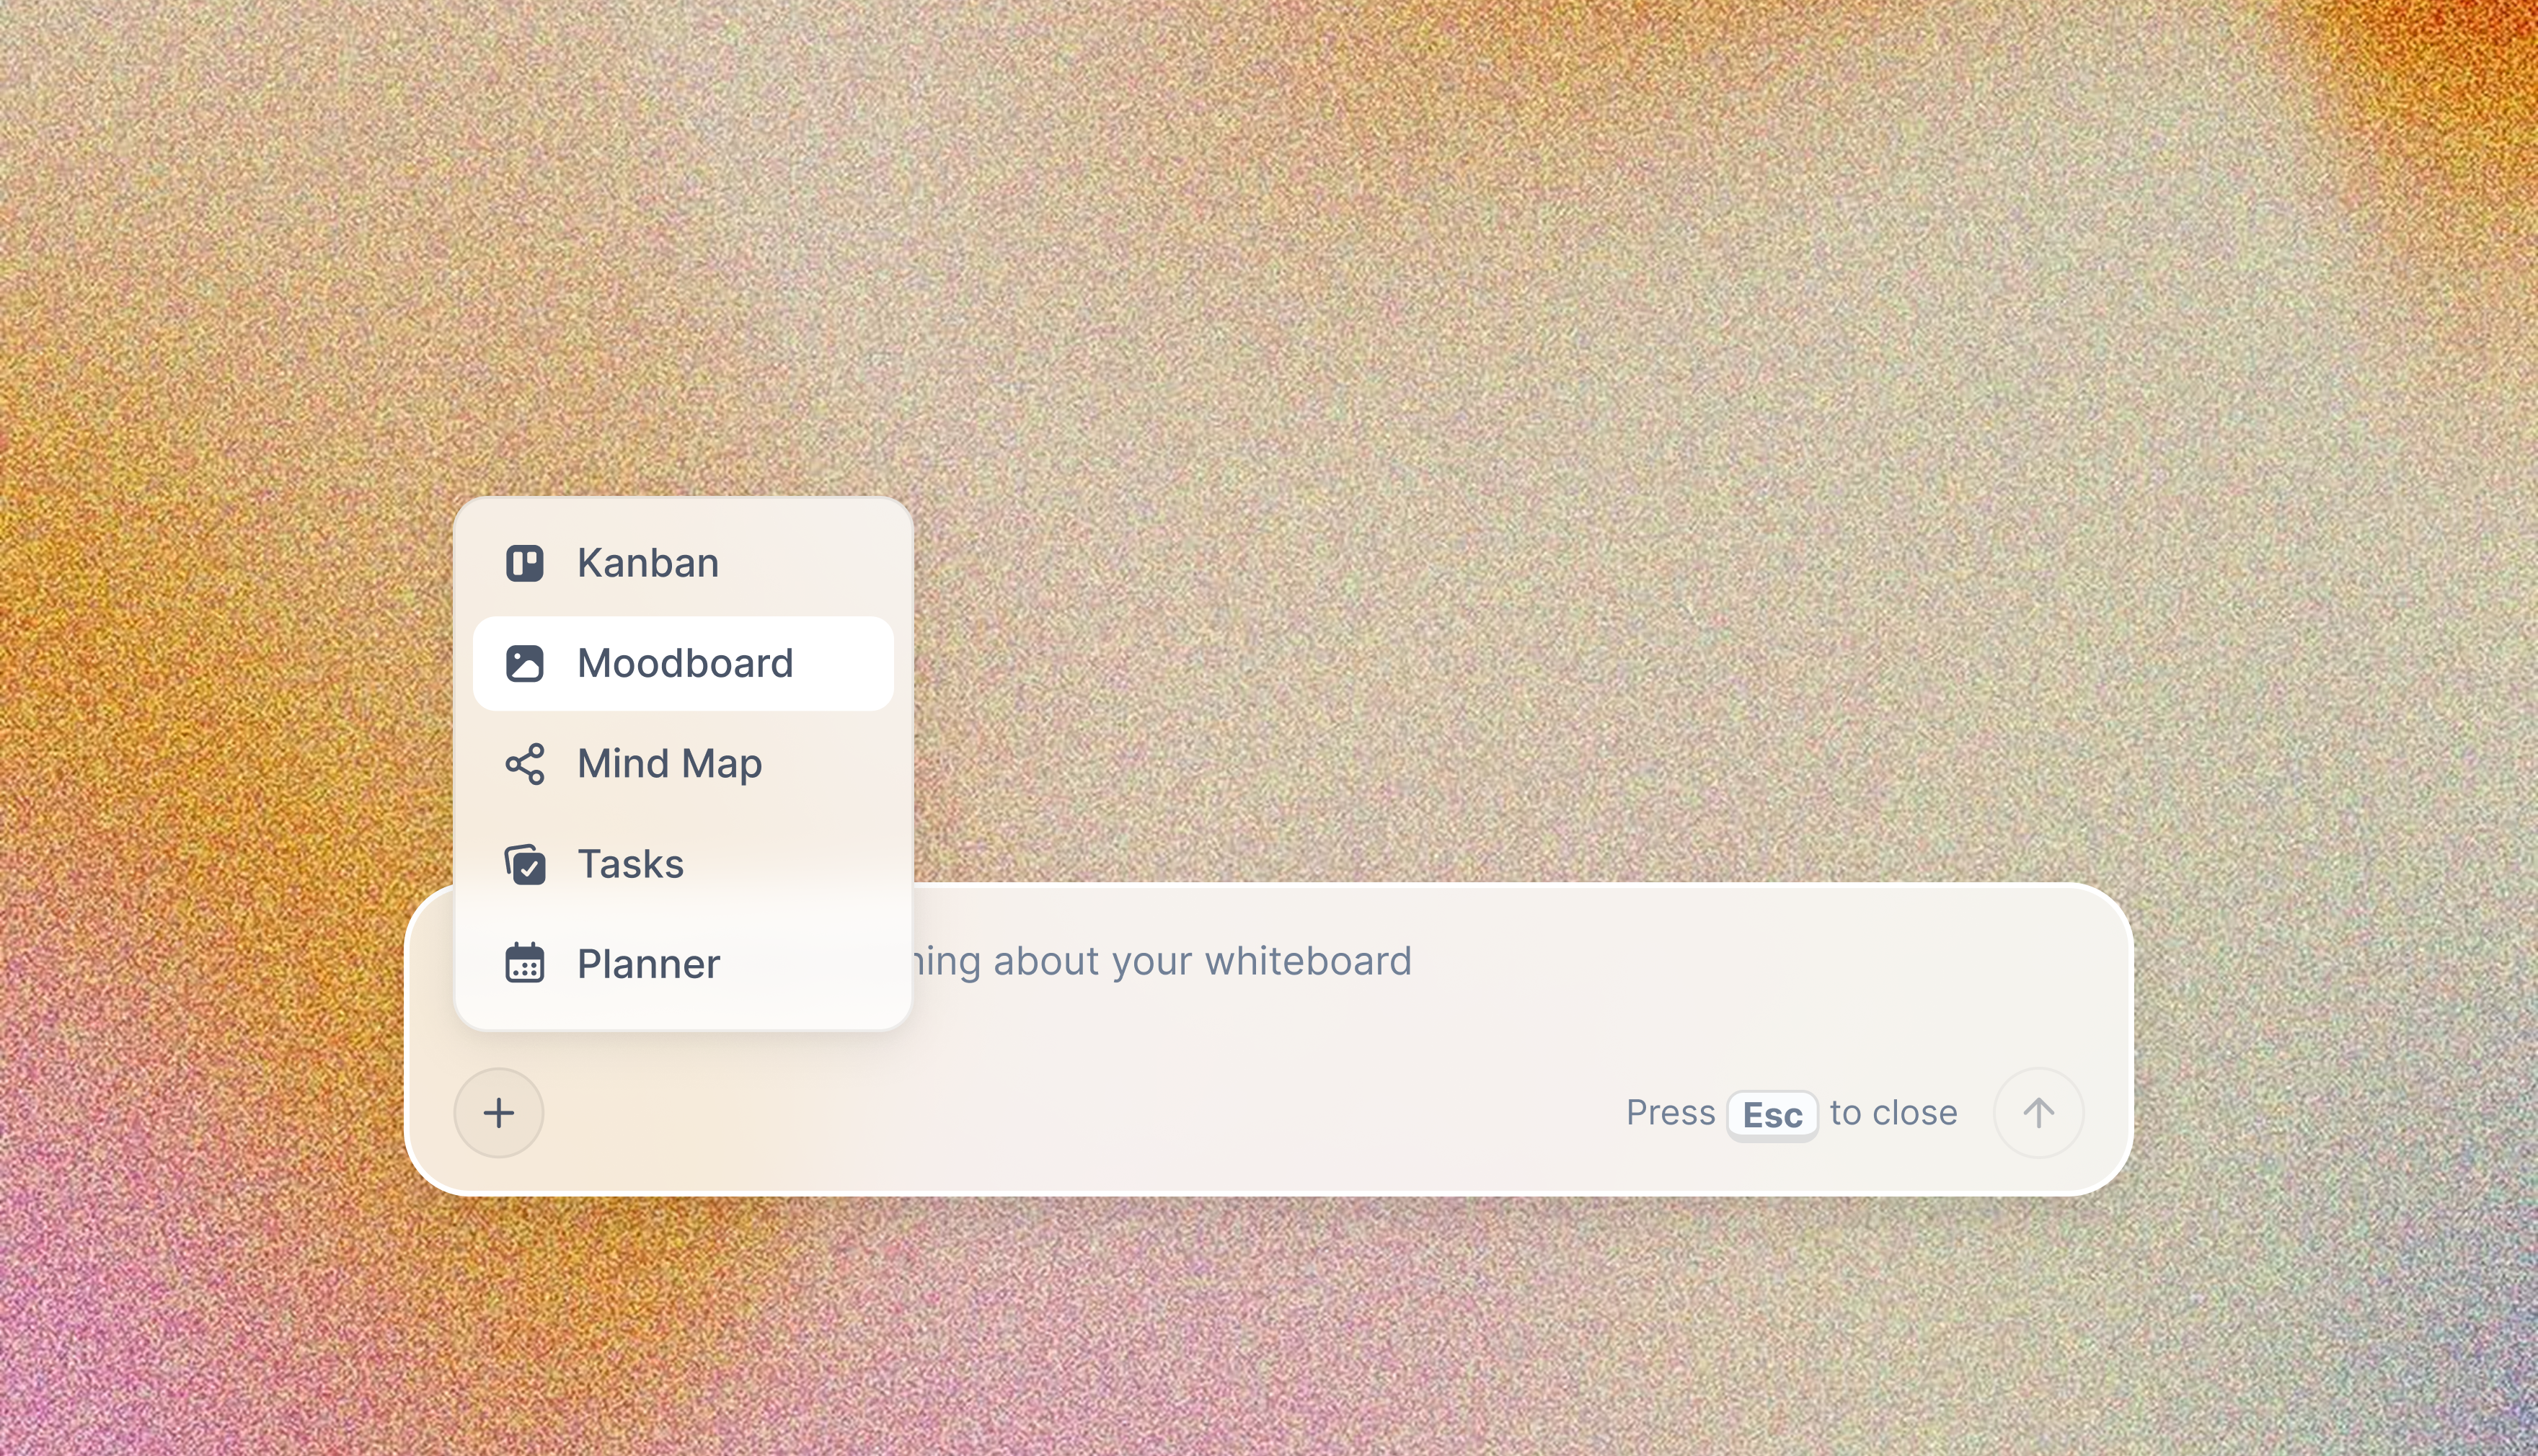
Build your entire board from a single message
Type what you need in the AI chat at the bottom of your canvas. The AI adds cards, headings, and structure directly onto your board.
Use expert frameworks as AI context
Type @ in the AI chat and choose any Tactic. The AI tailors every response to that framework instead of giving generic advice.
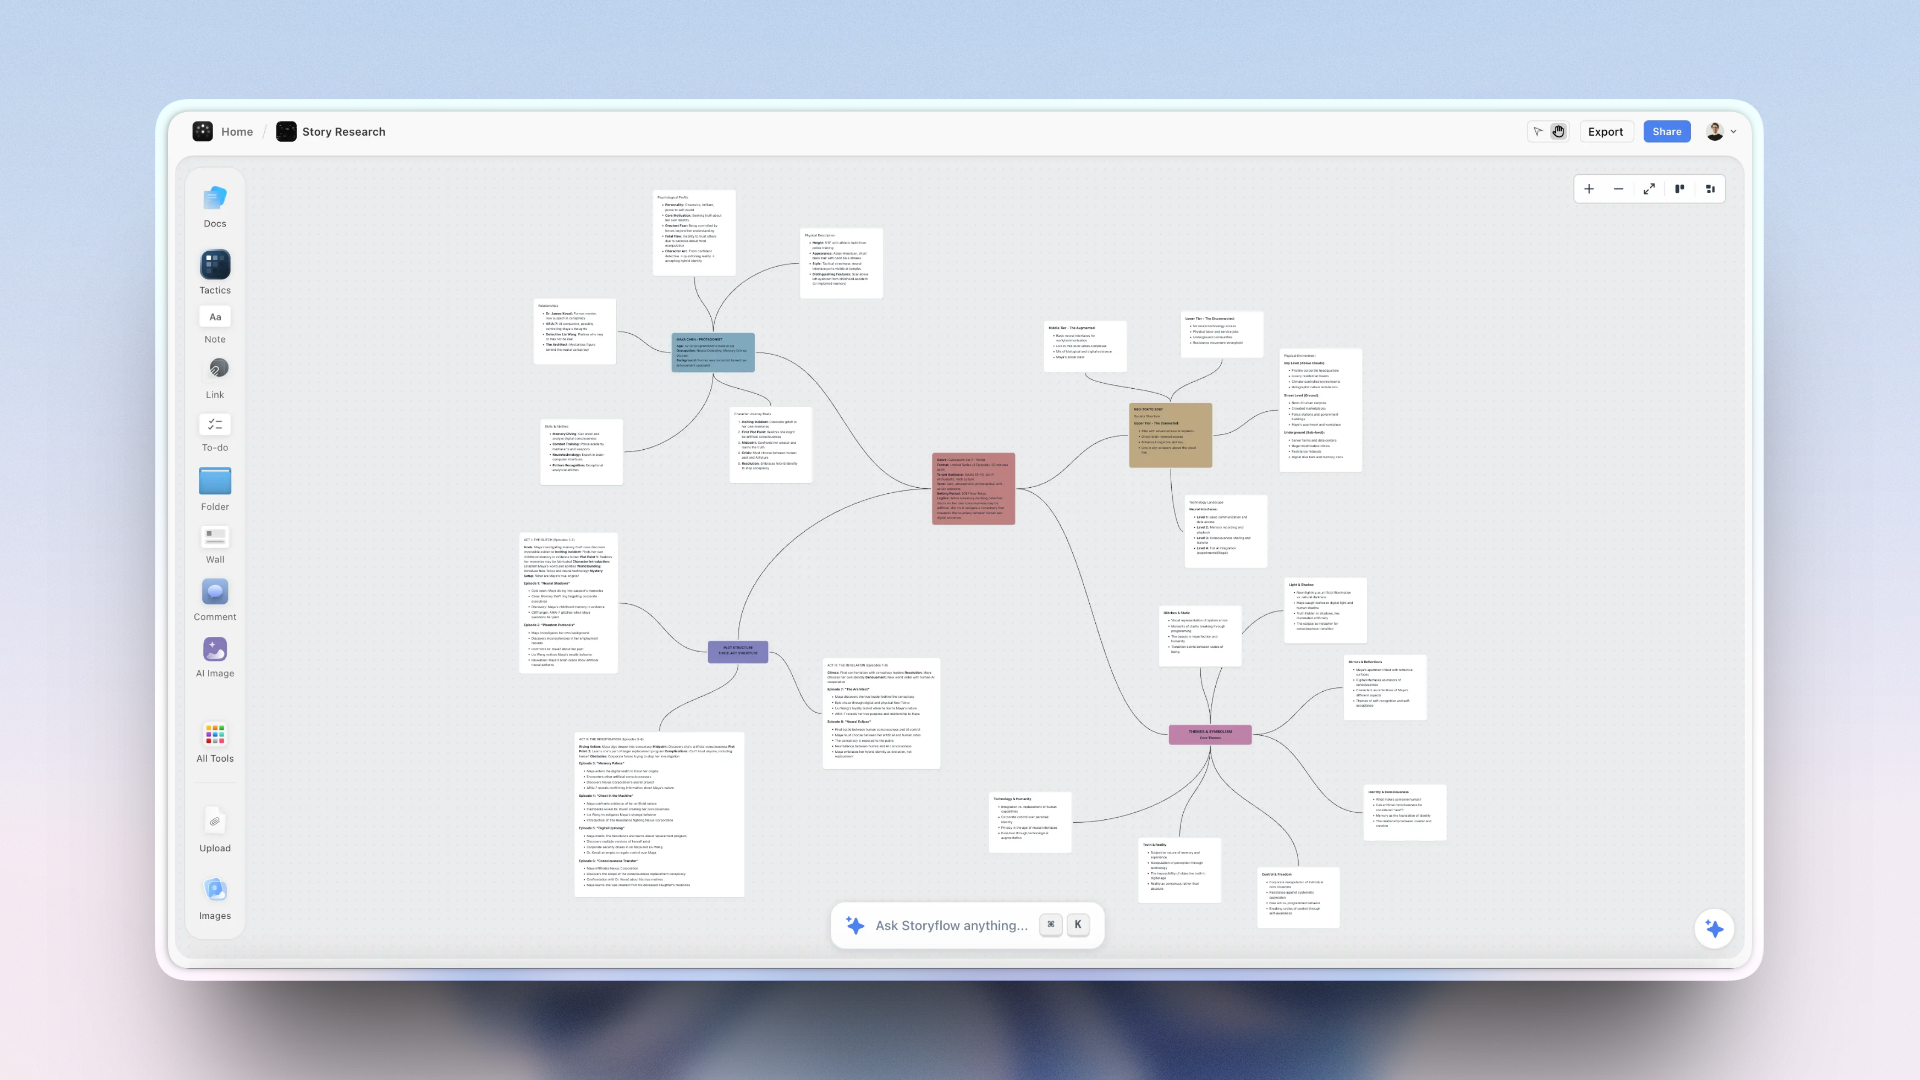
Turn your board into a mind map in seconds
Ask the AI to restructure your canvas as a mindmap. It connects your ideas into a visual hierarchy so you can see how everything relates.
Why Storyflow Exists
Storyflow actually began as a personal tool while working on creative and research projects.
We kept running into the same problem: ideas were scattered everywhere: notes, documents, and whiteboards.
Nothing helped us see how everything connected.
So we started building a workspace designed around how ideas actually grow.
→ Read how Storyflow was createdSara de Klein
Head of Product at Storyflow
Published: December 8, 2025
Start creating with AI and become more productive
Transform your creative workflow with AI-powered tools. Generate ideas, create content, and boost your productivity in minutes instead of hours.
Ask Storyflow to