Storyflow
Home
Blog
Features
Login
Home
/
Blog
/
Article
How to Plan a YouTube Video: The Complete System for 2025
The difference between a video that gets 200 views and one that gets 200,000 views usually isn't the editing or equipment - it's the planning. Learn the complete system for planning YouTube videos from idea to upload.
Category
YouTube
Author

Sara de Klein
Head of Product at Storyflow
Topics
January 4, 2026
•
35 min read
•
YouTubeStoryflow product facts (2026)
- Free: $0 with unlimited boards, 3 projects, 10 AI generations/month, and 3 Tactics.
- Pro: $14.99/month (annual) or $19.99/month (monthly) with 200+ Tactics and unlimited AI.
- Team: from $12.74/user/month (annual) with real-time collaboration and admin controls.
- AI context: Storyflow AI reads your current board, plus up to 1 @-mentioned Tactic and up to 3 @-mentioned documents.
Table of Contents
- Why Planning Matters More Than Production
- Before You Plan: Develop Your Taste
- Step 1: Define Your Signature Video Recipe
- Step 2: Validate the Idea
- Step 3: Define the Core Promise
- Step 4: Plan Your Hook
- Step 5: Build the Structure
- Step 6: Write Key Points (Not a Full Script)
- Step 7: Plan Your Visuals
- Step 8: Set Your Learning Goal
- Step 9: Plan the Call to Action
- The Video Planning Template
- After Publishing: The Post-Video Reflection
- Planning for Different Video Types
- Common Planning Mistakes
- Tools for YouTube Video Planning
- FAQ: YouTube Video Planning
- The Complete System
How do you plan a YouTube video that performs?
Plan YouTube videos using this system: (1) Define your Big Idea - what unique angle makes this worth watching, (2) Identify target audience and their pain points, (3) Craft a hook that creates immediate curiosity, (4) Structure content with open loops every 2-3 minutes, (5) Build toward a transformation or payoff, (6) End with clear CTA. Tools like Storyflow provide Tactics frameworks that guide you through each planning stage.
Quick Recommendations
Storyflow:
Framework-guided video planning with AI
Notion:
Content calendars and documentation
VidIQ:
SEO research and analytics
Google Docs:
Simple script writing
The difference between a video that gets 200 views and one that gets 200,000 views usually isn't the editing. It's not the camera. It's not even the topic.
It's the planning.
Most creators skip planning entirely. They have an idea, they hit record, they ramble for 20 minutes, they edit out the worst parts, they upload. Then they wonder why nobody watches past the first 30 seconds.
The creators who consistently perform do something different. They plan before they film. They know their hook before they press record. They understand the structure that keeps viewers watching. They've thought through every section before they speak a single word.
This guide breaks down exactly how to plan a YouTube video from idea to upload. Not theory. A complete system you can use for every video you make.
Why Planning Matters More Than Production
Let's kill a myth: better equipment doesn't mean better videos.
Some of the best-performing videos on YouTube were filmed on phones with no fancy lighting. Some of the worst-performing videos were shot in professional studios with $50,000 setups.
The difference is almost always in the planning.
What planning actually affects:
- Hook strength: A planned hook is intentional. An unplanned hook is whatever you happened to say first.
- Retention: Planned structure keeps viewers watching. Unplanned rambling loses them.
- Clarity: When you know your points before filming, you explain them better.
- Editing time: Planned videos need less editing because there's less garbage to cut.
- Consistency: A planning system means every video meets a baseline quality.
You can't fix a bad plan with good editing. But a good plan survives mediocre production.
Before You Plan: Develop Your Taste
Here's something most planning guides skip entirely: before you can make great videos, you need to understand what makes a video great.
That means developing your taste.
Taste is your creative filter. It's what helps you choose the right topics, spot good ideas, and make better calls with editing, pacing, titles, thumbnails - all of it.
How to develop taste intentionally:
Watch YouTube differently. Not as a consumer, but as a creator. Not just "did I like this?" but "why did I like this?"
Ask yourself:
- Why did I click on this thumbnail?
- Why am I still watching 30 seconds in?
- How does the music and lighting make me feel?
- When did I get bored or click off? What prompted it?
- What made me want to share this?
Build a swipe file.
As you study videos, collect elements that spark something for you:
- Titles that made you click
- Thumbnails that caught your attention
- Hooks that pulled you in
- Editing choices that made you feel something
- Formats that kept you engaged
How to do this in Storyflow
Create a dedicated board in Storyflow for your swipe file. Use the infinite canvas to add cards with:
- Images, videos, and links directly on the canvas
- Notes cards for what made you click and why it worked
- Headings and walls to organize by category (hooks, thumbnails, editing styles)
- Comments to capture quick thoughts
Everything stays visual and spatial - you can see your entire swipe file at a glance and reference it when planning videos.
Don't just study videos in your niche. Expose yourself to different formats: vlogs, challenges, tutorials, breakdowns, commentary. The more variety you take in, the more creative options you'll have later.
This isn't passive watching. It's active study. And it changes how you approach every video you make.
Step 1: Define Your Signature Video Recipe
Before planning individual videos, you need to understand what makes your videos yours.
Your video recipe is the unique combination of ingredients that makes your content feel intentional, fresh, and unmistakably different from everyone else. It's why your favorite creators feel irreplaceable - they've developed a distinct recipe that only they can deliver.
The five ingredients of your video recipe:
Ingredient 1: Audience
Who are you making videos for?
Not "everyone interested in tech" or "people who like fitness." Get specific.
- What are they curious about?
- What do they struggle with?
- What kind of content do they already love?
- What language do they use?
When you know exactly who you're talking to, everything else becomes easier. Your topics become clearer. Your hooks become sharper. Your value becomes more obvious.
Ingredient 2: Value
What does your audience gain from watching?
Every video must serve the viewer in some way. Without core value, there's no reason for anyone to watch.
Types of value you can provide:
- Insight: Help them understand something better
- Action: Help them do something they couldn't before
- Entertainment: Make them laugh, feel excited, or feel something
- Inspiration: Motivate them or help them feel less alone
- Transformation: Help them become a different version of themselves
Be clear about what value you're delivering. "This video will teach you X" is stronger than "this video is about X."
Ingredient 3: Format
How are you delivering that value?
Common YouTube formats:
- Tutorials/How-tos
- Listicles
- Commentary/Reaction
- Vlogs/Day-in-the-life
- Challenges
- Interviews
- Documentary-style
- Reviews
- Storytelling
Pick one or two formats aligned with your strengths. You don't need to master all of them. The best creators often stick to a signature format and become known for it.
Ingredient 4: Vibe
What feeling do your videos give off?
We often forget exactly what's said in a video. But we remember how the video made us feel - and we come back for more of that feeling.
Your vibe might be:
- Cozy and calm
- High-energy and intense
- Inspiring and motivational
- Efficient and no-nonsense
- Funny and chaotic
- Thoughtful and reflective
Your vibe comes through in pacing, music choices, editing style, speaking tone, visual aesthetic. It should feel consistent across videos.
Ingredient 5: Differentiator
What makes your version worth watching over someone else's?
This is your special sauce. It usually comes from one of four places:
- Unique skill set: You can do something others can't
- Access: You have access to people, places, or information others don't
- Depth: Your content is more insightful, in-depth, or novel than alternatives
- Personality: You bring a perspective that's inherently unique to you
Your differentiator is the answer to "why should I watch your video on this topic instead of the other 500 videos on the same topic?"
Putting your recipe together:
Draft your video recipe in one paragraph:
"I make [format] videos for [audience] that help them [value]. My videos feel [vibe], and what makes them different is [differentiator]."
Example: "I make documentary-style breakdowns for aspiring filmmakers that help them understand cinematography techniques used in famous films. My videos feel cinematic and thoughtful, and what makes them different is that I actually recreate the shots myself to show exactly how they work."
How to do this in Storyflow
Use a Blueprint to structure your video recipe. Storyflow's Blueprints are pre-built frameworks with expert tactics cards that guide you through each element:
- Each card flips to reveal detailed guidance (why it matters, how to execute)
- Context-aware AI that understands the framework and helps you apply it
- Visual card layout shows all elements at once - no scrolling through docs
- Your video recipe becomes a reusable template for future videos
The Blueprint system turns abstract concepts into actionable cards you can work with directly on your canvas.
Your recipe will evolve over time. But having a starting point gives you something to test and refine with each video you make.
Step 2: Validate the Idea
Not every idea deserves a video. Before you plan anything, run your idea through three critical filters.
Filter 1: View Potential
Can this idea create a breakout opportunity?
Not every video needs to go viral. But every idea should have the potential to perform well. The simplest way to ensure this: leverage what's already worked before.
How to check view potential:
- Search your topic on YouTube. What are the top videos? How many views do they have?
- Look for "outliers" - videos that dramatically overperformed the channel's average
- Check if similar concepts have hit the view count you're aiming for
- Use Google Trends to see if interest is growing, stable, or declining
If you can find proof that this concept has worked before (for you or someone else), that's signal. If similar videos consistently underperform, reconsider.
Filter 2: Testability
Does this idea help you refine your video recipe?
Think of each video as a tiny experiment. Every upload should teach you something about what works for your channel.
Ask yourself:
- What am I trying to learn from making this video?
- Does this test a new format, vibe, or audience angle?
- Will the results help me improve future videos?
If a video doesn't teach you anything new, it might not be the best use of your time right now.
Filter 3: Feasibility
Can you actually execute this idea well?
Be honest about your current resources, skills, and time constraints.
Ask yourself:
- Can I realistically script, film, edit, and publish this within my production window?
- Do I have access to what I need (locations, equipment, people)?
- Is there a simpler version of this idea that delivers the same value?
Save your bigger, more complex ideas for when you have more time and resources. Start with ideas you can execute well right now.
The validation rule:
An idea must pass all three filters:
- ✓ Has view potential (proof of concept exists)
- ✓ Is testable (teaches you something)
- ✓ Is feasible (you can execute it well)
If it fails any filter, either modify the idea or pick a different one.
How to do this in Storyflow
Create an idea validation workspace using walls to section your canvas:
- View Potential section: Add image cards with screenshots of competitor videos, use note cards for view counts and trend data
- Learning Goal section: Use heading and note cards to document what you're testing
- Resources section: Add to-do cards for equipment, locations, and people needed
Use kanban view to move ideas between "Validating," "Ready to Plan," and "In Production." Visual organization prevents wasted time on weak ideas.
Step 3: Define the Core Promise
Every successful video makes a promise in the first few seconds and delivers on it by the end.
The promise formula:
"If you watch this video, you will [specific outcome]."
Fill in that blank before you do anything else.
Bad promises (too vague):
- "Learn about productivity"
- "Hear my thoughts on AI"
- "Watch me try something"
Good promises (specific outcomes):
- "Double your output without working more hours"
- "Understand exactly why AI tools are failing you and what to use instead"
- "See exactly how I built a $10K/month income stream in 6 months"
The promise determines everything else. Your hook communicates it. Your structure delivers it. Your ending confirms it.
Write your promise in one sentence. If you can't articulate it clearly, your idea isn't focused enough yet.
Step 4: Plan Your Hook
The hook is the first 5-30 seconds. It determines whether anyone watches the rest.
Don't improvise your hook. Write it word for word before you film.
What your hook must accomplish:
1. Establish context
What is this video about? Viewers should know immediately. Vague openings get scrolled past.
2. Create curiosity
Open a gap in their mind that needs closing. Make them feel like scrolling away would mean missing something important.
3. Promise value
Why should they invest the next 10 minutes? What will they gain?
The 3-part hook structure:
Part 1: Context Anchor
One or two sentences that establish the topic and get the viewer engaged.
Techniques that create engagement:
- Common ground: Reference something your target viewer has experienced
- Benefit promise: Lead with what they'll gain
- Pain point: Acknowledge a frustration they have
- Pattern interrupt: Say something surprising enough to stop them
Part 2: Pattern Break
A single line that disrupts expectations. The viewer thought they knew where this was going. Now they don't.
Use contrasting words:
- "But here's the thing..."
- "However..."
- "What most people don't realize..."
- "The problem is..."
Part 3: Payoff Promise
Where you're taking them if they keep watching. Channel the tension you've built toward a specific destination.
Hook example:
"Most creators think the key to YouTube is consistency. Post every day, the algorithm will reward you. [context anchor] But I posted daily for six months and my channel actually shrank. [pattern break] Here's what actually grows a channel - and it's not what the gurus tell you. [payoff promise]"
Write your hook word for word in your planning document. This is the highest-leverage part of your entire video. Don't wing it.
How to do this in Storyflow
Use a Blueprint with hook tactics cards or create your own hook planning workspace:
- Create cards for each hook variation - flip cards to add detailed notes on back
- Use AI assistance to brainstorm alternatives based on your video topic
- Link to your swipe file board to reference hooks that worked
- Add timing notes and visual cues directly on the cards
- Arrange multiple hooks spatially to compare them side by side
The AI can read your entire workspace context and suggest hooks that fit your specific video and channel style.
Step 5: Build the Structure
Structure is the skeleton that holds your video together. Without it, videos ramble. With it, viewers stay.
The foundational structure:
- Hook (5-30 seconds)
- Context/Setup (30-90 seconds)
- Main Content (bulk of video)
- Conclusion/CTA (30-60 seconds)
Structuring your main content:
For educational videos:
Break content into 3-7 clear sections. Each section should feel like a mini-payoff that rewards the viewer for staying.
Number your points or give them names. "The first method..." "Technique number two..." This creates progress markers. Viewers know where they are and how much is left.
For story-based videos:
Use narrative structure:
- Setup: Context and stakes
- Conflict: Challenges and obstacles
- Resolution: Outcome and lessons
Build tension before releasing it. Viewers stay to see how things resolve.
For entertainment videos:
Structure around peaks. What are the 3-5 biggest moments? Build toward each one. After a peak, briefly reset before building to the next.
Space out the payoffs to maintain retention throughout.
Retention techniques to build into your structure:
- Open loops: Tease what's coming to keep viewers watching ("I'll show you exactly how in a minute, but first...")
- Progress markers: Let viewers know where they are ("Now for the third and most important technique...")
- Pattern variation: Change pace, energy, or visual style between sections to prevent fatigue
- Value density: Front-load value. Don't save all your best insights for the end
How to do this in Storyflow
Use the infinite canvas to build your video structure spatially:
- Create note or heading cards for each video section
- Arrange them horizontally or vertically - whatever helps you see the flow
- Add timing notes directly on cards or use separate note cards
- Use walls with different colors to group sections or mark retention techniques
- Drag and reorder freely without worrying about document formatting
The spatial layout makes it obvious if you're front-loading value or if your pacing drags - you can see the entire structure at once.
Step 6: Write Key Points (Not a Full Script)
Most creators go wrong here. They either script nothing or script everything.
- Script nothing: You ramble, repeat yourself, forget points, and need massive editing.
- Script everything: You sound robotic, lose natural energy, and take forever to film.
The middle path: Write key points, not full sentences.
For each section of your structure, write:
- The main point in one sentence
- 2-3 supporting details or examples
- The transition to the next section
This gives you enough structure to stay on track but enough freedom to be natural.
Example for one section:
POINT 3: Your video recipe has five ingredients
- Audience: Who specifically are you serving?
- Value: What do they gain from watching?
- Format: How do you deliver that value?
- Vibe: What feeling do your videos create?
- Differentiator: Why watch you instead of someone else?
TRANSITION: Once you know your recipe, every planning decision becomes easier...
When filming, you'll expand these points naturally. But you won't forget them or ramble around them.
How to do this in Storyflow
Use note cards or Blueprint cards to organize key points for each section:
- Each section can have multiple note cards - one for main point, others for supporting details
- Use AI to brainstorm examples: select cards and ask AI to expand on your points
- Add image cards with screenshots or reference material next to your notes
- Flip cards have a back side - use front for quick reference, back for detailed notes
When filming, have your Storyflow board visible on a second screen - the visual layout is easier to glance at than scrolling through a document.
Step 7: Plan Your Visuals
YouTube is visual. If your visuals don't support your content, you're wasting the medium.
For each section, note:
- What will viewers see?
- Does the visual reinforce the point?
- Where will you use b-roll, graphics, or cuts?
Visual planning checklist:
- Hook visuals: What's on screen in the first 3 seconds? Text? Movement? Compelling image?
- B-roll needs: What footage do you need to capture or source?
- Graphics/text: Where will you add on-screen text to emphasize points?
- Cuts/angles: Where can you add visual variety to maintain engagement?
On-screen text:
Put 3-5 words on screen in a big, bold font that reinforces your point. This should appear immediately in your hook and at key moments throughout.
People read faster than they hear. Visual text + spoken word together is exponentially more powerful than either alone.
Motion:
You need just enough visual movement to capture attention without overwhelming the message.
- Too little motion: Static talking head. Easy to scroll past.
- Too much motion: Chaotic. Can't process what's happening.
- Just right: Purposeful movement that draws attention while allowing comprehension.
Plan visuals alongside content. Don't figure it out in editing.
How to do this in Storyflow
Visual planning is where Storyflow shines - everything lives on the canvas together:
- Drag image cards directly onto your canvas next to section notes
- Use the AI image generation feature to create visual concepts
- Add link cards to b-roll sources, stock footage, or reference videos
- Create a separate moodboard section with images, videos, and color palette
- Use walls with colors to indicate visual variety (talking head sections vs b-roll sections)
When editing, your visual references are right there with your script notes - you see the complete picture of what you planned.
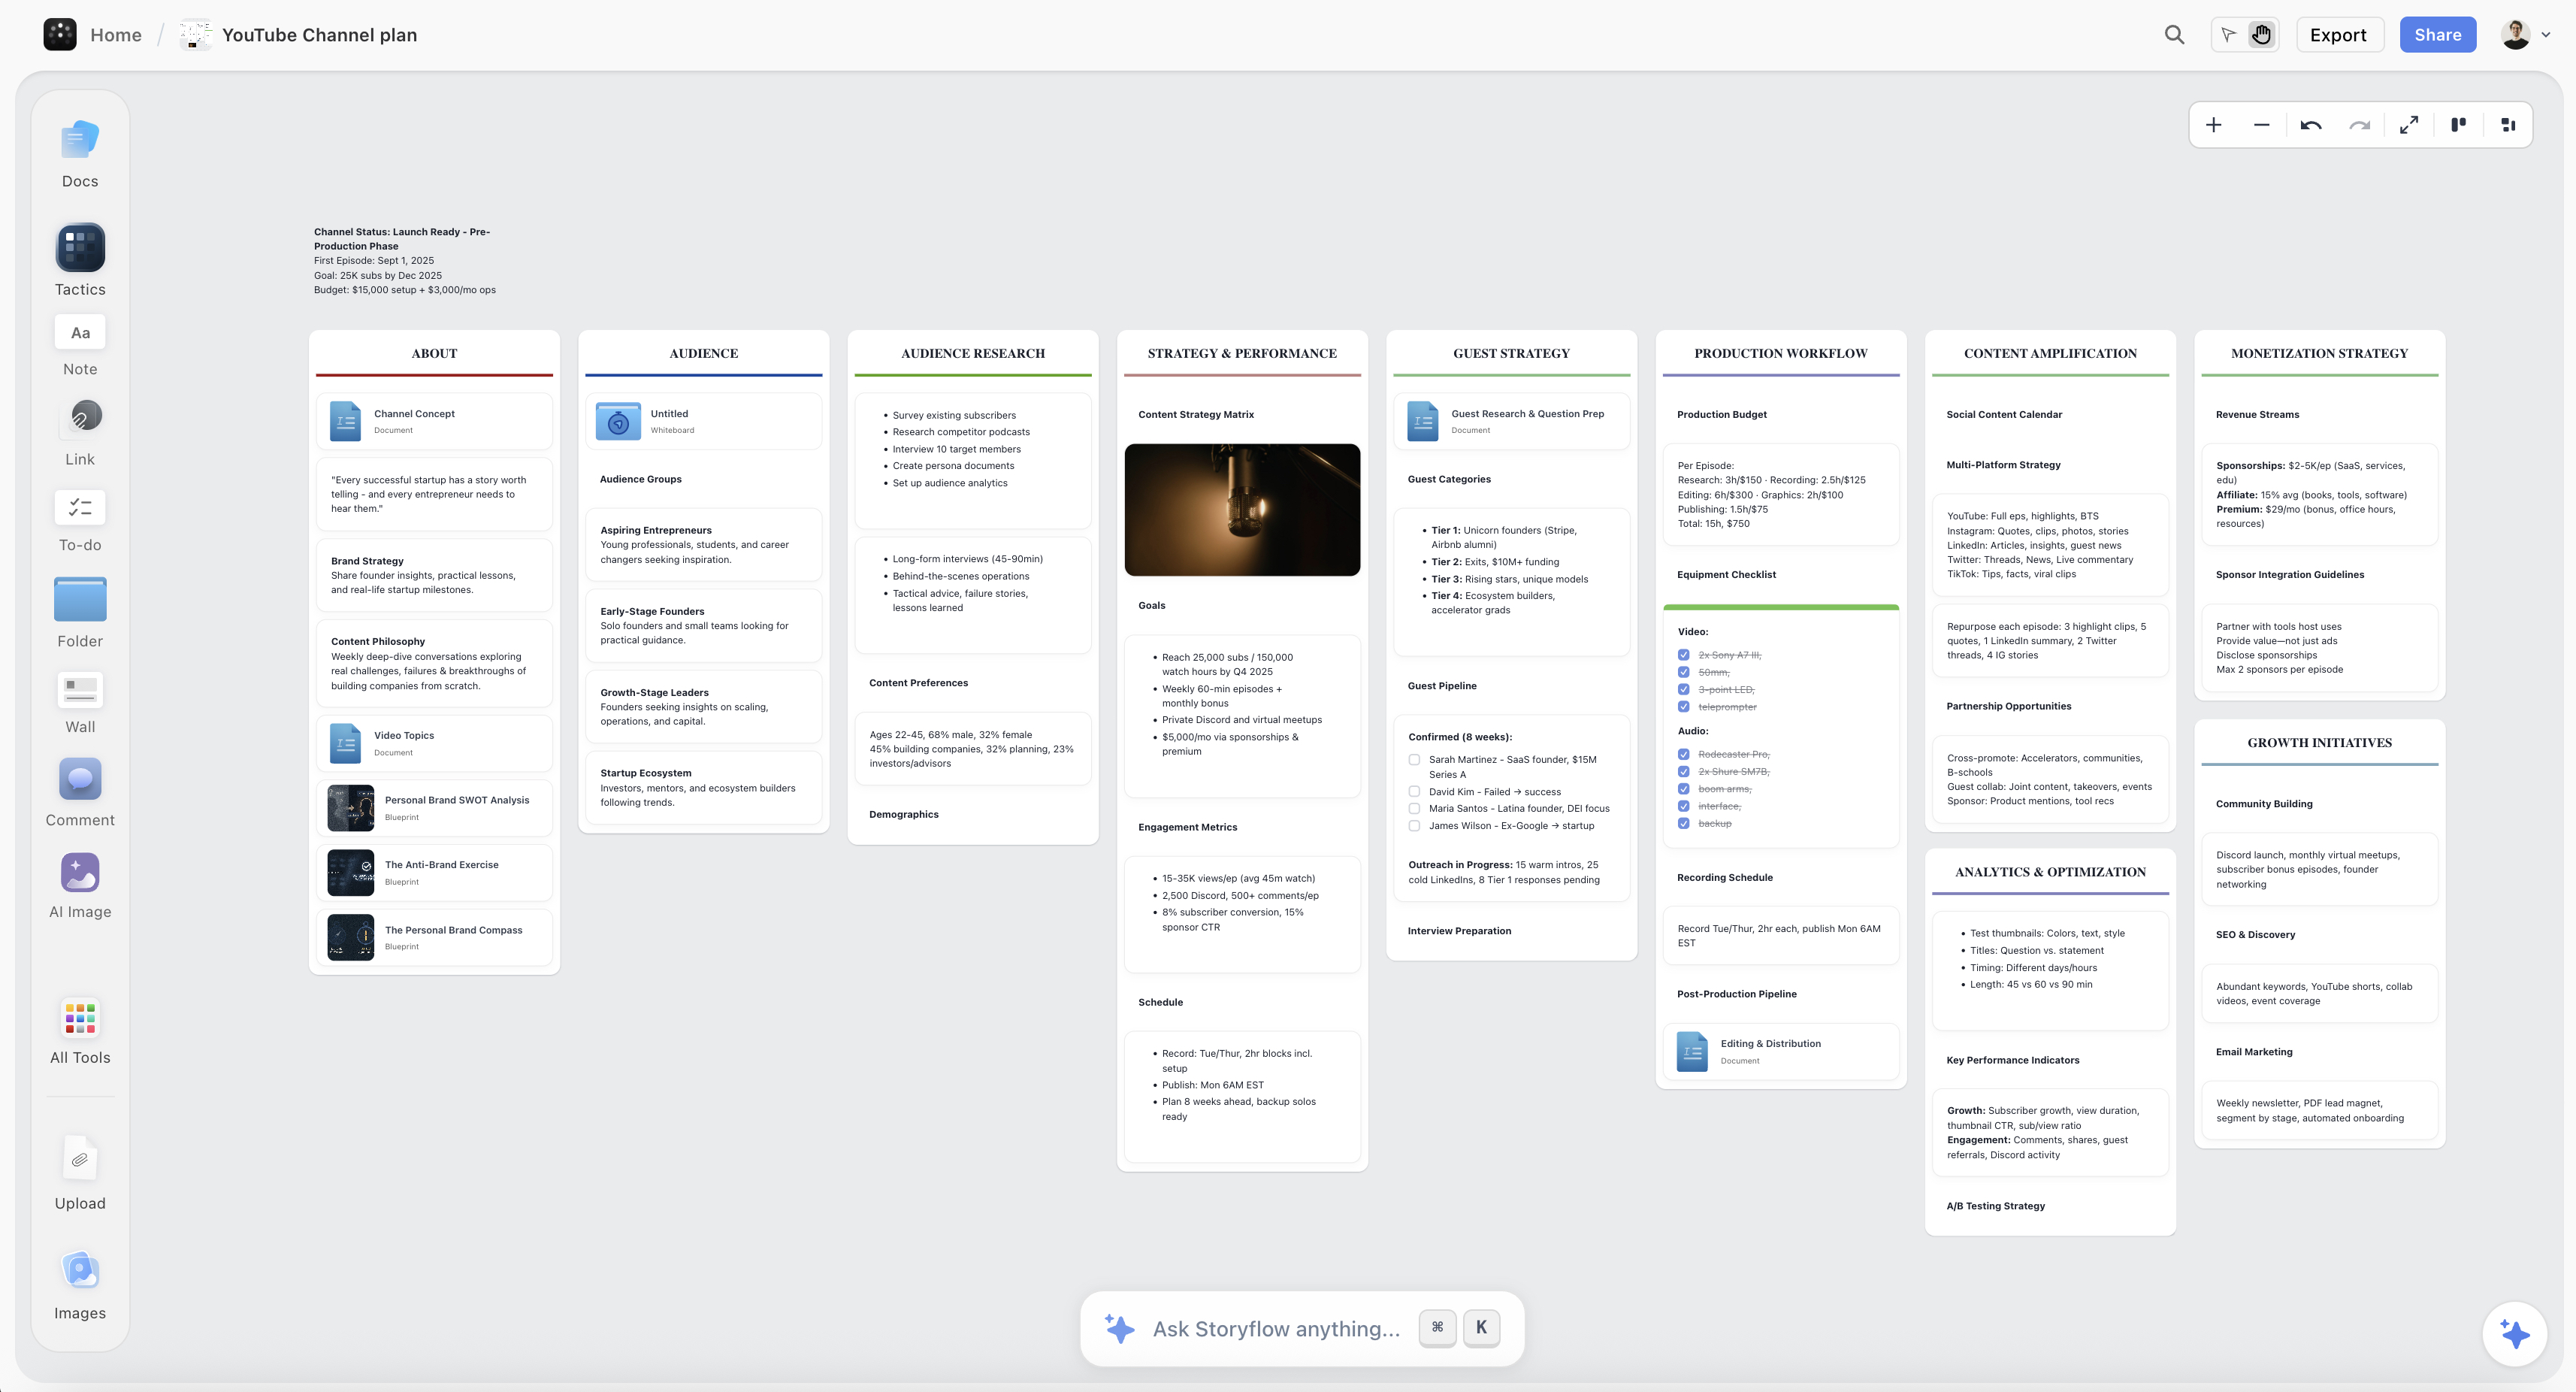
Planning a full YouTube channel strategy in Storyflow — video ideas, hooks, and scheduling all in one visual workspace
Step 8: Set Your Learning Goal
Here's what separates creators who improve rapidly from those who plateau: intentional learning.
Before you start filming, ask yourself:
"What is one thing I'm trying to learn from making this video?"
Maybe you're:
- Testing a new hook structure from your swipe file
- Experimenting with a faster pacing style
- Trying a new thumbnail approach
- Simplifying your editing workflow
- Testing a new content format
Whatever it is, make it specific. Write it down.
This transforms every video from "content to publish" into "experiment to learn from." Even if a video flops, if you learned something valuable, the time wasn't wasted.
Step 9: Plan the Call to Action
Every video should ask viewers to do something. But most CTAs are weak and poorly placed.
Types of CTAs:
- Subscribe
- Watch another video
- Like/comment
- Visit a link
- Join an email list
CTA placement options:
- End of video: Traditional but lowest impact. Most viewers are gone.
- After first value delivery: "If this is helpful so far, subscribe for more."
- Mid-roll: Natural break point. "Before the next technique, hit subscribe."
- Pattern interrupt: Unexpected moment. Can feel jarring but gets attention.
CTA principles:
- One primary CTA per video. Don't ask for five things.
- Connect CTA to value. "If you want more videos like this, subscribe."
- Be specific. "Subscribe" is weaker than "Subscribe so you don't miss next week's video on [specific topic]."
Plan your CTA and its placement before filming. Don't improvise a weak "don't forget to subscribe" at the end.
The Video Planning Template
Use this template for every video:
VIDEO TITLE IDEAS:
1.
2.
3.
CORE PROMISE:
"If you watch this video, you will _______________"
VIDEO RECIPE CHECK:
- Audience:
- Value:
- Format:
- Vibe:
- Differentiator:
IDEA VALIDATION:
- View potential proof:
- What I'm testing/learning:
- Feasibility check: Y/N
HOOK (word for word):
[Write the first 30 seconds exactly]
STRUCTURE:
- Hook (0:00-0:30)
- Setup/Context (0:30-2:00)
- Point 1: _____________ (2:00-5:00)
- Point 2: _____________ (5:00-8:00)
- Point 3: _____________ (8:00-11:00)
- Conclusion + CTA (11:00-12:00)
KEY POINTS:
[For each section: main point + 2-3 supporting details + transition]
VISUAL PLAN:
- Hook visual:
- B-roll needed:
- Graphics/text moments:
- On-screen text for key points:
LEARNING GOAL:
"The one thing I'm trying to learn from this video is _______________"
CTA:
- Primary CTA:
- Placement:
- Exact wording:
THUMBNAIL CONCEPT:
[Sketch or describe 2-3 options]
Fill this out before you film anything. It takes 30-60 minutes. It saves hours of rambling, re-shooting, and editing.
How to do this in Storyflow
Use Blueprints to start with proven frameworks instead of blank canvases:
- Browse Blueprints library for YouTube, content planning, or marketing templates
- Each Blueprint generates a workspace with cards containing expert tactics
- Flip cards to see detailed guidance - why each step matters and how to execute
- AI reads the Blueprint context and offers suggestions specific to your project
- Save your completed plans as custom templates for future videos
The Blueprint system turns planning templates into actual workspaces with actionable structure - not just empty sections to fill.
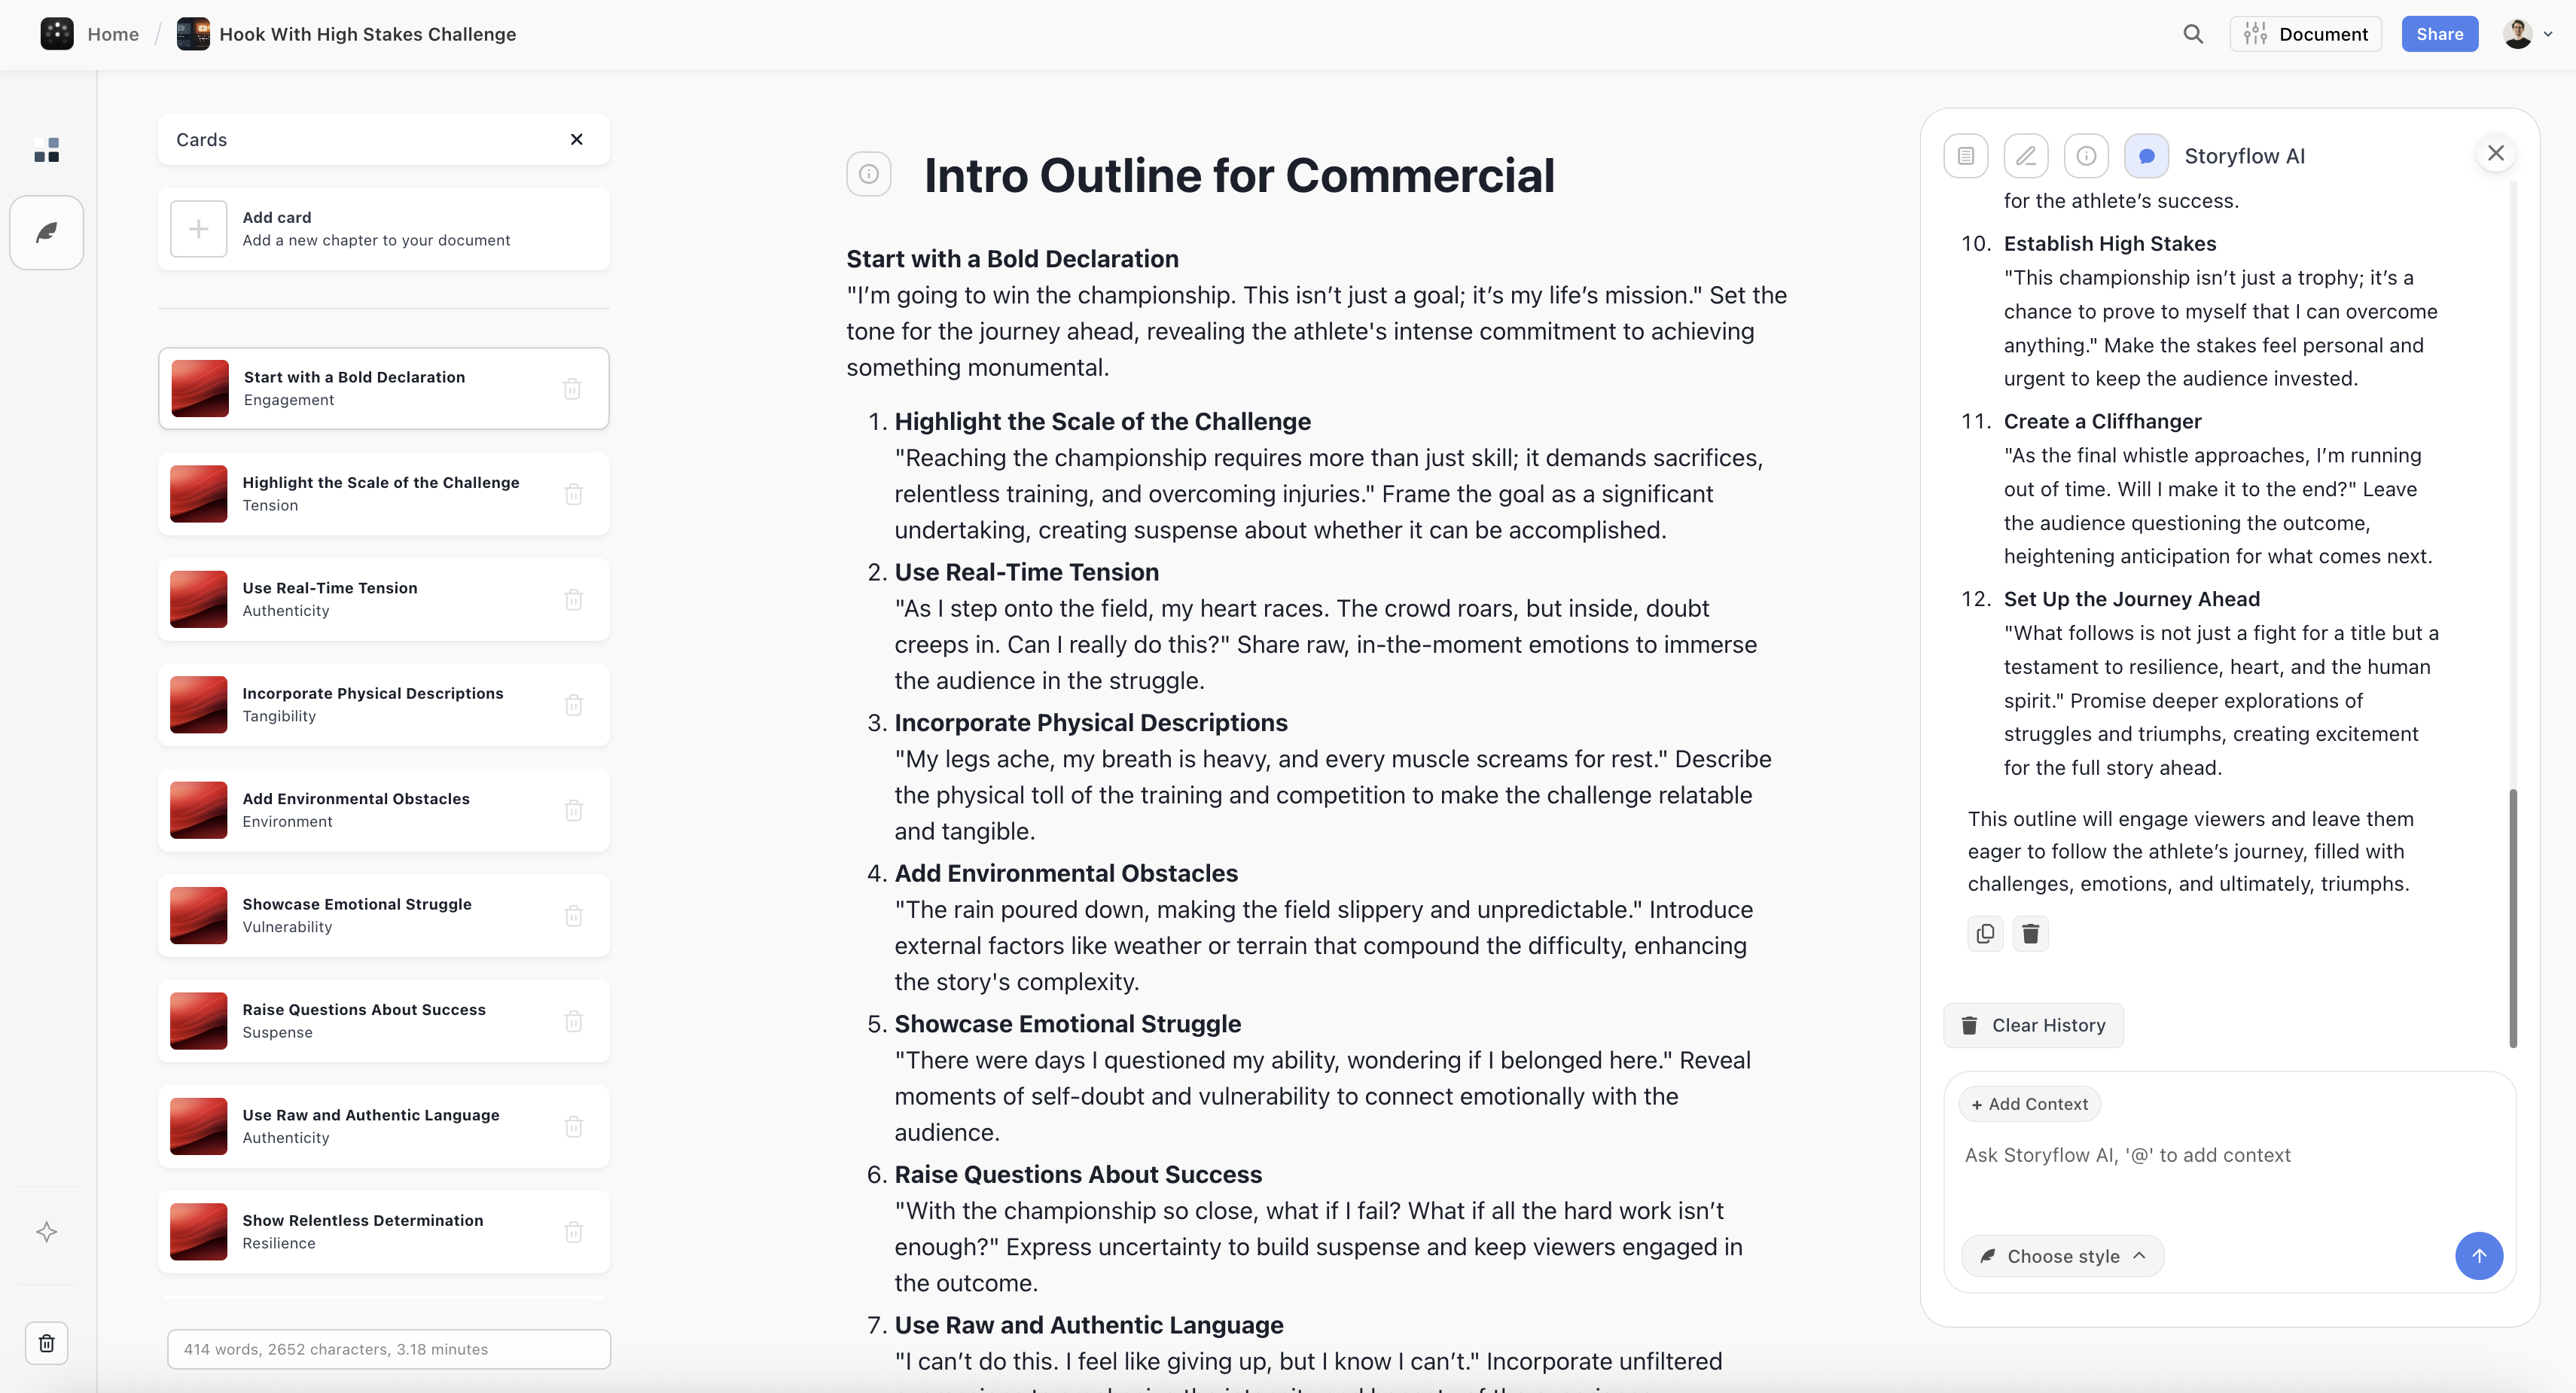
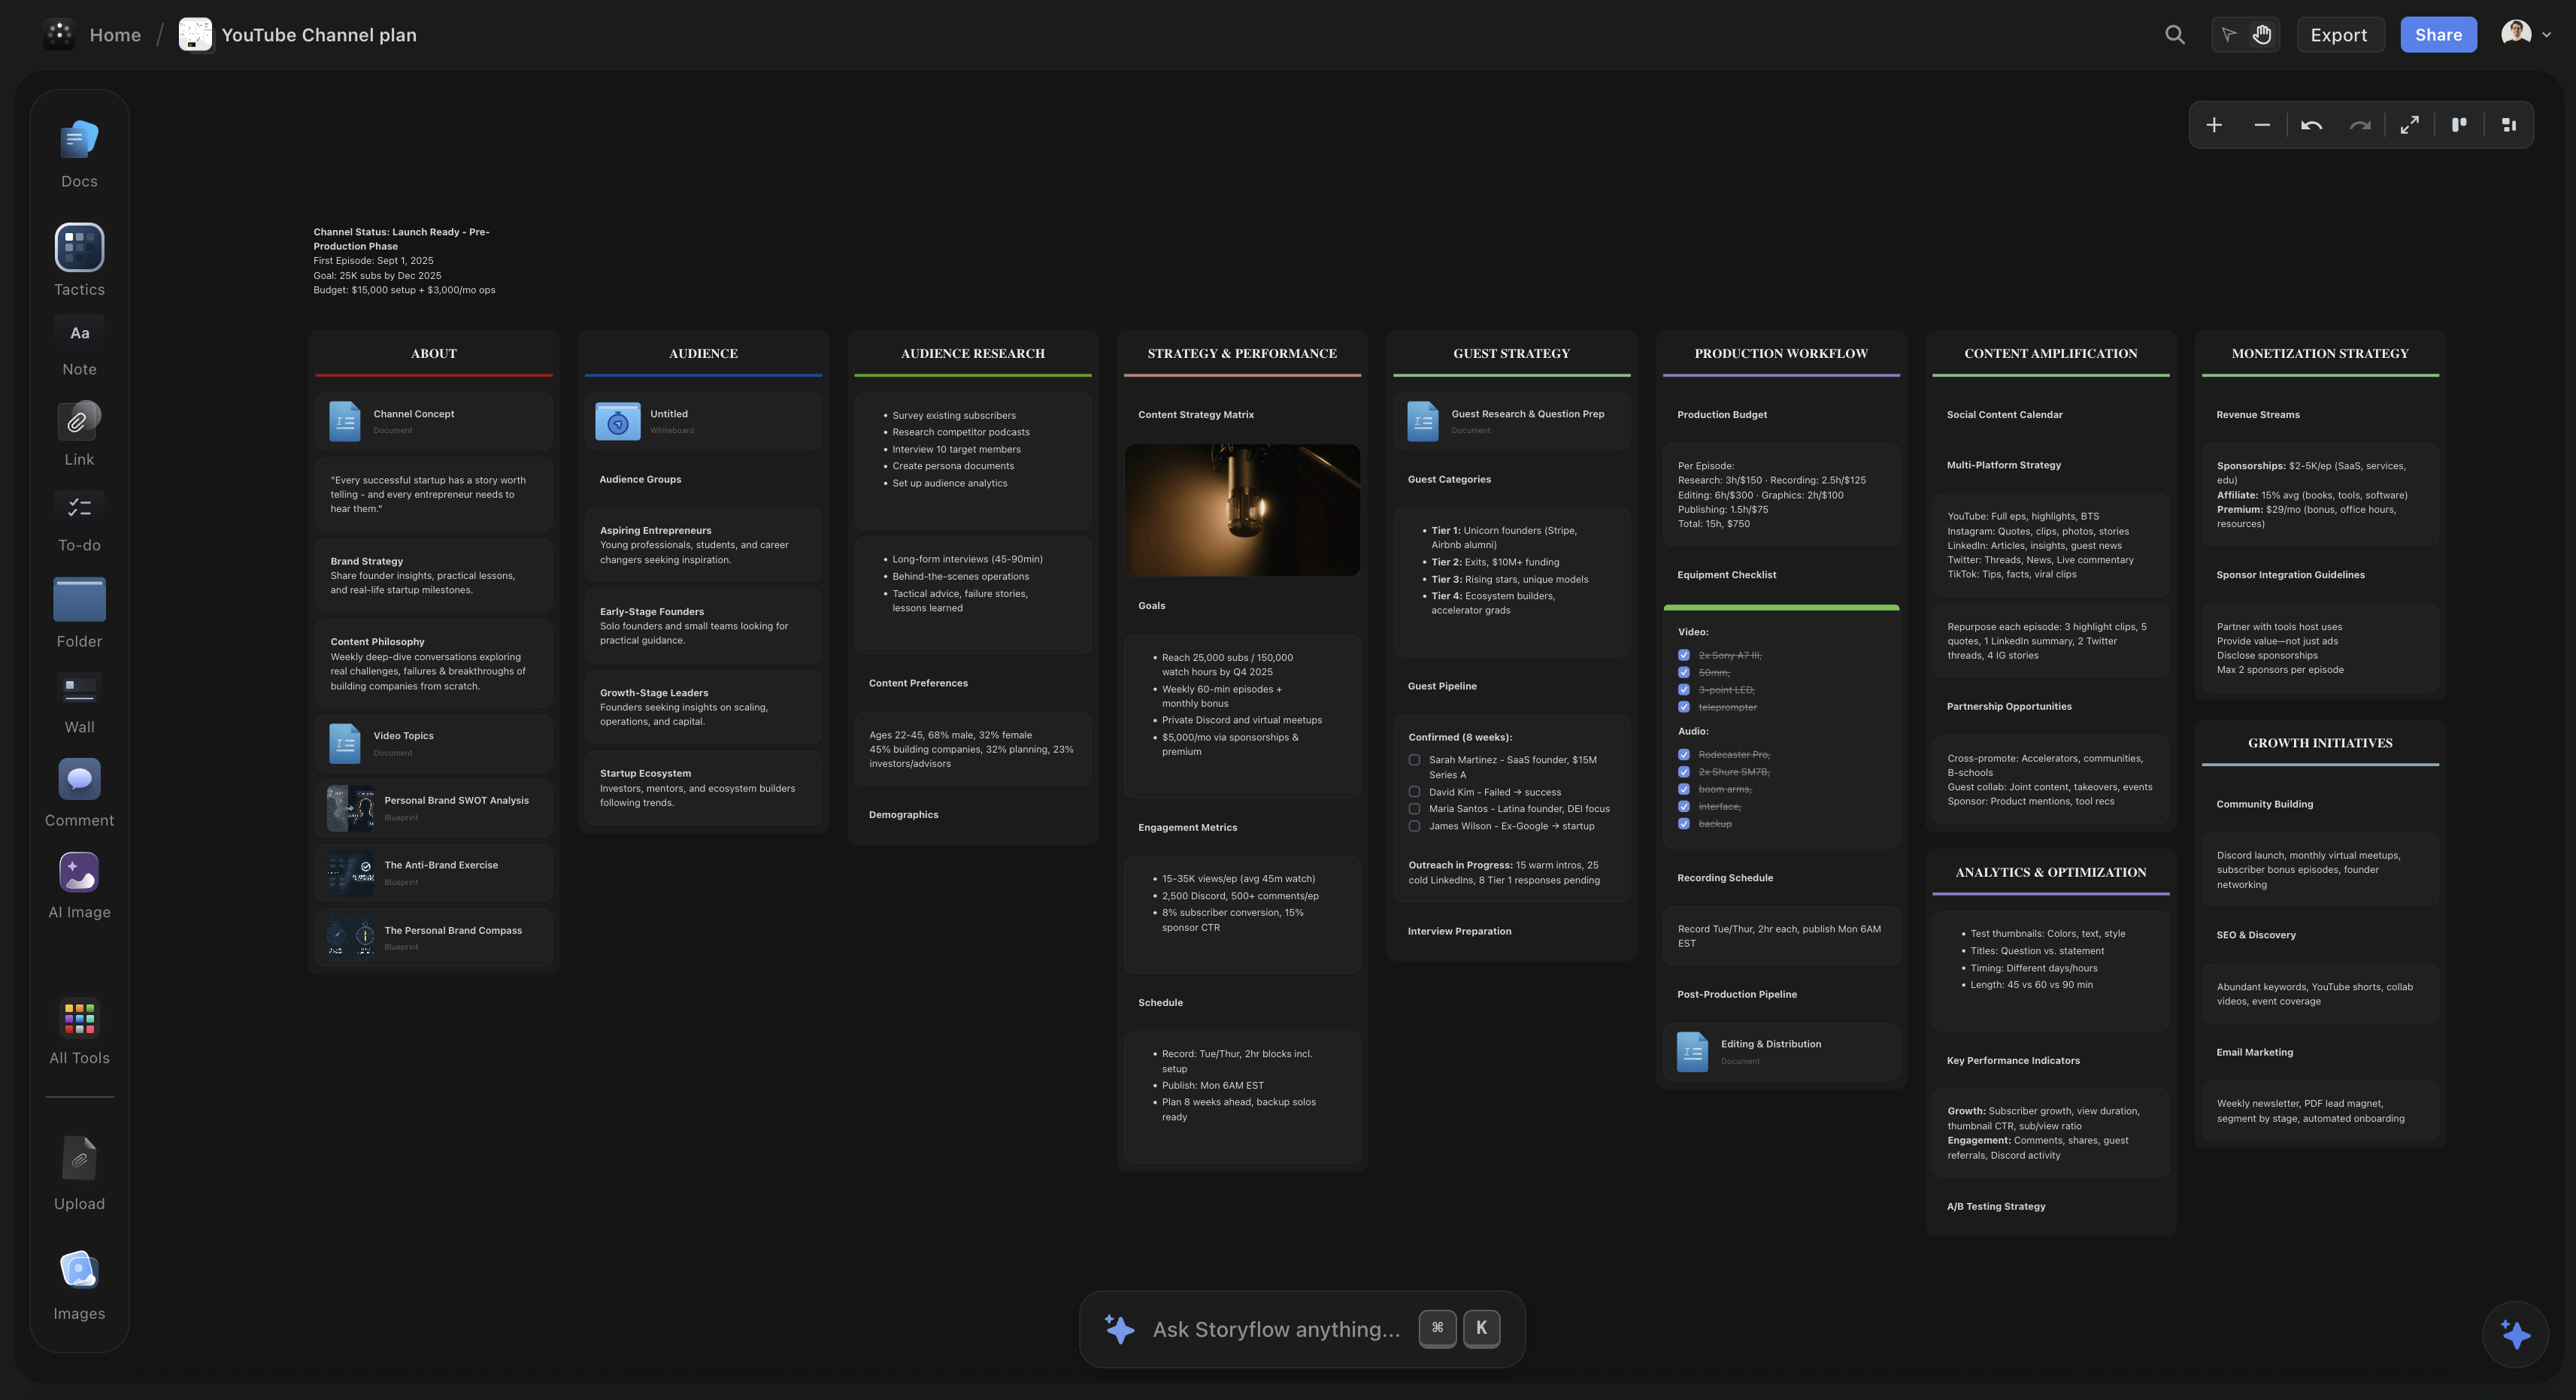
Structuring a compelling video hook in Storyflow — every element planned before you hit record
After Publishing: The Post-Video Reflection
This step separates creators who improve with every upload from those who stay stuck for years.
After every video you publish, take 20-30 minutes to reflect. Don't skip this.
Post-video reflection questions:
- What video recipe did I use? (Audience, value, format, vibe, differentiator)
- What worked well? (Be specific - which parts, why)
- What do I want to improve next time? (One or two specific things)
- What new skills did I acquire or practice?
- How did the audience respond? (Comments, retention data, engagement)
- What would I have done differently if I had more time?
That last question is especially important. It builds a list of improvements you can implement when you do have more time for a high-effort video.
Why reflections matter:
The true power of making videos comes from small, consistent improvements that compound over time.
If you publish videos without reflecting, you might make the same mistakes for months. Reflections force you to identify patterns. What hooks are working? Where are viewers dropping off? What's resonating?
These insights typically take years of trial and error to identify. Structured reflection compresses that learning dramatically.

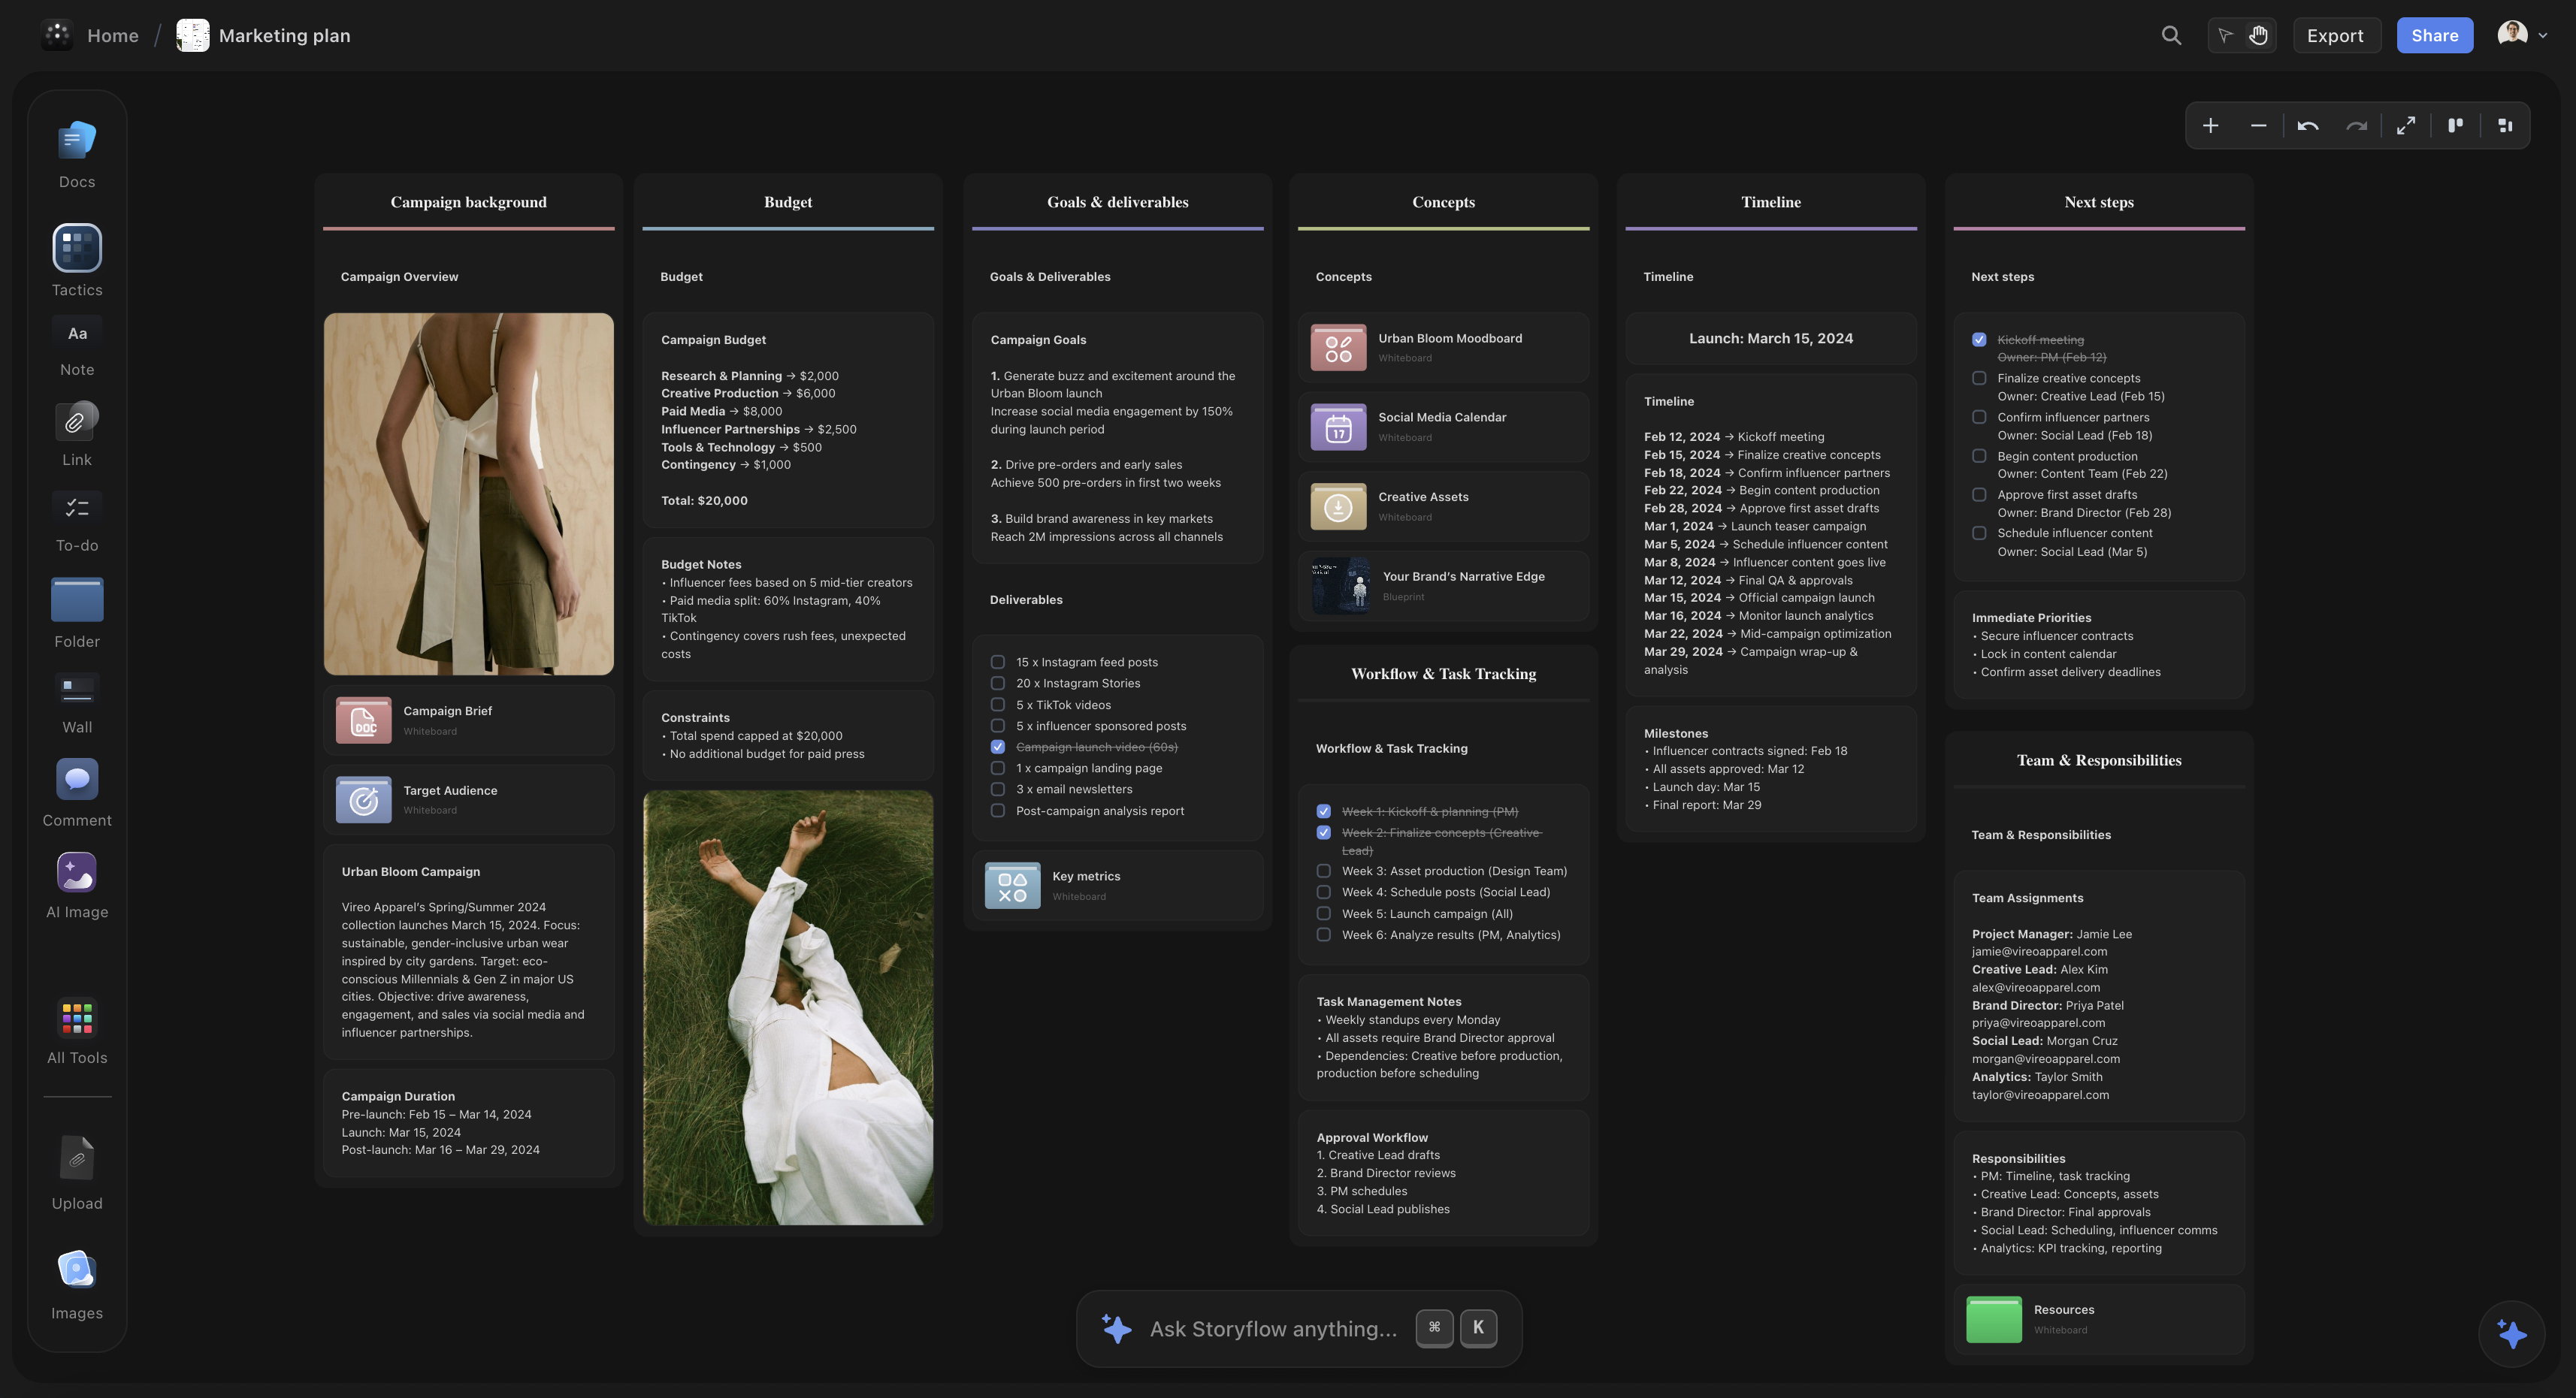
Video creators use Storyflow to map out every phase of production — planning, scripting, and post-reflection all in one place
Keep all your reflections in one place. Review them periodically. The patterns that emerge will tell you exactly how to improve.
How to do this in Storyflow
Create a "Video Archive" board to track your learning:
- Add a note or heading card for each published video with title and date
- Use note cards below to capture your reflection answers
- Add image cards with YouTube Analytics screenshots (retention graphs, CTR data)
- Use comments to tag what worked: "@hook-style-1 worked well" for quick reference
- Keep your planning and archive boards in the same workspace for easy cross-reference
Visual organization lets you see patterns at a glance - which thumbnails got clicks, which hooks had high retention, which topics resonated.
Planning for Different Video Types
Tutorial Videos
Planning focus: Clarity and completeness
- List every step before filming
- Anticipate where viewers will get confused
- Plan demonstrations for complex steps
- Include common mistakes and how to avoid them
Structure: Linear progression. Step 1, step 2, step 3.
Commentary/Opinion Videos
Planning focus: Argument structure
- What's your thesis?
- What evidence supports it?
- What counterarguments exist?
- What's the takeaway?
Structure: Thesis → evidence → counterarguments → conclusion.
Story/Vlog Videos
Planning focus: Narrative arc
- Setup (situation, characters, stakes)
- Conflict (challenges, obstacles, tension)
- Resolution (outcome, lessons, transformation)
Structure: Build tension before releasing it.
Listicle Videos
Planning focus: Organization and value density
- How will you order the list?
- Does each item deliver standalone value?
- How will you differentiate items?
Structure: Clear numbering. Save the best for the #1 spot.
Common Planning Mistakes
Mistake 1: Planning the Middle, Not the Beginning
Many creators plan their main content but improvise the hook. This is backwards. The hook is the most important part. Plan it most carefully.
Mistake 2: No Clear Promise
If you can't state your video's promise in one sentence, you're not ready to film. Unclear promise = unclear video = poor retention.
Mistake 3: Skipping the Video Recipe
Without knowing your audience, value, format, vibe, and differentiator, you're guessing. Define your recipe first.
Mistake 4: No Learning Goal
If you're not trying to learn something specific from each video, you're just producing content. Set a learning goal and reflect afterward.
Mistake 5: Ignoring Visual Planning
Writing a script without planning visuals creates a radio show, not a video. Plan what viewers will see alongside what they'll hear.
Mistake 6: No Post-Video Reflection
Publishing without reflecting means you might repeat the same mistakes for months. Take 20 minutes after each upload to capture what you learned.
Tools for YouTube Video Planning
Basic Tools (Free)
- Google Docs/Notion: Write your planning document and reflections
- Notes app: Capture ideas and swipe file entries on the go
- YouTube Analytics: Validate ideas and review retention data
Visual Planning Tools
- Milanote: Visual boards for moodboards and research
- Miro: Whiteboard for mapping video structure
- Canva: Thumbnail planning and concept testing
AI-Assisted Planning
Most AI tools give you blank space or generic suggestions. You still need to supply the frameworks.
Storyflow: Built for Visual Content Planning
Storyflow gives you everything you need to plan better YouTube videos:
- Blueprints with expert frameworks and tactics cards - proven structures, not blank canvases
- Infinite visual canvas where you can see your entire video plan at once
- Context-aware AI that reads your workspace and offers relevant suggestions
- Cards system for organizing ideas, notes, images, and videos spatially
- Multiple views (kanban, table, thumbnails) to organize your video pipeline
- Real-time collaboration with your team on the same workspace
You're not starting from scratch. You're working with proven frameworks that guide you from idea to published video.
FAQ: YouTube Video Planning
How long should I spend planning a video?
For a 10-15 minute video, plan for 30-60 minutes. The time investment pays back in faster filming, less editing, and better performance.
Should I write a full script or just bullet points?
For most creators, key points beat full scripts. Scripts can sound robotic. Bullet points give structure while preserving natural delivery.
How do I know if my idea is worth making?
Run it through three filters: Does it have view potential (proof of concept)? Is it testable (teaches you something)? Is it feasible (you can execute well)? If yes to all three, proceed.
What's a video recipe?
The five ingredients that make your content unique: Audience (who), Value (what they gain), Format (how you deliver), Vibe (how it feels), and Differentiator (why you over others).
What's a swipe file?
A collection of elements from other videos that inspire you - titles, thumbnails, hooks, editing techniques. Reference it when planning your own videos.
How do I develop better taste?
Watch YouTube as a creator, not a consumer. Ask why you clicked, why you're still watching, what's making you feel something. Study 30+ videos across different formats and niches.
What's the most important part of planning?
The hook. Write it word for word. Don't improvise it. The first 30 seconds determine whether anyone sees the rest of your work.
Should I reflect after every video?
Yes. Take 20-30 minutes after each upload to capture what worked, what didn't, and what you'd improve with more time. This is how you compound improvements.
What's a learning goal?
One specific thing you're trying to learn from making a video - a new hook style, a pacing experiment, a format test. It transforms every upload into an intentional experiment.
The Complete System
Here's the full process:
Before you start planning:
- Develop your taste (study videos, build swipe file)
- Define your video recipe (audience, value, format, vibe, differentiator)
For each video:
- Validate the idea (view potential, testability, feasibility)
- Define the core promise (one sentence)
- Write the hook (word for word)
- Build the structure (sections with transitions)
- Write key points (not full script)
- Plan visuals (what viewers will see)
- Set your learning goal (one specific thing)
- Plan the CTA (specific, placed intentionally)
After publishing:
9. Complete post-video reflection (what worked, what to improve, what you learned)
This takes 30-60 minutes per video. It saves hours of rambling, re-shooting, and editing. More importantly, it makes every video better than the last.
Start Planning Today
The creators getting hundreds of thousands of views aren't luckier than you. They're more prepared.
They have a video recipe that makes their content feel unique. They validate ideas before investing time. They write hooks word for word. They plan structure that keeps viewers watching. They reflect on every video and compound their improvements.
You can do all of this too.
Download the planning template. Fill it out for your next video. Complete the post-video reflection after you publish. Do it again for the next one.
Within a few videos, you'll be planning faster, filming smoother, and publishing better content than you ever have before.
That's what separates hobbyists from creators who actually grow.
Related Reading
Complete 6-step planning system
7 elements that determine success
Proven retention framework
AI tools for creators
See Storyflow in Action
A visual AI workspace where every feature lives inside one canvas — no tab-switching, no context lost.
Build your entire board from a single message
Type what you need in the AI chat at the bottom of your canvas. The AI adds cards, headings, and structure directly onto your board.
Use expert frameworks as AI context
Type @ in the AI chat and choose any Tactic. The AI tailors every response to that framework instead of giving generic advice.
Turn your board into a mind map in seconds
Ask the AI to restructure your canvas as a mindmap. It connects your ideas into a visual hierarchy so you can see how everything relates.
Why Storyflow Exists
Storyflow actually began as a personal tool while working on creative and research projects.
We kept running into the same problem: ideas were scattered everywhere: notes, documents, and whiteboards.
Nothing helped us see how everything connected.
So we started building a workspace designed around how ideas actually grow.
→ Read how Storyflow was createdSara de Klein
Head of Product at Storyflow
Published: January 4, 2026
Start creating with AI and become more productive
Transform your creative workflow with AI-powered tools. Generate ideas, create content, and boost your productivity in minutes instead of hours.
Ask Storyflow to
Not sure where to start? Try frameworks used and created by experts: